Overview
Creating a connection to the AuthID OIDC service requires configuration in two different areas: AuthID's backend and the identity provider of your choosing. This page will cover the steps and options for creating an integration within AuthID, along with examples of popular identity providers you can integrate with.
Video Walkthrough
The following video shows how to set up an OIDC connection in the Identity Portal.
Identity Portal
Although some users may prefer to use the API endpoints to generate an OIDC integration within AuthID's backend system, this guide will cover integration creation via the Identity Portal.
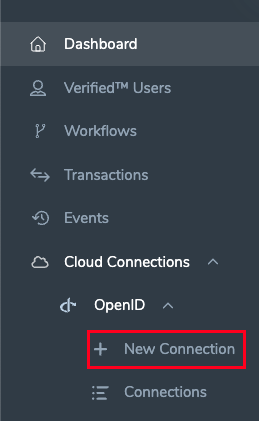
Start by logging into the Identity Portal and navigate to the Cloud Connections > OpenID > New Connection blade of the menu:
Connection Settings
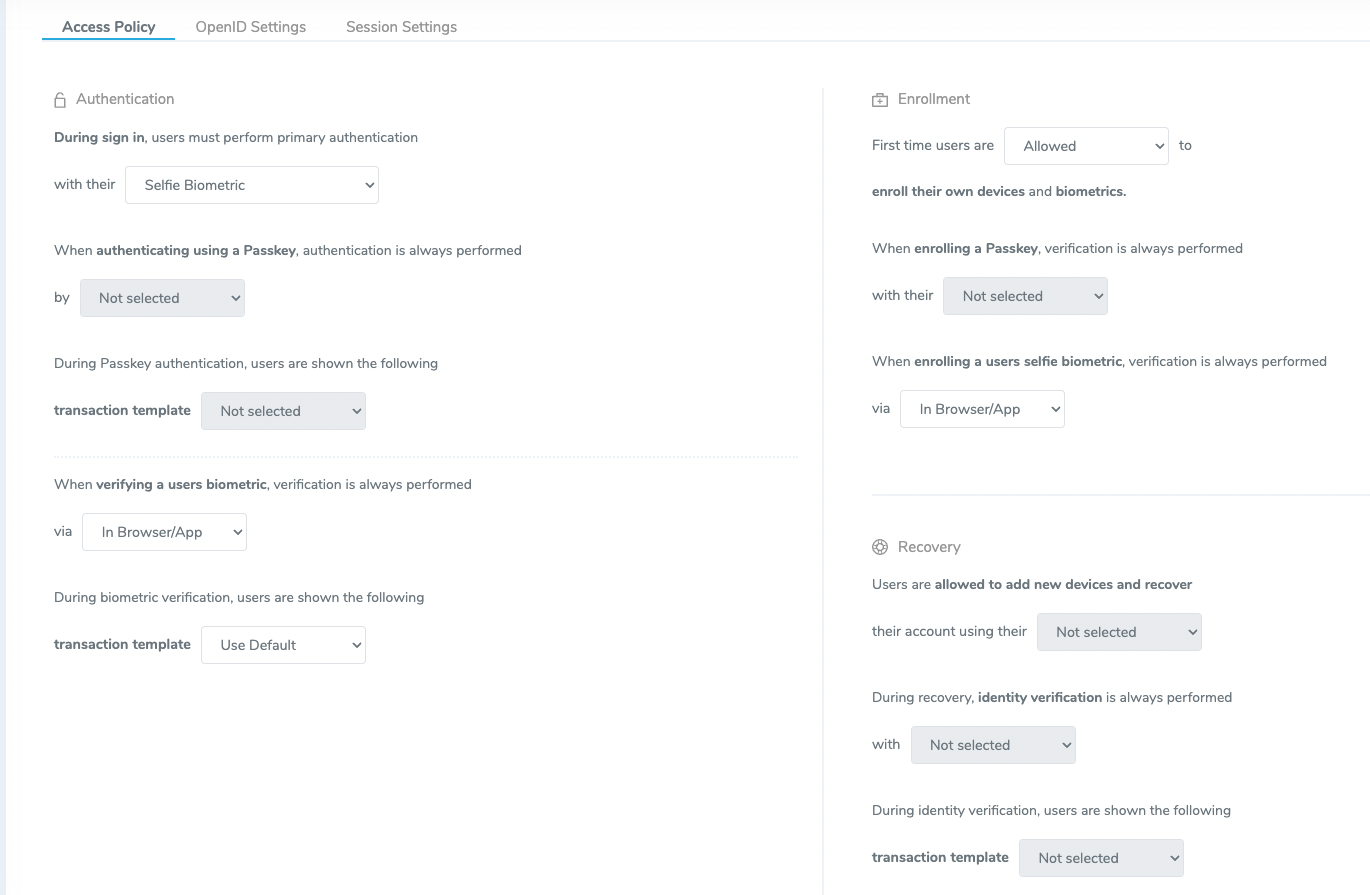
Access Policy
This page contains plainly worded explanations of the various scenarios that a user might encounter and the desired behavior of the OIDC connection.
OpenID Settings
After creating this integration, you will be presented with a Client ID and Client secret. These values will be used when configuring the identity provider connections on other platforms, and the Identity Portal does not save these values. Be sure to copy them or store them in your application if using the API endpoints.
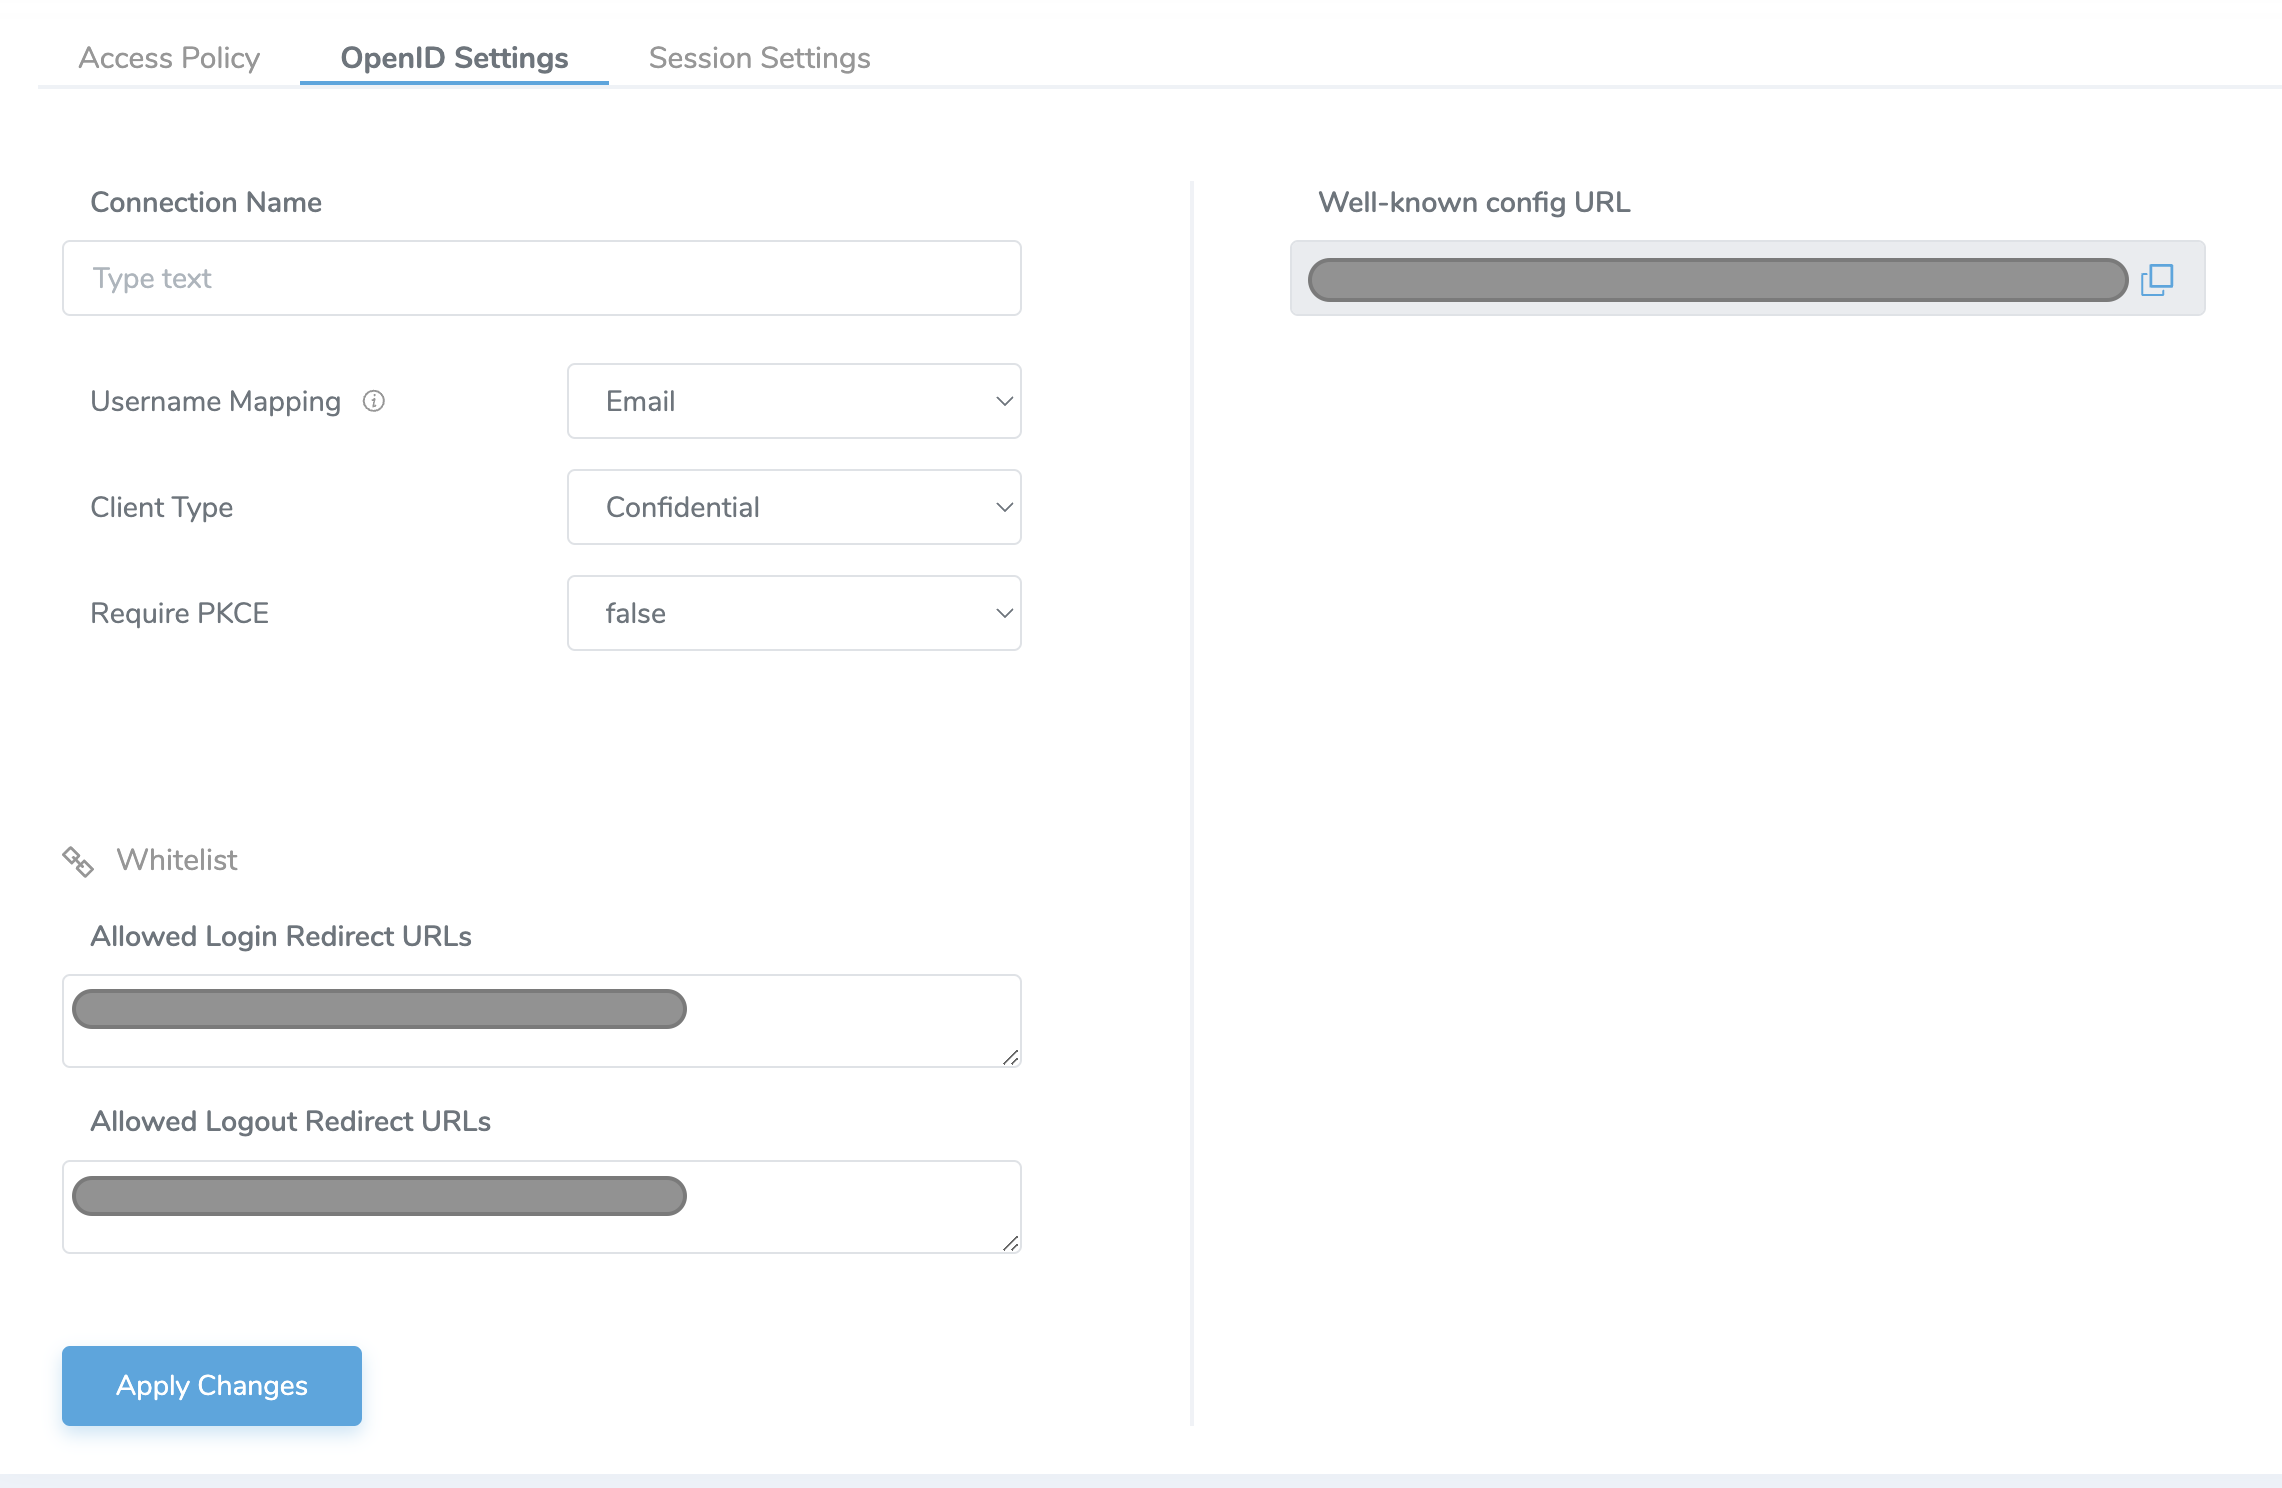
- Name: name of the integration
- Username Mapping: OIDC user claim (attribute) mapped to Verified Account ID for the user in authID platform.
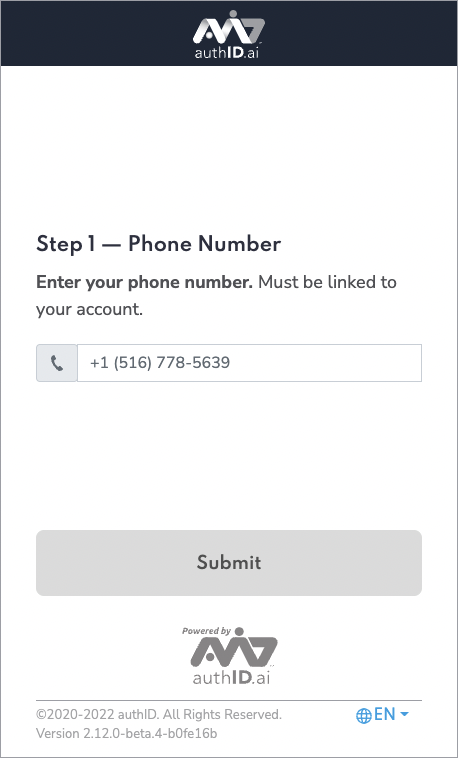
Can be email, phone number, or username. Note that the allowed characters are listed below:
- Upper and lower case letters (a-z), numbers (0-9)
- Symbols: periods (.), hyphens ( - ), underscores ( _ ), the @ sign , hash ( # ), Circumflex accent ( ^ ), exclimation ( ! ) , tilde ( ~ ), grave accent ( ' )
- See the screenshot of the experience using a phone number:
- Client Type: Public or Confidential. Public clients will not generate a client secret. Both can be used with or without PKCE.
- Require PKCE: Sets whether PCKE is mandatory to complete authentication. Public clients can be used without PKCE but this is not recommended.
- Whitelist
- Allowed Login Redirect URLs: URLs used by the identity provider to handle login callbacks
- Allowed Logout Redirect URLs: URLs used by the identity provider to handle logout callbacks
- Connection ID: Internal ID of the connection
- API Key ID: ID of API key for the connection
- Client ID: Client ID used for connecting other platforms
- Well-known config URL: URL for OIDC document discovery. Contains URL endpoints for platforms that do not support document discovery
If you know your domain name, you can generate redirect URLs for common scenarios for the major identity providers that are discussed in this guide. If you are leveraging additional custom domains, these URLs must be separated by commas.
- Okta
- Auth0
- Workspace ONE
- PingIdentity
- BeyondTrust
https://{YOURDOMAIN}.okta.com/oauth2/v1/authorize/callback
https://{YOURDOMAIN}.okta.com
https://{YOURDOMAIN}.us.auth0.com/login/callback
https://{YOURDOMAIN}.us.auth0.com
https://{YOURDOMAIN}.workspaceair.com/federation/auth/response/oauth2
https://{YOURDOMAIN}.workspaceair.com
https://auth.pingone.com/{EnvironmentId}/rp/callback/openid_connect
Please see the BeyondTrust walkthrough for information on the Login Redirect URL.
Session Settings
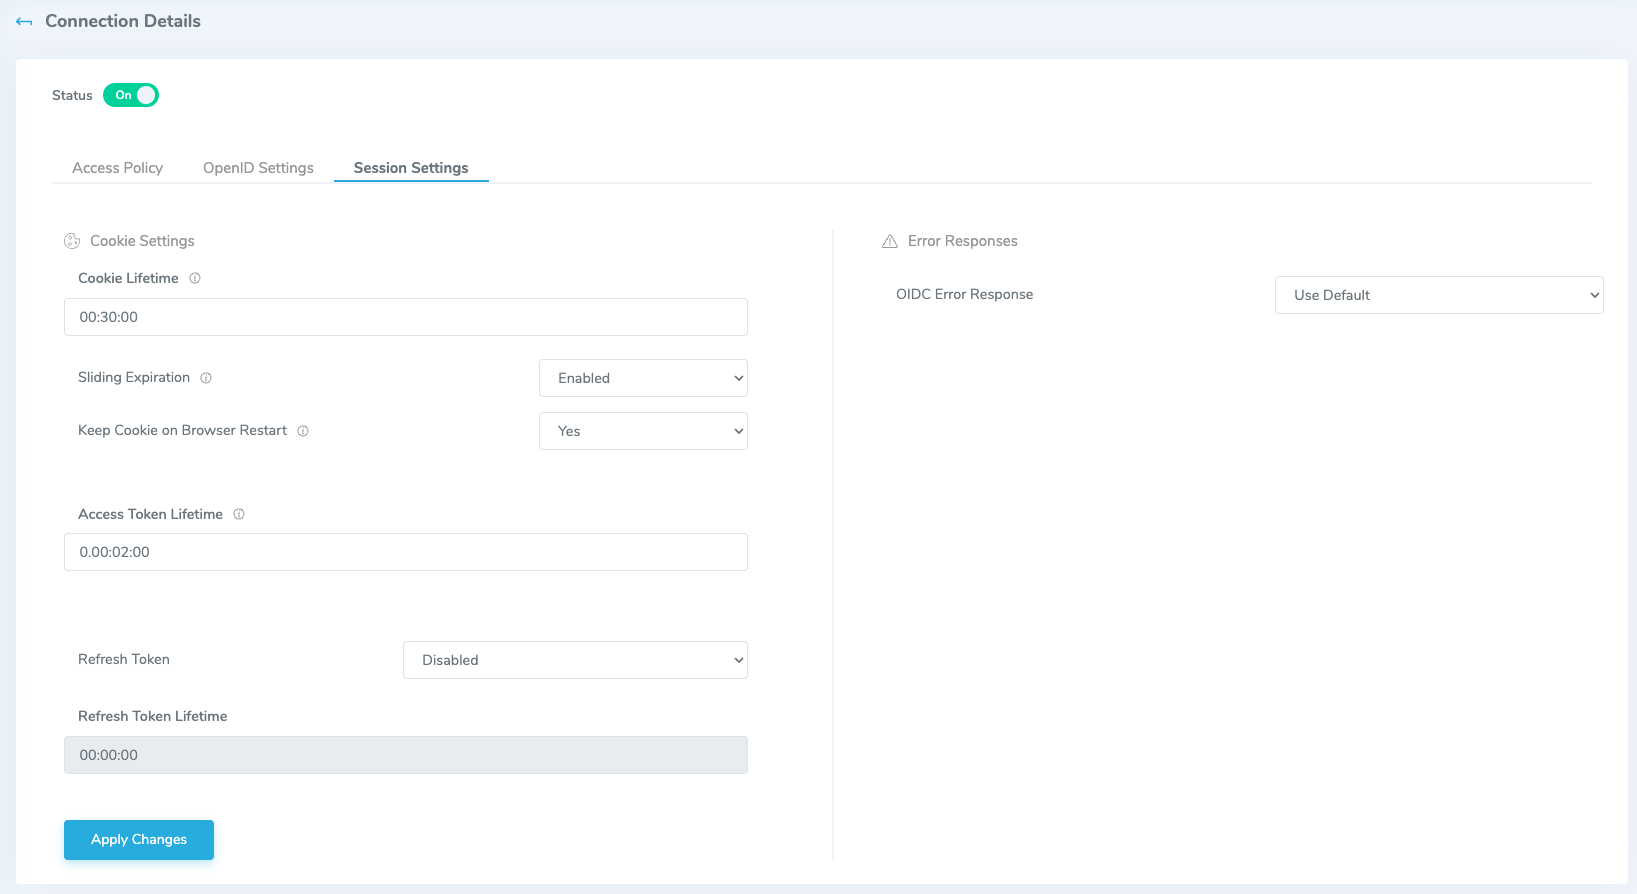
- Cookie Settings
- Cookie Lifetime: The lifetime of the cookie issued by the IDComplete OIDC Service to the user browser on successful authentication. If the cookie is still valid, the authentication is not performed, i.e. user is still logged in (in that browser)
- Sliding Expiration: When the Sliding Expiration is enabled, the time interval during which the authentication cookie is valid is reset to the expiration timeout value. This happens if the user browses after half of the timeout has expired.
- Keep Cookie on Browser Restart: Determines whether the cookie persists between browser restarts. This value will be used if the parameter of the same name is not set in the integration.
- Access Token Lifetime: Lifetime of token issued by authID OIDC server to Okta, Auth0, etc OR to application if our OIDC is used as a primary identity provider.
- Refresh Token: Enables the client application to get new access tokens without having to ask the user to log in again. This is required if you are requesting the
offline_accessscope. - Refresh Token Lifetime: validity of the refresh token.
- Error Responses
- OIDC Error Response: determines whether to send detailed error messages to the end user or client application.
AMR Values
In support of RFC-8176, authID now returns Authentication Method Reference (AMR) values as part of the OIDC response to better support customers who need to know what authentication methods were used during the authentication process. The following values will be returned for the appropriate scenarios:
face: when biometric verification (not enrollment) is performeduser: when liveness check is performed during biometric verifiction or enrollmenthwk: when FIDO2 verification (not enrollment) is performedsms: when veirfication link is sent via SMS transportemail: this is a custom value outside of the RFC spec that is returned when the verification link is sent via email transport