Okta Walkthrough
The following page will demonstrate how to set up Okta to fully leverage AuthID's biometric authentication platform.
This page assumes that you are using the Okta Identity Engine and you have features such as Custom IdP Factor authentication enabled.
Authentication Scenarios
Below are a few common scenarios that you may be trying to solve for with the authID platform. Each section includes links to other parts of this page to help create a solution that best suits your needs.
Protect all critical areas of Okta
- Recommended approach: Passwordless Login and Biometric/Passkey Multi-factor Authentication
- Used when: you want the strongest protection across all areas of your Okta instance
- Benefits:
- All areas of Okta protected
- True passwordless login and seamless biometric MFA
- Strongest combination of authentication factors
- How to implement:
- Add authID as a Factor-only IdP
- Add another authID IdP in SSO Only mode
- Create a routing rule to activate the SSO IdP at login
- Add IdP Authenticator and set Enrollment policy
- Create Authentication Policy to apply Factor-only IdP in certain situations
Protect user logins
- Recommended approach: Passwordless Login with Biometric/Passkey
- Used when: you want to increase login security and potentially eliminate passwords
- Benefits:
- Replace or augment traditional MFA with stronger biometric authentication
- Potential to eliminate passwords entirely
- Less friction at login
- How to implement:
- Add an authID IdP in SSO Only mode
- Create a routing rule to activate the SSO IdP at login
- (Optional) Create a sign-on policy for extra verification
Protect instance features and account/device recovery
- Recommended approach: Biometric/Passkey Multi-factor Authentication
- Used when: you want certain functions to be protected with biometric controls, or you want to increase security around account and device management
- Benefits:
- Granular application of authentication factors
- Secure account/device recovery and management
- How to implement:
- Add authID as a Factor-only IdP
- Add IdP Authenticator and set Enrollment policy
- Create Authentication Policy to apply Factor-only IdP in certain situations
Video Walkthroughs
Add New Identity Provider
The following video demonstrates how to add the authID integration you created earlier to Okta.
Configure Policies
The following video demonstrates how you can use the new identity provider in common authentication scenarios.
Setup Steps
These steps are not ordered and can be used as needed by your solution.
Add Identity Provider in SSO Only mode
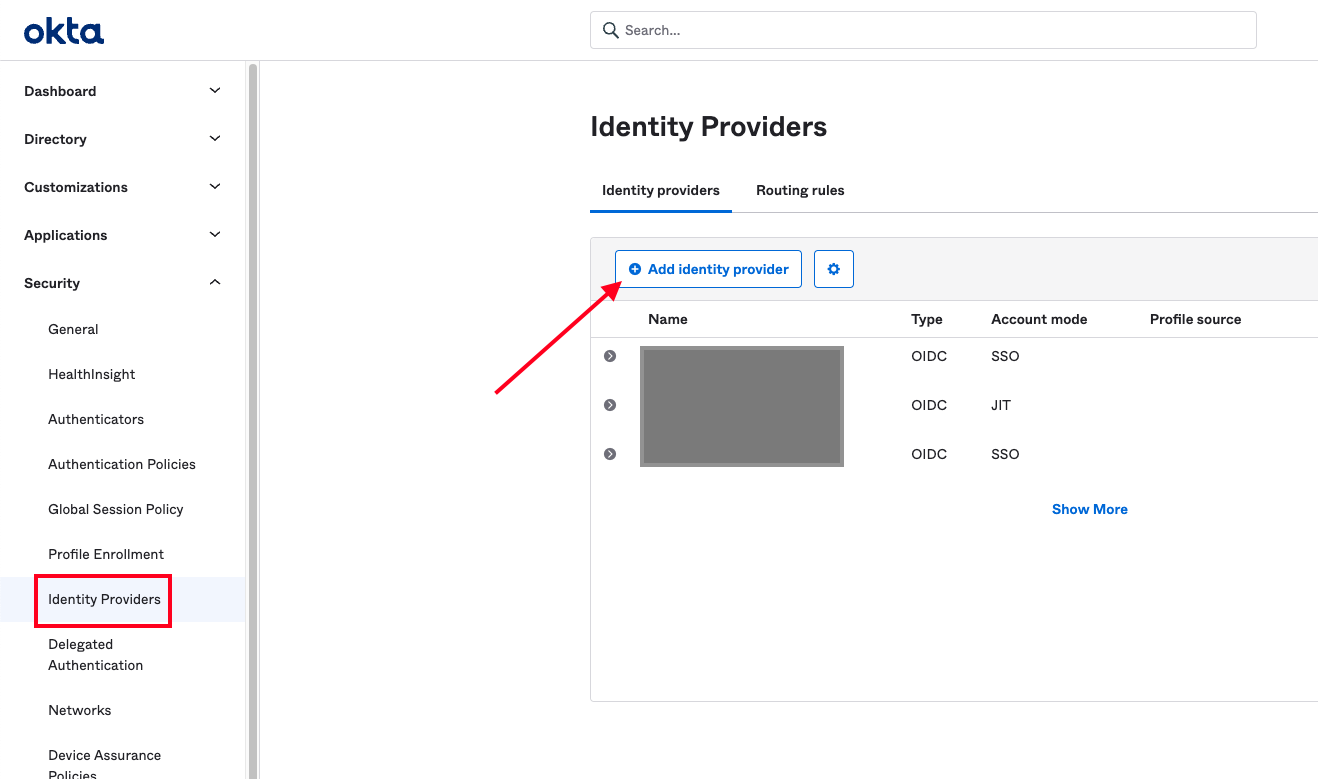
Follow these steps to add an identity provider that will be used in conjunction with a routing rule to protect user logins. First, navigate to the Security > Identity Providers section of your dashboard and click the button labeled Add Identity Provider.
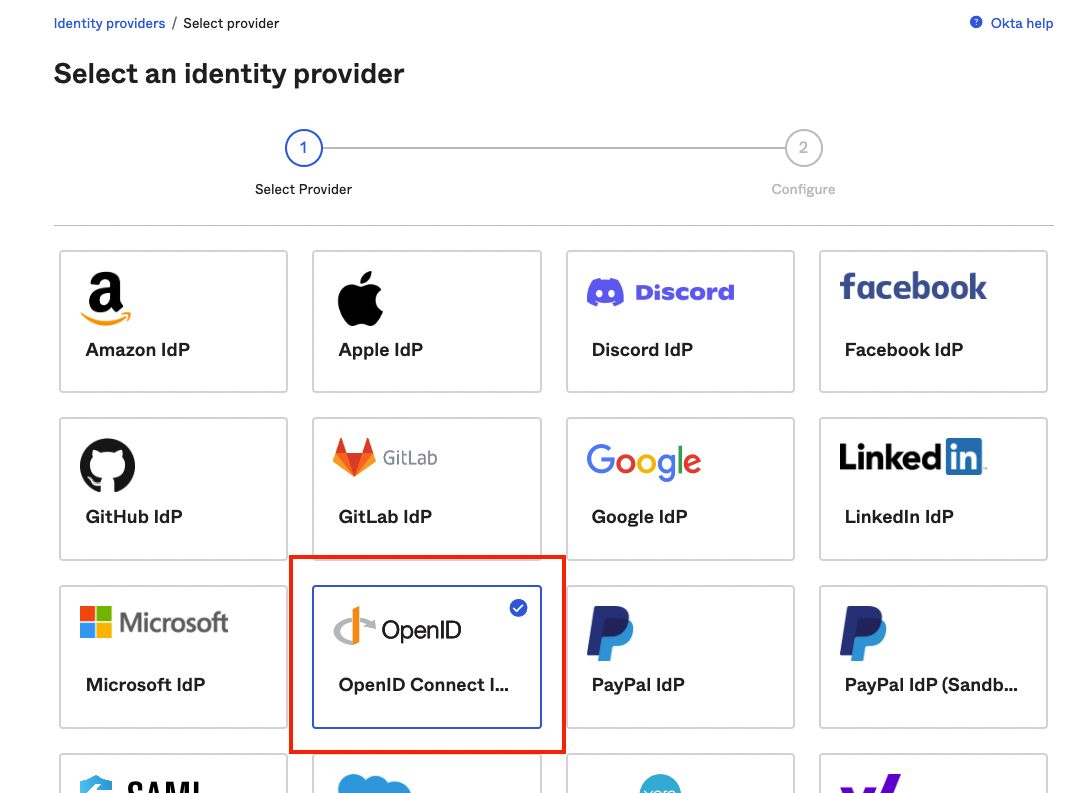
Select the tile marked OpenID Connect.
Specify a Name for the connection. Ensure that the IdP Usage field is set to SSO only. Next, use the saved values from your AuthID integration to fill out the Client ID and the Client Secret fields.
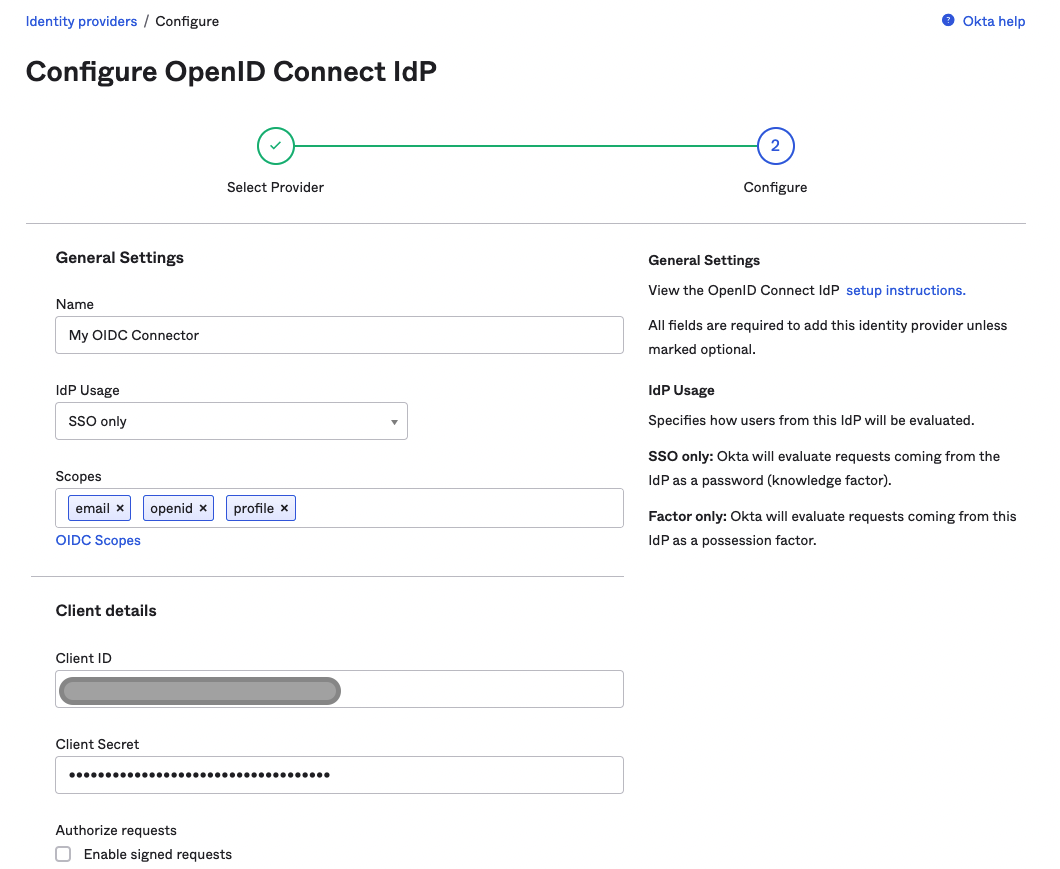
Fill out the Endpoints section with the following values from the AuthID OIDC server:
Issuer:
https://id.authid.ai/oidc/web
Authorization endpoint:
https://id.authid.ai/oidc/web/connect/authorize
Token endpoint:
https://id.authid.ai/oidc/web/connect/token
JWKS endpoint:
https://id.authid.ai/oidc/web/.well-known/jwks
Userinfo endpoint:
https://id.authid.ai/oidc/web/connect/userinfo
Finally, specify your preferred Authentication Settings and then JIT settings if applicable. Save to create the Identity Provider.
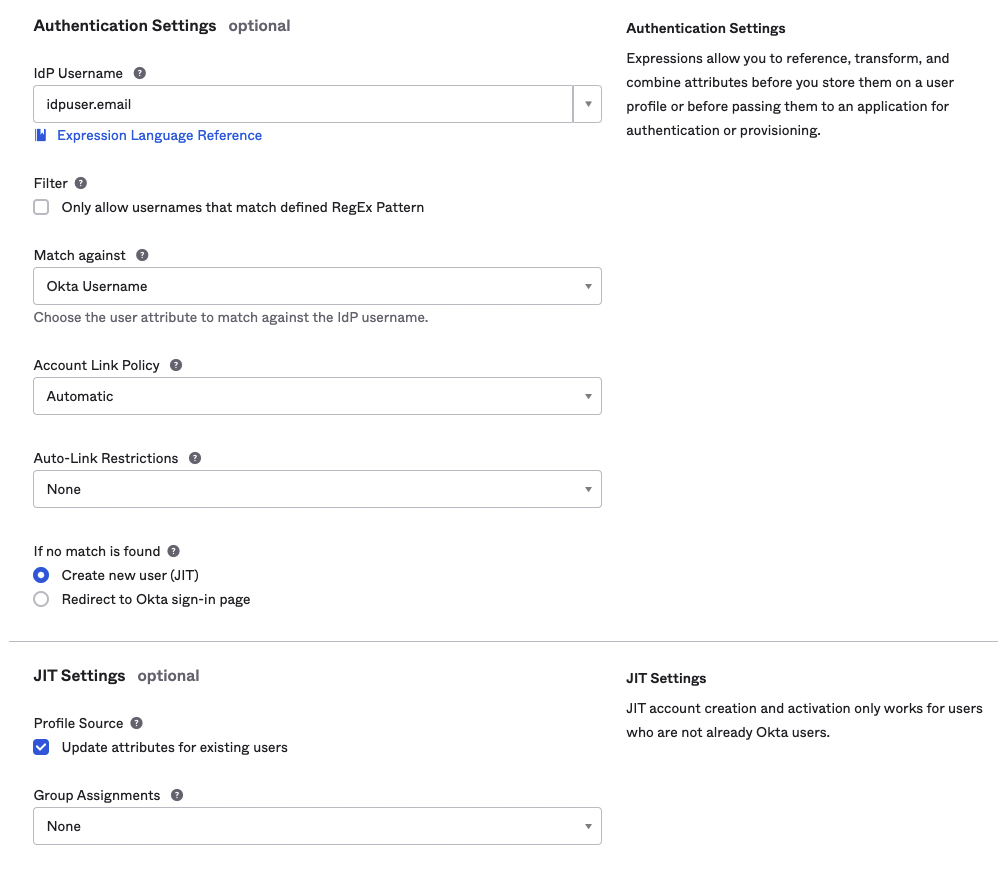
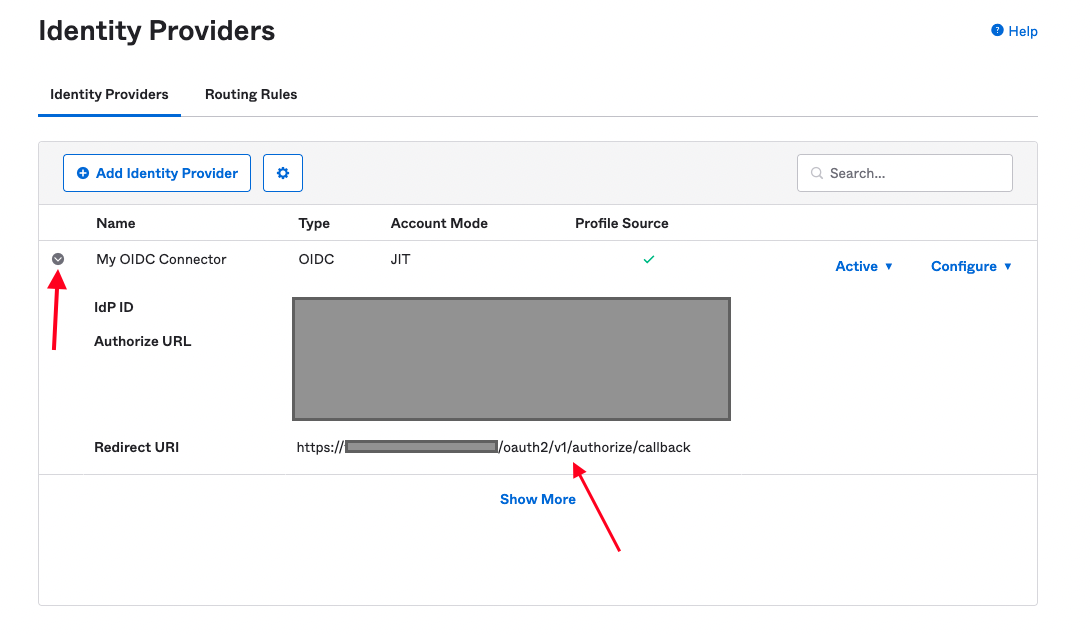
Once the identity provider has been created, you must ensure that at least one value from the Login redirect Urls parameter for your authID integration matches the Redirect URI. This value can be found by clicking on the identity provider in the list:
Add Identity Provider in Factor Only mode
Follow the sections to create an integration in authID, and then use the same directions to create an identity provider in SSO only mode but be sure to edit the settings of the new IdP so that it is set to Factor only for the IdP Usage, as seen in the screenshot below:

Add Routing Rule
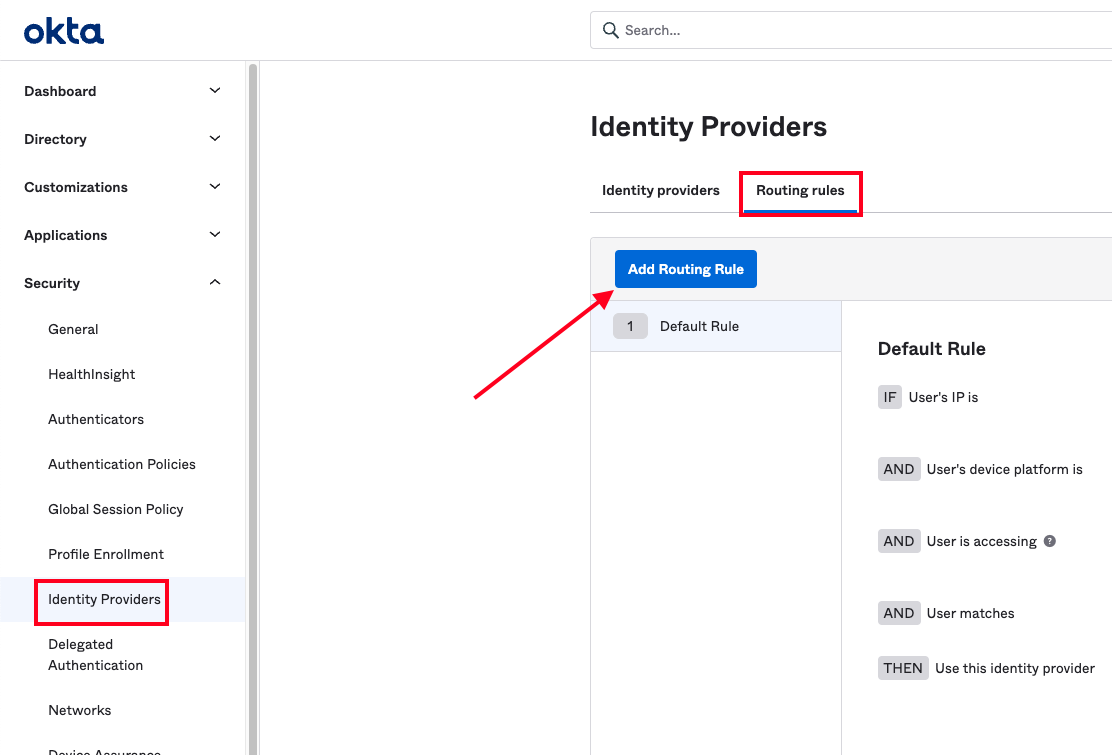
Routing rules are used to direct users to the preferred identity provider based on their conformance to the conditions you set forth. In this way, we can make a determination to send a subset of the user population through the OIDC identity provider we have created. To begin, navigate to the Security > Identity Providers section of your dashboard and select the Routing Rules tab. From here, click the Add Routing Rule button to open the modal for creating a rule.
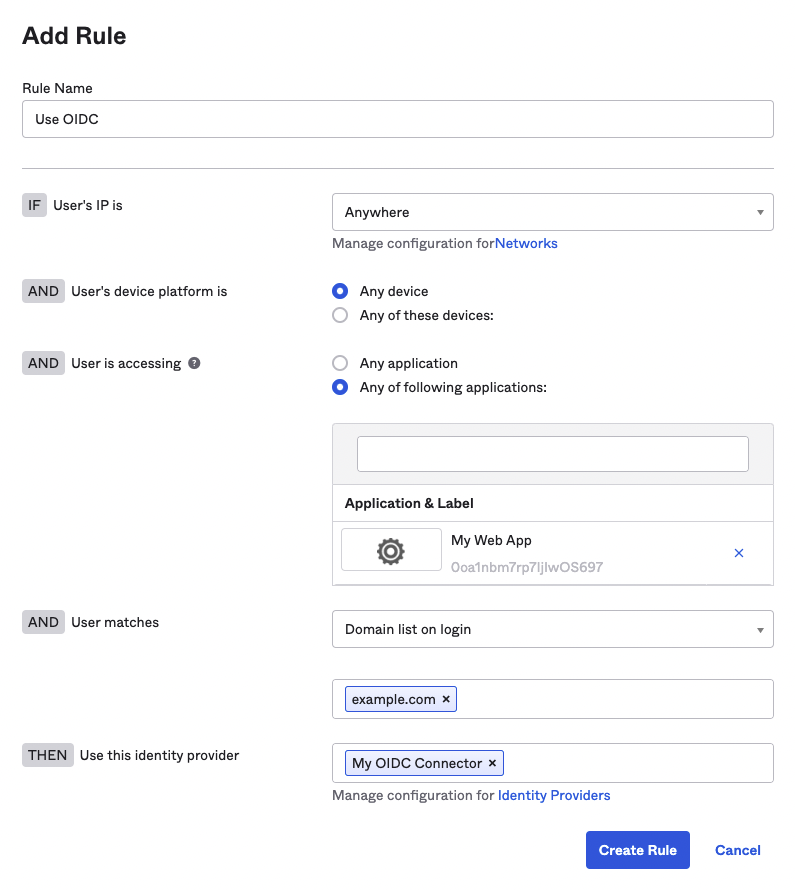
You can configure the rule as you see fit, but ensure that the last section labeled Use this identity provider points to the identity provider created earlier. For example, this rule will route any users attempting to access the app integration you created previously with an @example.com email address to use the OIDC connection.
Add Custom IdP Authenticator
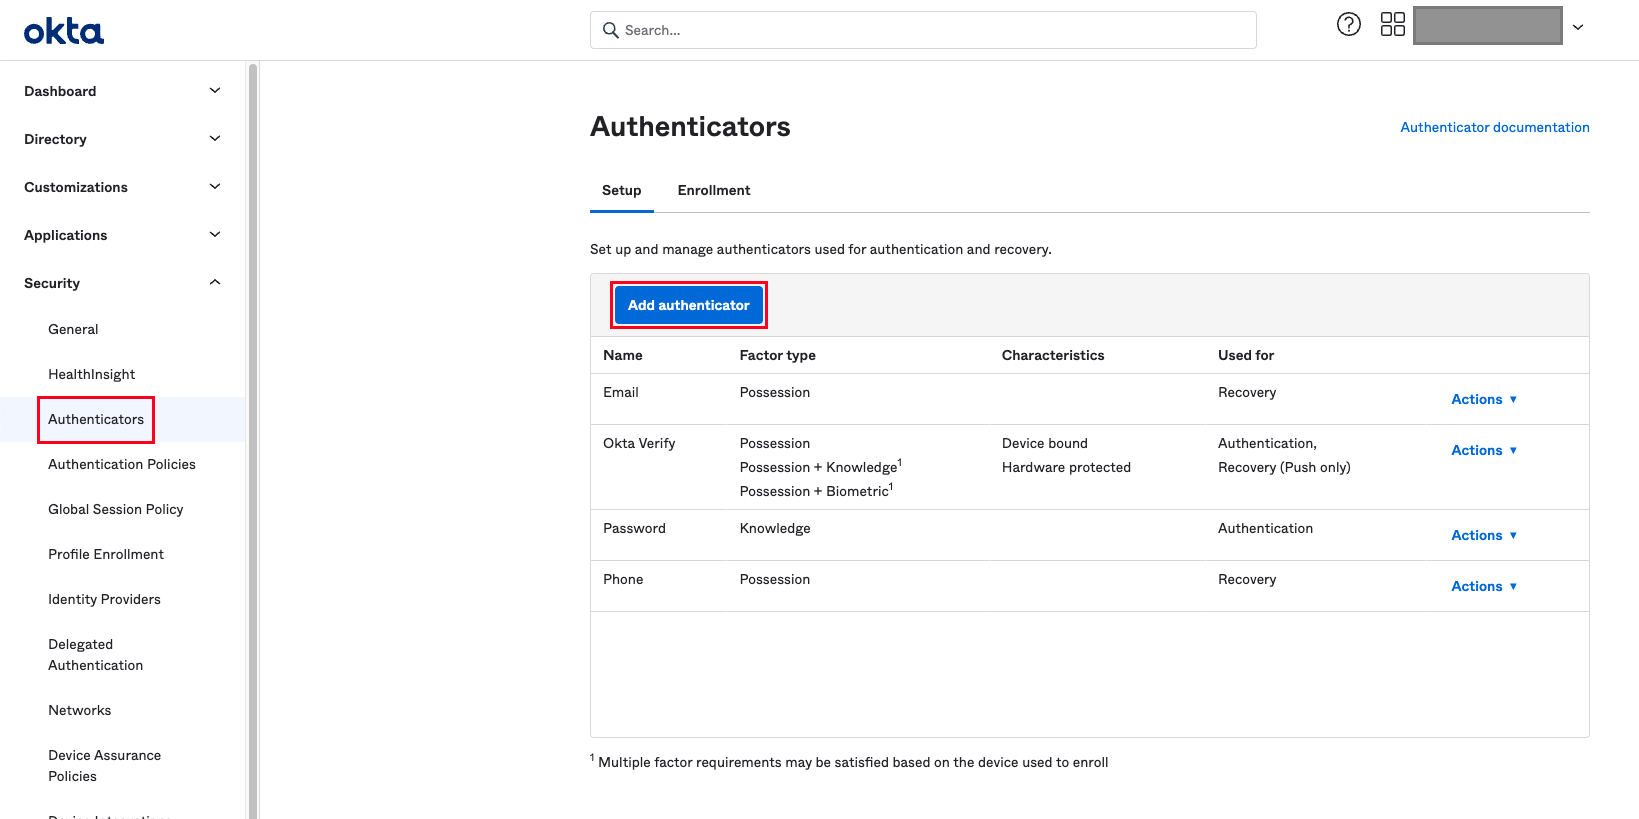
Next, you add the Custom IdP Authenticator by navigating to Security > Authenticators and clicking Add Authenticator.
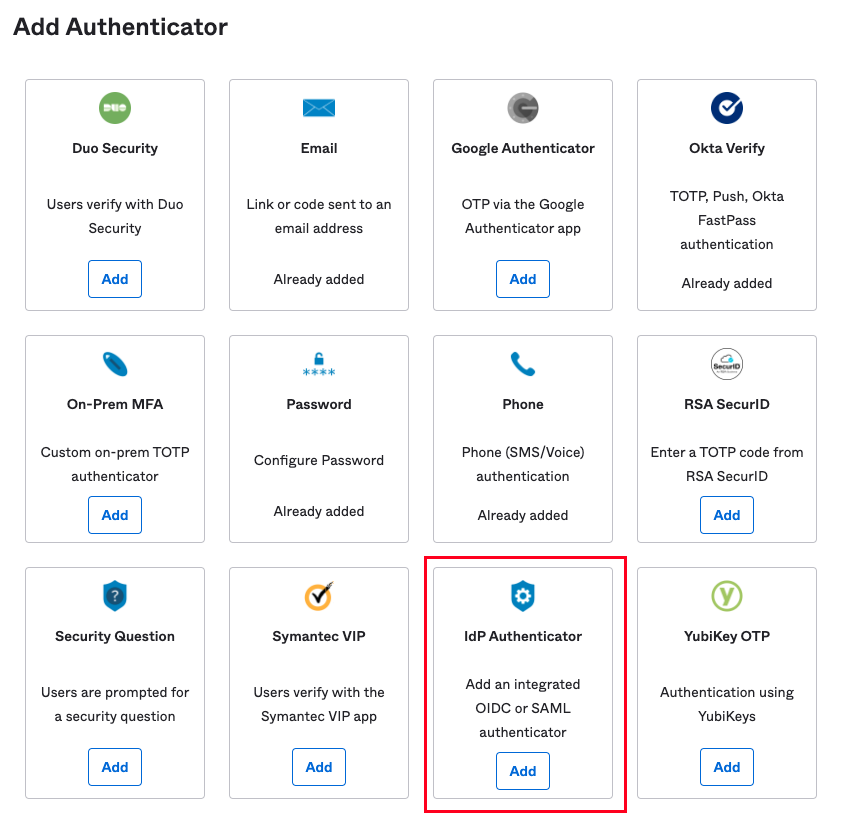
Select IdP Authenticator from the dialog.
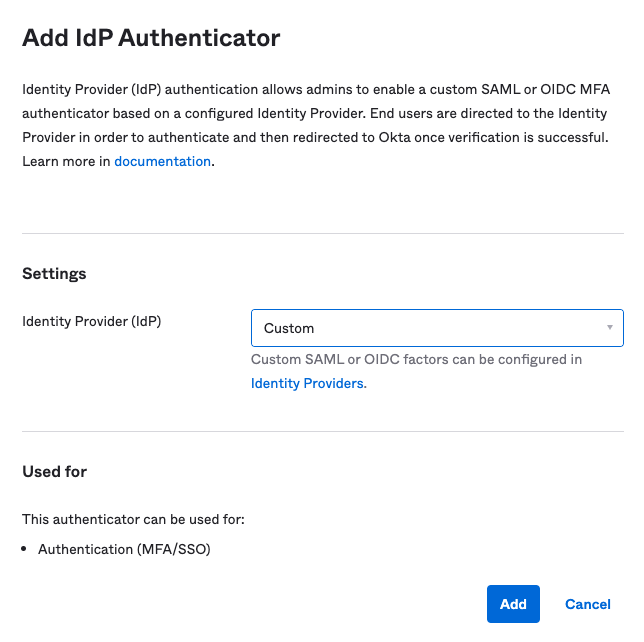
Choose the IdP you created earlier from the dropdown and click Add.
You should now see the authenticator in the list of available authenticators.
Testing Custom Authenticator
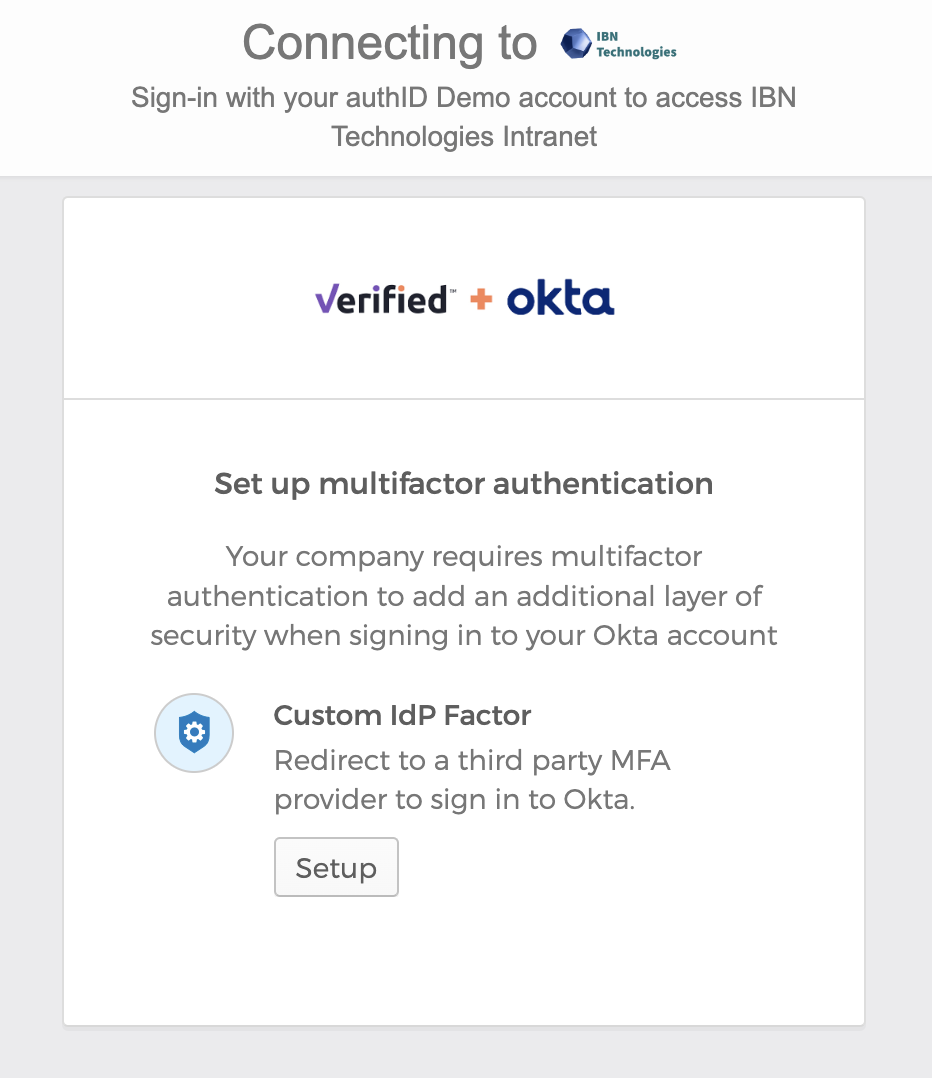
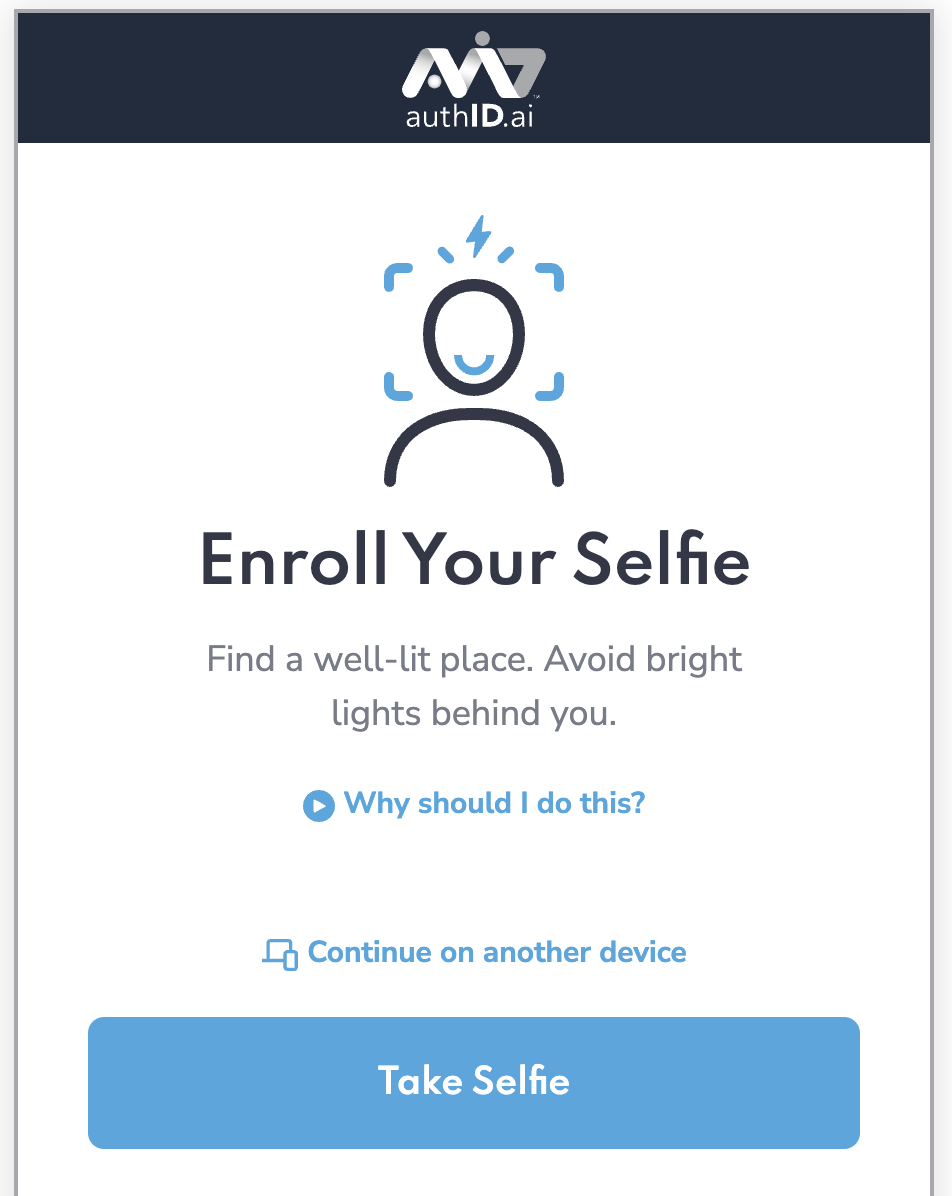
When a user first clicks on the resource or feature protected by the authID custom IdP Authenticator, they will be prompted to enroll the authenticator to their account:
Depending on your integration configuration, a user will be prompted to enroll their selfie, passkey, or both. Below the user is being asked to enroll only their selfie:
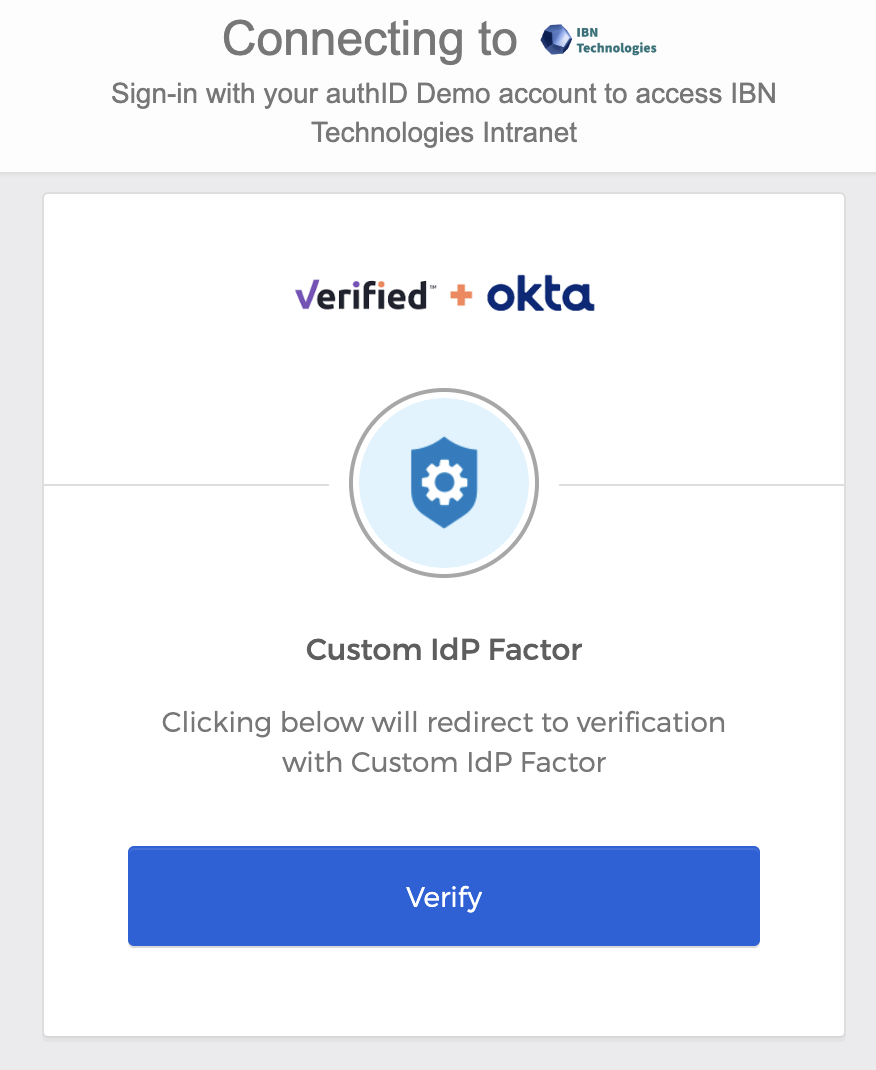
Once this is complete, the authentication should proceed and a user will be allowed to continue the action that triggered the MFA challenge. When the user attempts the same action on subsequent occasions, they will be prompted by Okta to verify their identity using this authenticator:
Set Authenticator Enrollment Policy
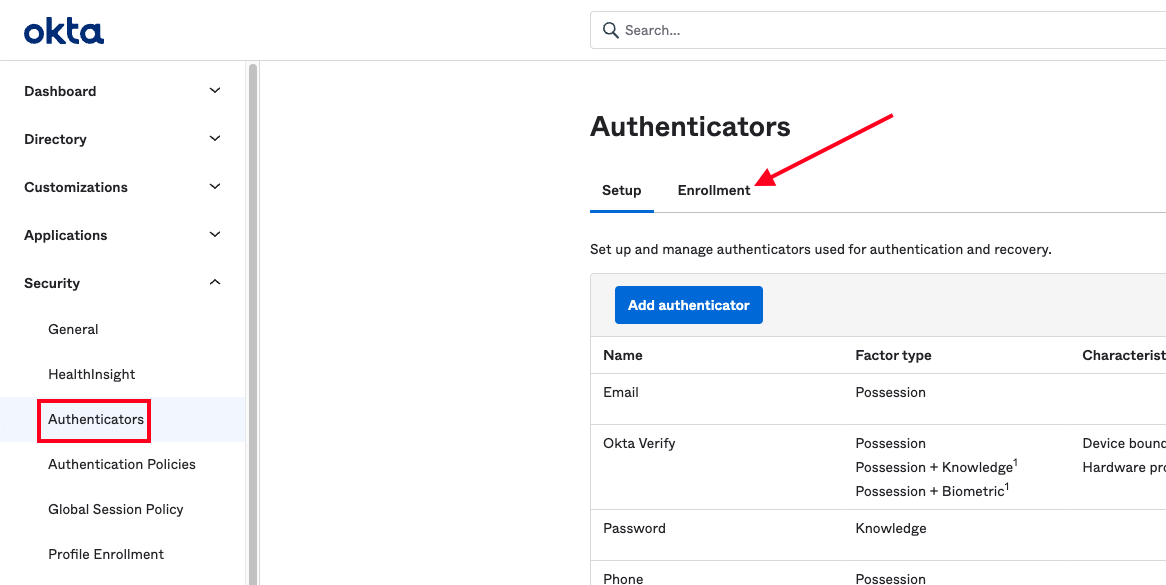
It is recommended to present enrollment options to your users for the new authenticator type, and you can craft policies on how and when this happens. Navigate to Security > Authenticators and click the Enrollment tab.
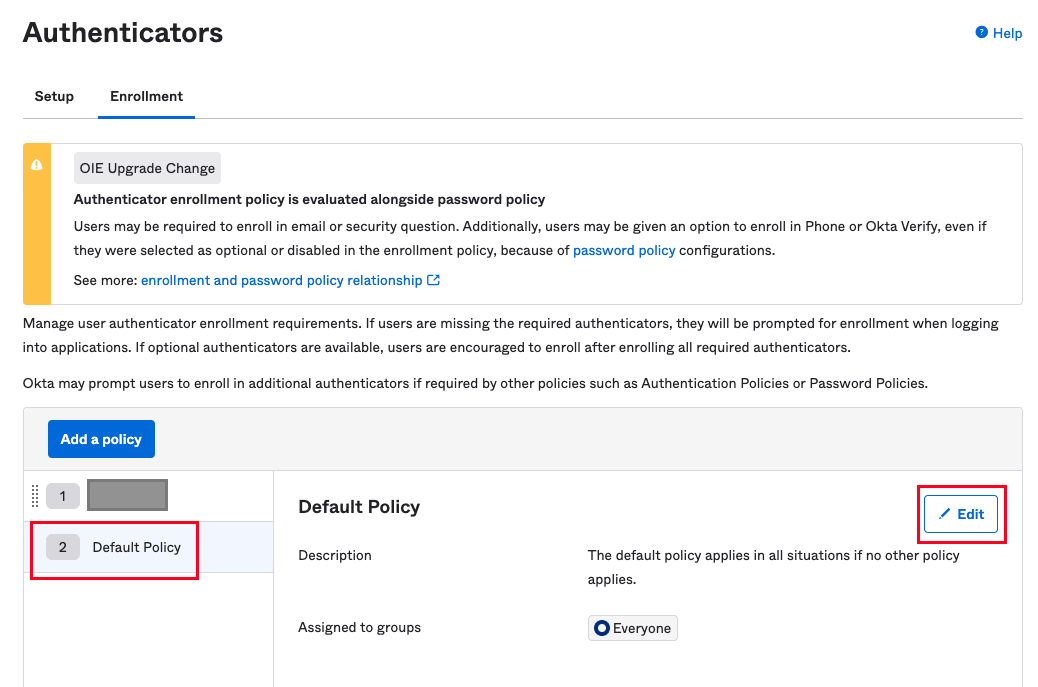
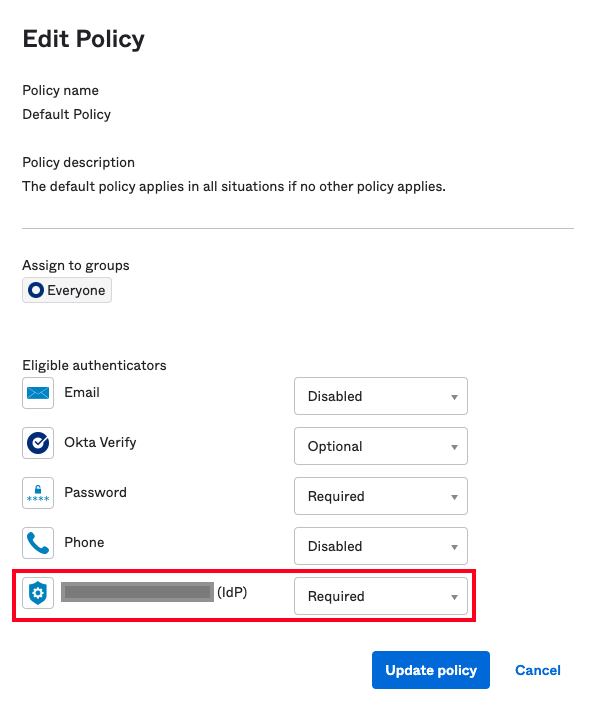
Here, you can either add a new policy or edit an existing one. In this example, we will edit the Default Policy and enable the IdP Authenticator as an eligible authenticator. Select the policy from the left-side list and click the Edit button:
Find your authenticator, and select the behavior from the dropdown. Click Update Policy to save your changes.
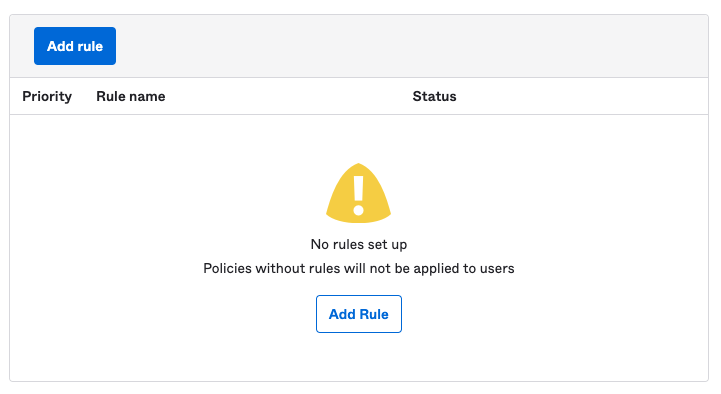
Finally, you must add at least one rule to allow group members to enroll their authenticators. Click Add Rule below Eligible authenticators:
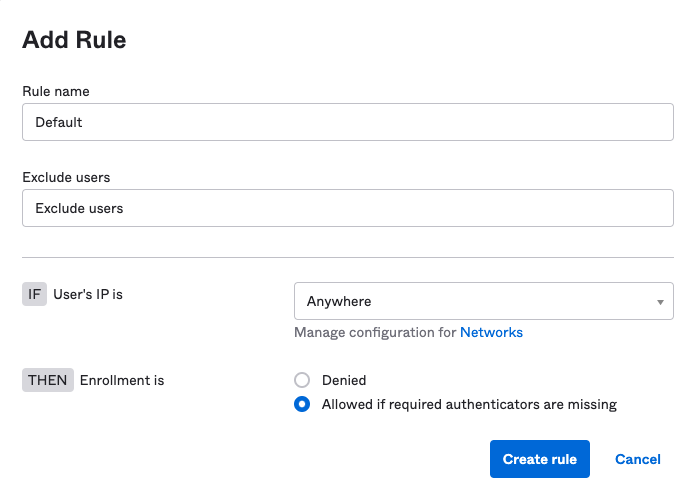
Accept the defaults settings and click Create rule. This will allow anyone in the applicable group to enroll their authenticators. You can later add rules to exclude users based on name, IP address, or other attributes.
Create Authentication Policy
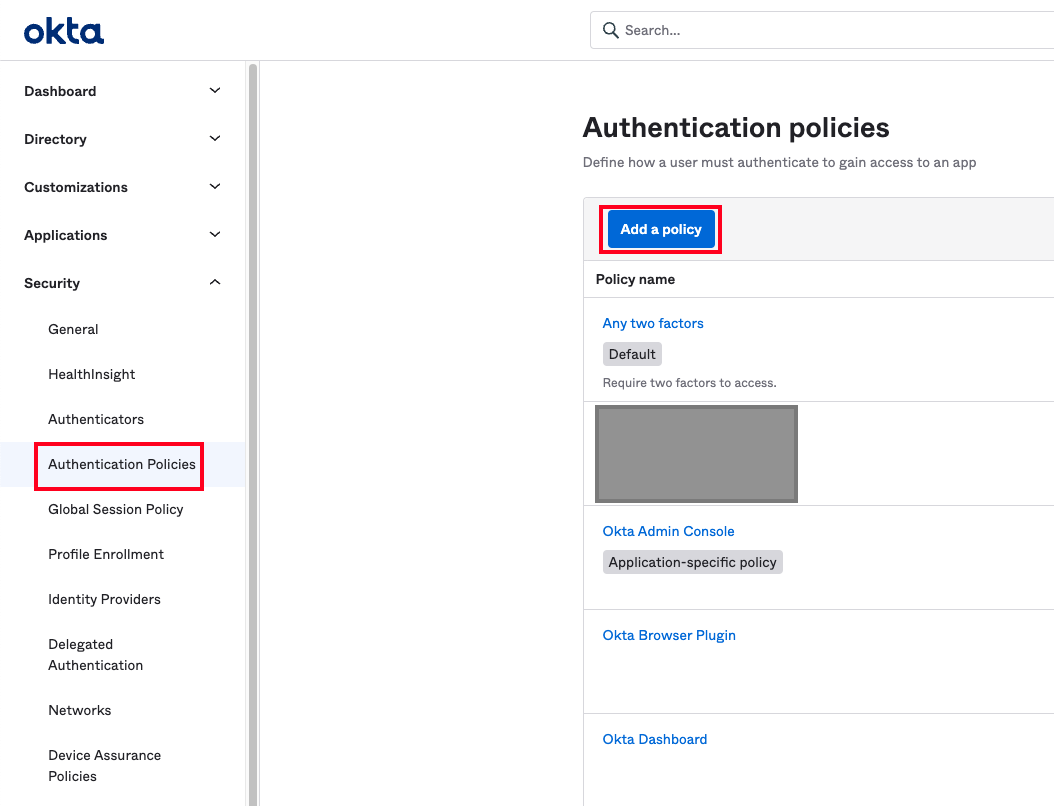
Authentication policies are used to control when and where your configured authenticators are applied. To edit or add policies, navigate to Security > Authentication Policies. Click an existing policy to edit it, or click Add a policy to create a new one.
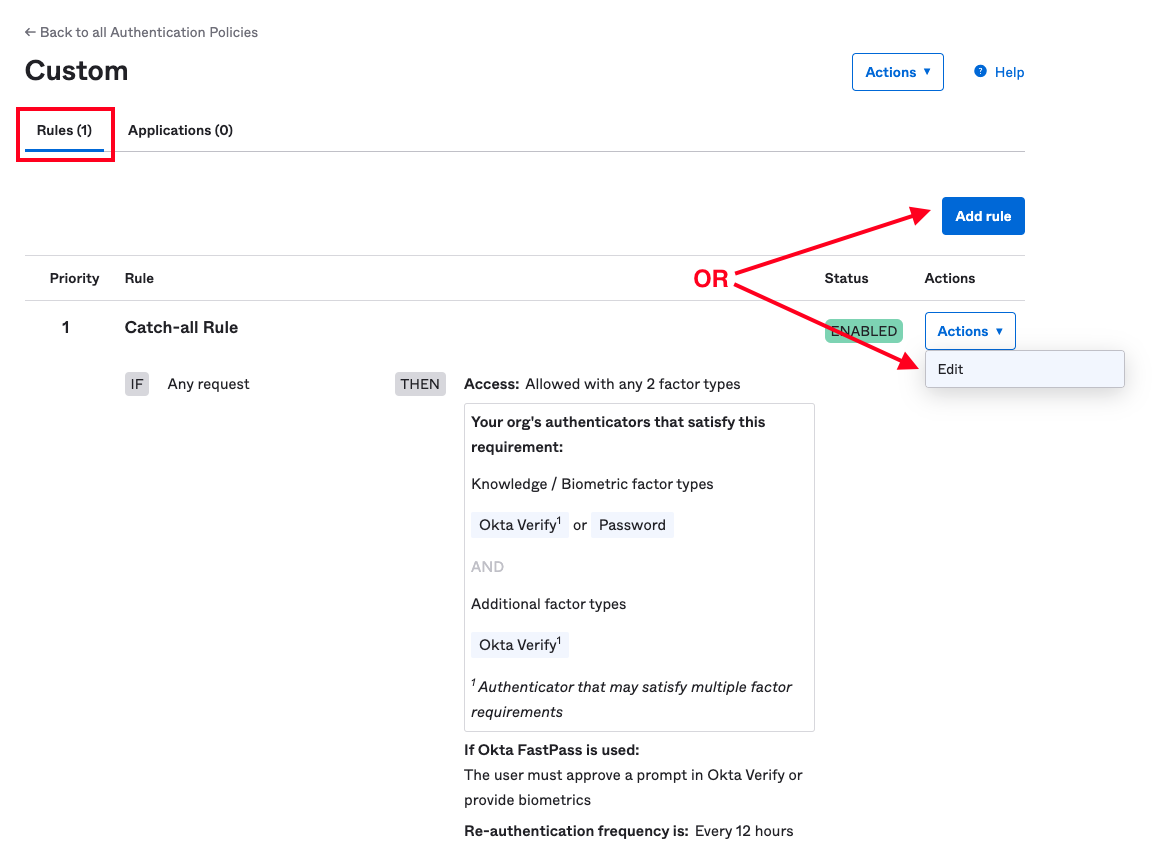
After creating a policy or clicking an existing one, you will be directed to the Rules tab. By default, every policy will have a Catch-all Rule if no other rules apply. Again, you can either edit this rule or add a new one by clicking Add Rule:
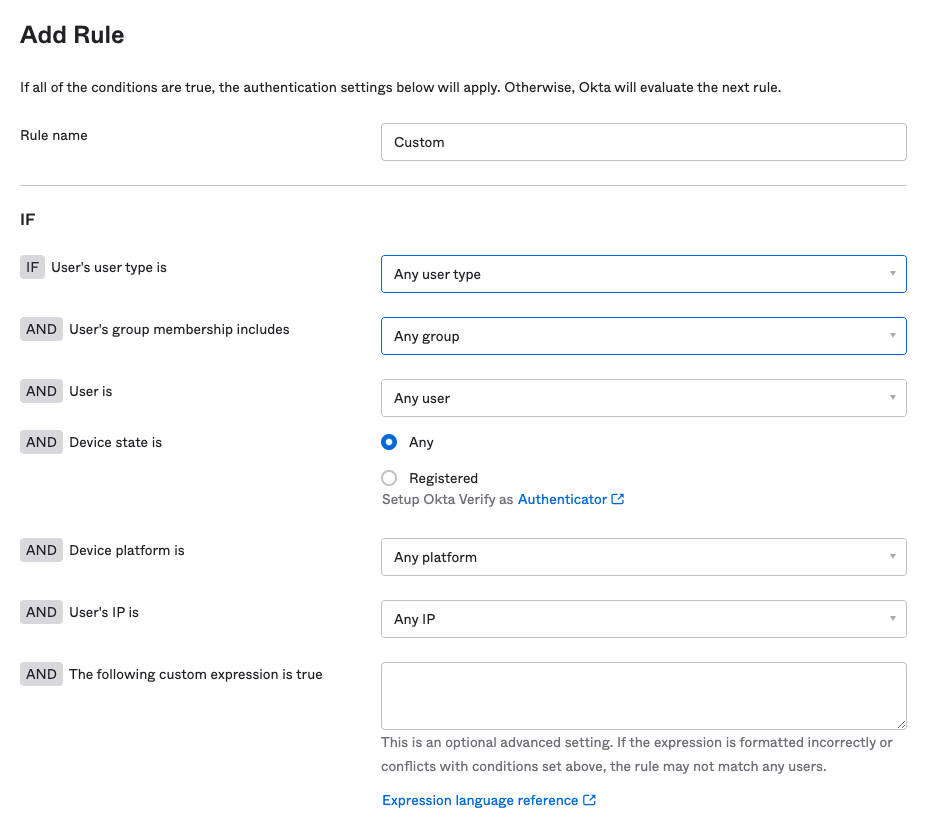
First, specify a name and the conditions upon which the rule will activate.
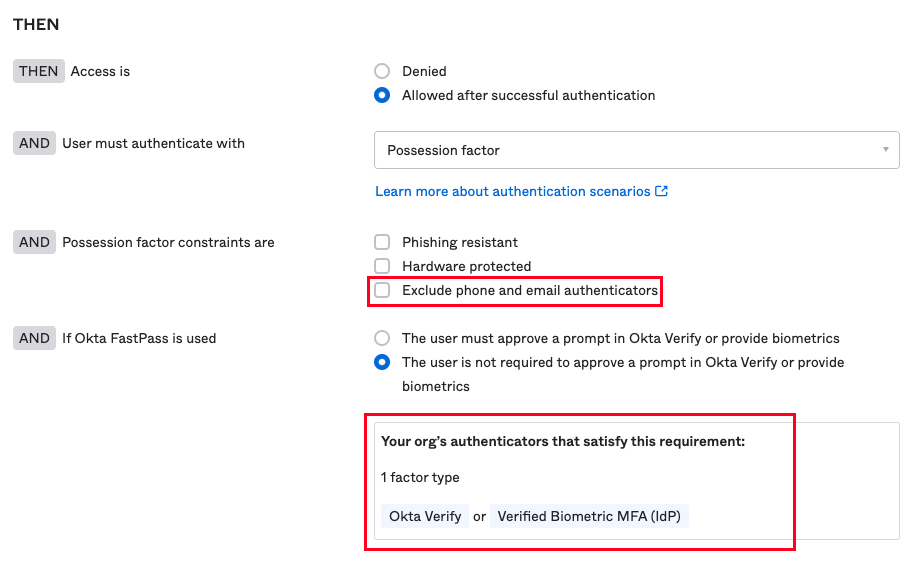
For the outcome of a match, set the authenticate behavior to use anything except Password / IdP. Uncheck the box marked Exclude phone and email authenticators under the Possession factor constraints are section. You should see the IdP authenticator you configured earlier in the box below:
Set the frequency for re-authentication to the appropriate value and click Save.
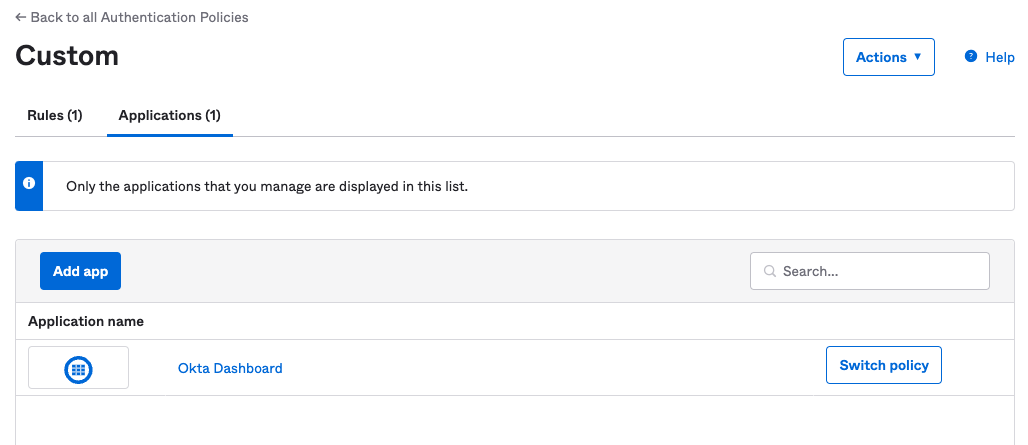
Next, specify the applications that this rule applies to by navigating to the Applications tab of the policy details and clicking Add app:
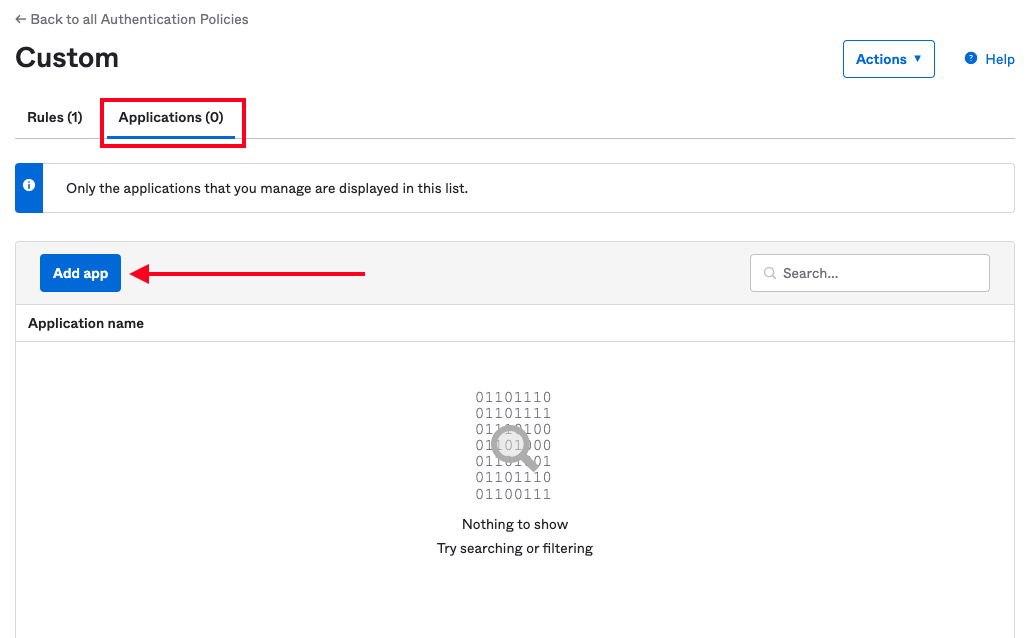
Select the applications you want to apply this authentication policy to, and then close the dialog. You should now see those apps listed on the page: