Overview
From time to time, you will need to control or customize the behavior of your tenant within the Verified platform. This could take the form of updating default transaction settings, adding more administrative users, managing user credentials, or other common administrative tasks.
This page will demonstrate the settings and procedures available to you through the Identity Portal.
Tenant Settings
Tenant settings can be accessed by clicking the Settings blade on the Identity Portal navigation. Below is a screenshot showing all the options available to customize:
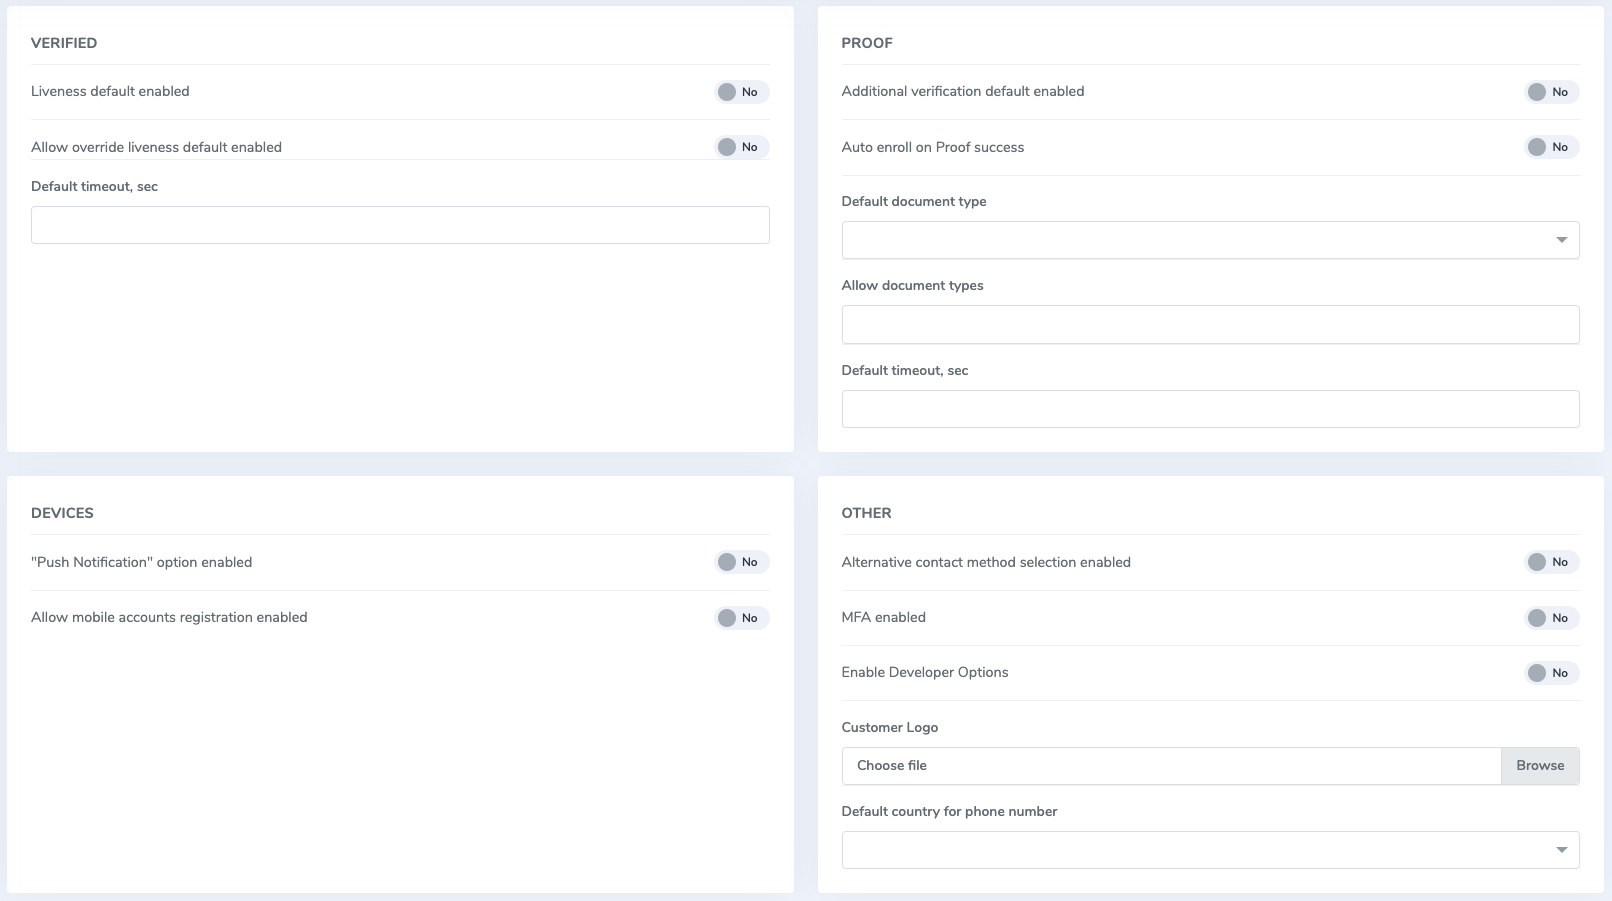
The following settings control behavior strictly within the Identity Portal, and do not serve to alter API request behavior.
Verified
- Liveness default enabled: enabling forces a liveness check when running a verification transaction through the Identity Portal
- Allow override liveness default enabled: allows you to disable the liveness check when running a verification transaction through the Identity Portal
- Default timeout, sec: timeout for verification transactions initiated through the Identity Portal
Proof
- Additional verification default enabled: automatically runs additional document verifications when running a proof transaction through the Identity Portal
- Auto enroll on Proof success: enabling automatically creates a Verified account using a concatenated version of the phone number or email address when running a proof transaction through the Identity Portal
- Default document type: default document when running a proof transaction through the Identity Portal
- Allow document types: configurable list of documents you can use in a proof transaction
- Default timeout, sec: timeout for proof transactions initiated through the Identity Portal
Devices
- Push notification option enabled: allows transactions to be sent to a mobile device with the AuthID app installed
- Allow mobile accounts registration enabled: allows a user to register for a Verified account when completing a transaction through the AuthID app
Transactions
- No prefix: (Portal only) normally the Identity Portal will add a prefix to designate accounts created via the portal versus accounts created elsewhere. Turning this off removes the prefix from any transactions going forward.
- Alternative contact method selection enabled: enables adding a new modality of delivery for transactions initiated through the Identity Portal
- Enable Developer Options: displays basic debugging data after initiating a transaction in the Identity Portal, e.g. request body content, QR codes, and web links to the BioWebApp interface. Note that this will prevent transactions from being sent via the designated delivery method
- Default country for phone number: country code to append to a phone number for transactions initiated through the Identity Portal
- API version: (Portal only) dictates whether the portal should use the V1 or V2 API.
Account Lockout Options
- Enabled: enables or disables the account lockout feature.
- Max failed attempts: number of times a user can authenticate before their account is locked by our system.
- Failed attempts timeout, sec: time that a user has to complete the transaction successfully
Other
- MFA enabled: forces biometric enrollment to gain access to the Identity Portal
- Customer Logo: changes the logo within the Identity Portal
User Management
User management manifests in one of two ways within the Identity Portal. Administrative users have control over the tenant and its settings, while Verified users are users who have been enrolled for verification transactions with a stored biometric credential. The following sections detail how each can be administered.
Administrative users
You need to have the Customer Owner role associated with your account in order to manage other administrative users. Tenants will always have at least one administrative user with this role.
If you have sufficient role permissions, navigate to the Users blade on the left-hand menu. Here you will see a searchable list of other administrators and their roles. From here, you can either edit existing users or add new ones.
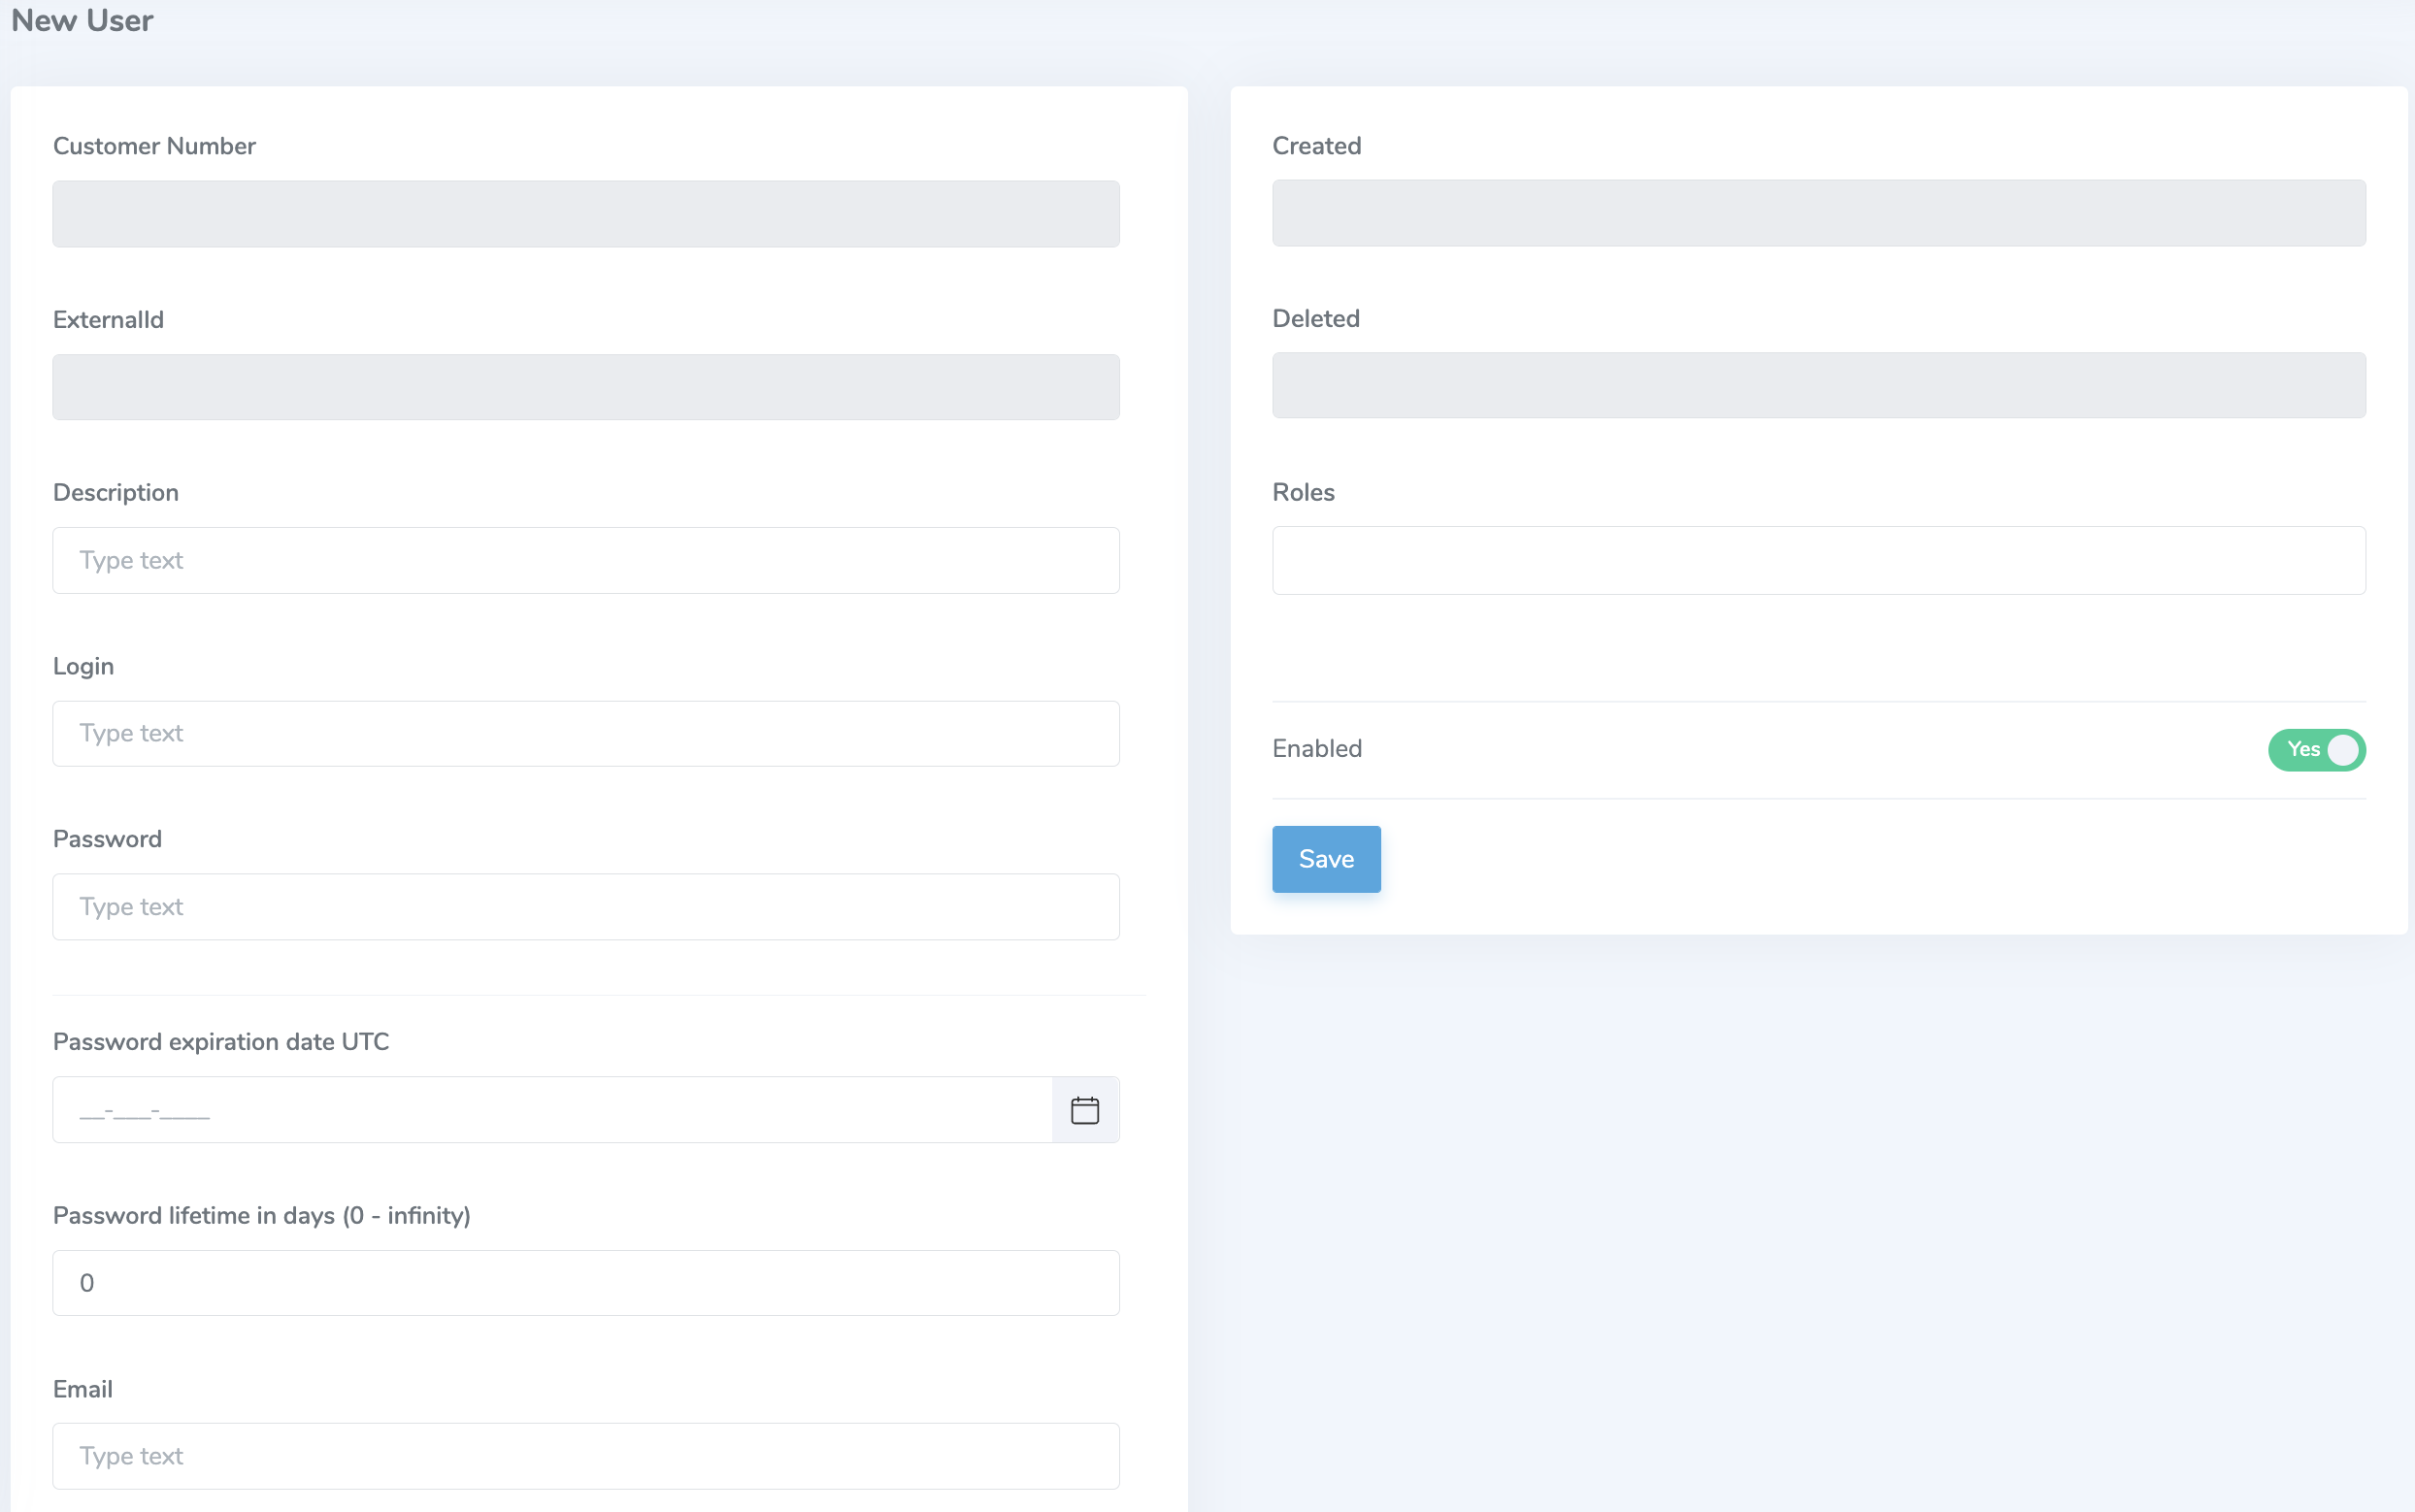
Adding user
At the minimum, the Login and Password fields must be filled out as this constitutes the credential used to access the portal. You can also fill out the following fields:
- Description: (optional) description for the user account
- Password expiration date UTC: date when the password for this user expires. User will be prompted to reset their password if the expiration date has passed.
- Password lifetime: length of days that the password is valid.
- Email: used for automated password delivery.
- Roles: list of role permissions for a user. Find out more about the roles on the role permissions page.
- Enabled: toggle for denying or allowing an account to perform its associated role functions.
Editing users is nearly identical to adding users and you have access to all the same fields as above. This can be done after the user is created initially.
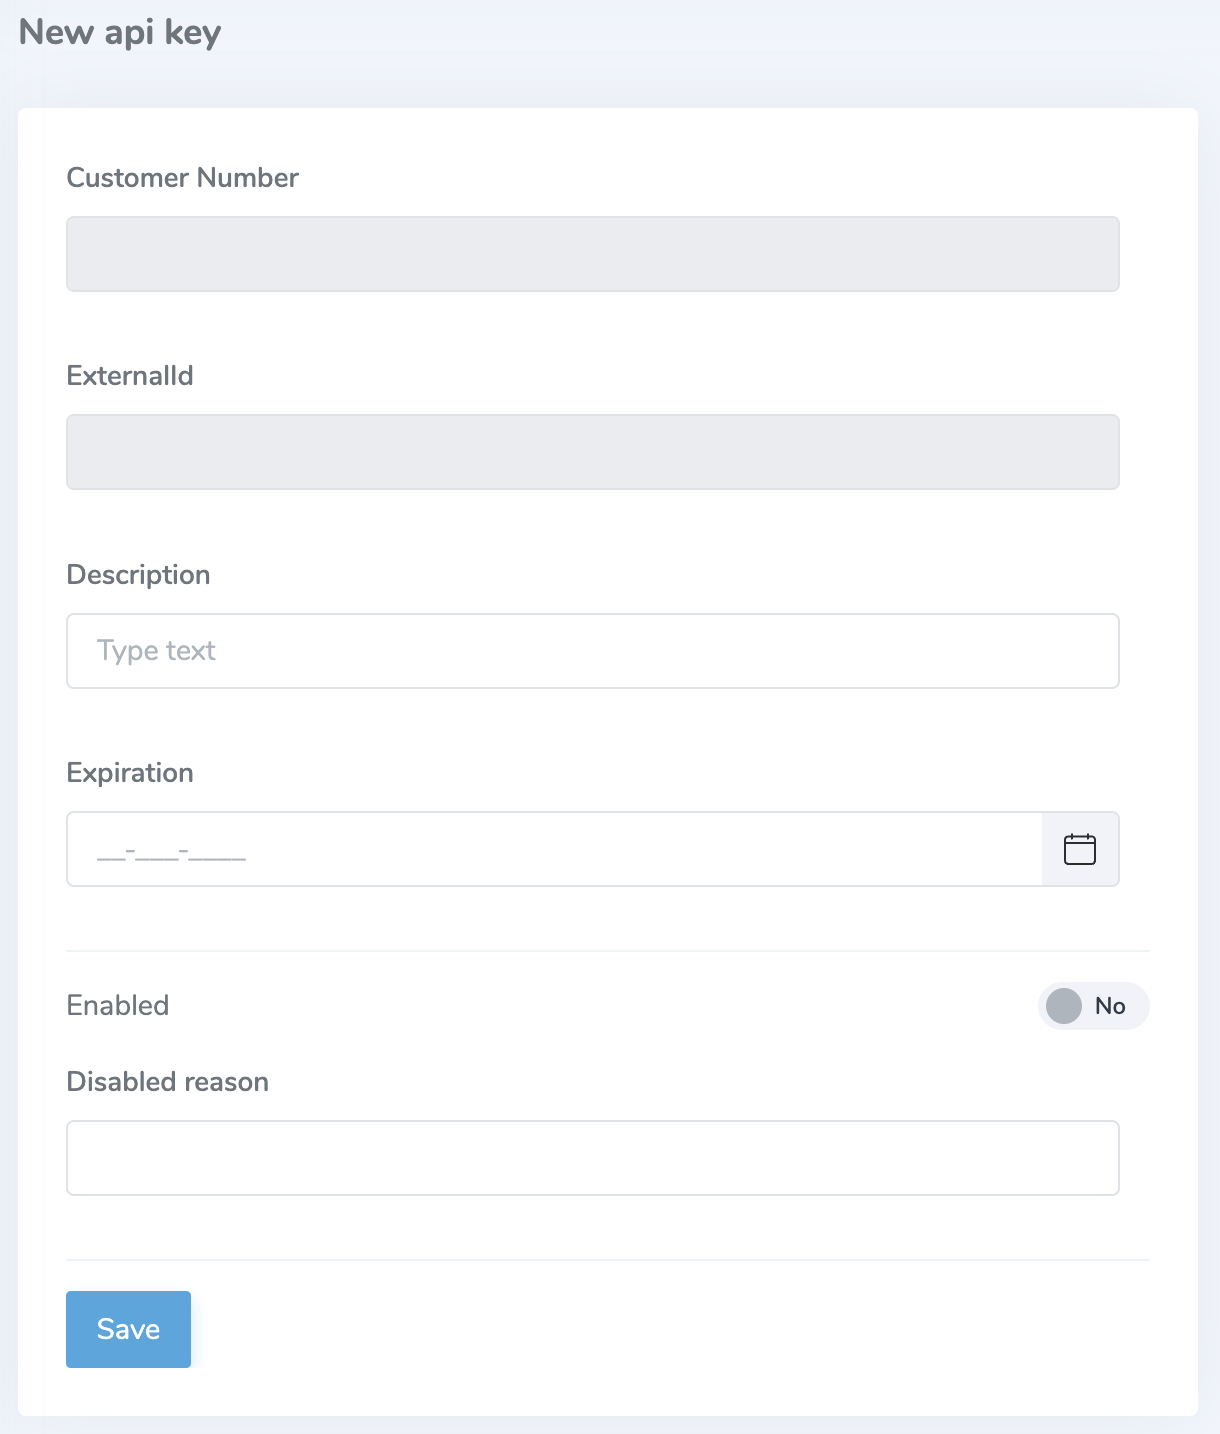
Creating API Keys
When editing a user, you can also create or manage API keys associated with the account. Create a new API key and fill out the Description and Expiration fields at a minimum. Be sure to capture the External ID and Value since the Identity Portal does not store these values.
Verified users
Managing end users of a tenant starts by navigating to the Verified enrolled users blade on the left-hand menu. This page provides a searchable list of users with a limited amount of information such as their username, the time of last modification, and a link to their reference biometric credential. When you click into an account you will be presented with the following screen:
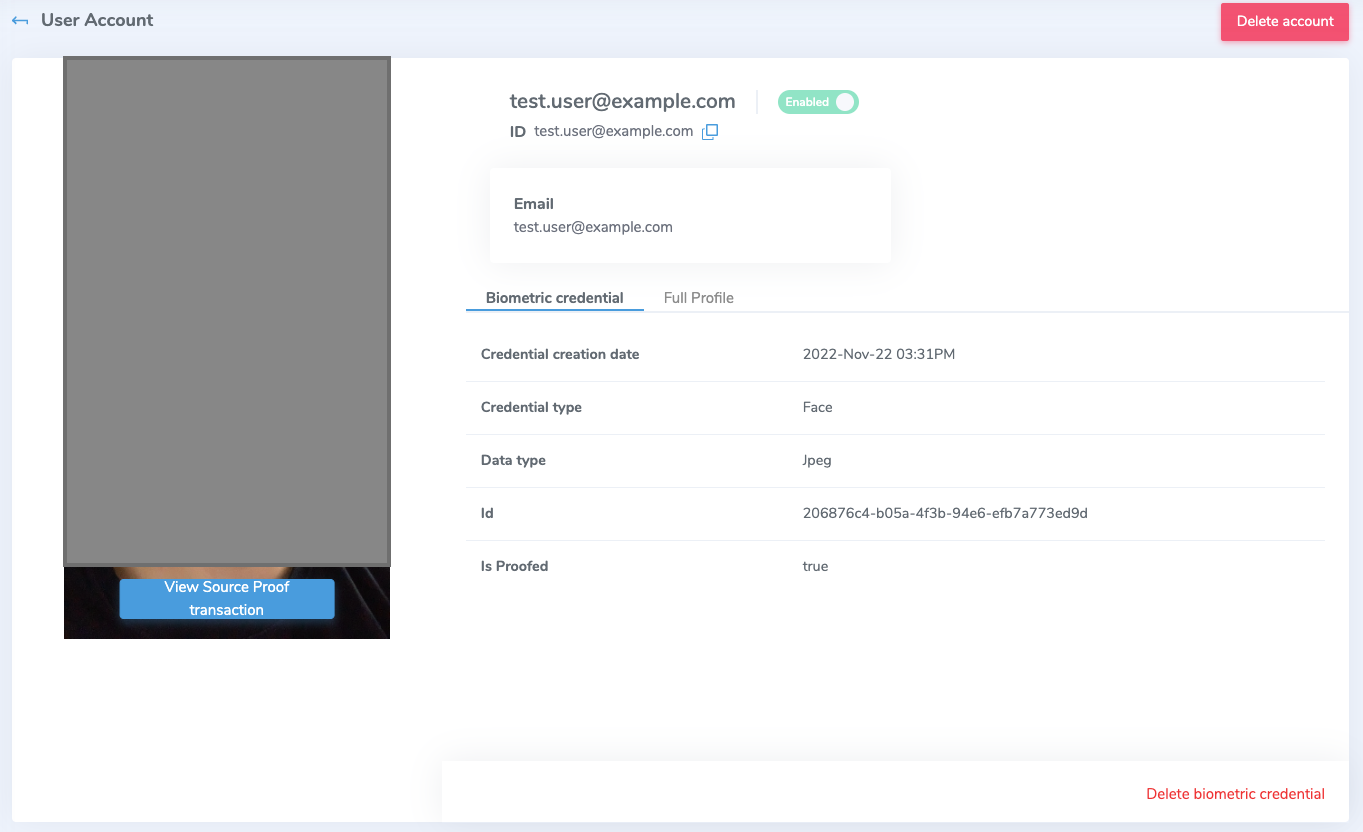
The link to a user's information will display some metadata about the account along with some important account features:
- Link to source proof transactions: this will display information about the transaction used to capture a user's documents and biometry.
- Delete: this button will invoke a delete action for a user's account. While it will not delete any linked external accounts, it will permanently remove them from the Verified platform.
- Enable/disable: locks or unlocks a user account. Useful for administrators to unlock accounts of users who have had their account locked by the system. This can also be accomplished using the
/enableendpoint. - Delete biometric credential: deletes the biometric information associated with the account.
If a user has any FIDO2 passkeys enrolled with the account, they will appear on the Passkeys tab where you can delete them individually or all at once.
Finally, some basic profile information will be displayed under the Full Profile tab.