Transaction Customization
Using the Administration API, you can customize a certain amount of the user experience to accommodate branding, messaging, or other appearance-related concerns.
For each transaction scenario, there is a corresponding template with a designated name. These templates contain resources with reserved names to customize the transaction depending on how it it presented to the user. For example, a verification transaction would have a template with a named resource that controls the title of an email sent to a user asking them to verify their identity. Additionally, when using the APIs to generate transactions, you can send variables to the resources to create custom experiences on a per-transaction basis.
In this way, you gain a great deal of control over the scenarios you present to your users, either by setting default behavior or by setting behavior for each transaction.
Accessing Template Details
There are two types of templates that are included with your tenant: predefined operations and custom operations.
Predefined operations include templates for the following scenarios by default:
- Proof transactions
- Selfie transactions
- FIDO2 passkey enrollment
- Biometric credential enrollment
Custom operations include templates for the following scenarios by default:
- Verification transactions
You can add as many custom operations as you like, which can be useful for creating a dedicated experience for different needs. For example, you can add a custom operation for North American users trying to login and another one for European users, each with its own unique messaging. More information on the transaction scenarios can be found below.
For a list of all the predefined operations for your tenant, call the GetPredefinedOperations API endpoint. The example response body below shows the template structure for document proofing transactions.
Example response body:
...,
{
  "CustomerName": "Test Customer",
  "CustomerNumber": "TestCustomer",
  "Description": "ForeignOperation/GetForeignIDDocument",
  "ExternalId": "51596c69-23bb-4e1a-9b72-6eae8c19c083",
  "Name": "ForeignOperation/GetForeignIDDocument",
  "Parameters": [],
  "Resources": [
    {
      "Content": "Verify Your Identity\n\nhttps://id.authid.ai/?i=%Operation.Id%&s=%ForeignUser.OneTimeSecret%&c=%ForeignUser.NeedCodeword%",
      "CreatedDate": "2022-07-22T18:26:51.34",
      "DeletedDate": null,
      "ExternalId": "56dbc30a-e4f6-436e-8df2-3994776ebfbf",
      "Locale": "default",
      "Name": "SmsTemplate",
      "Version": 2
    },
    {
      "Content": "<html>...truncated HTML content...</html>",
      "CreatedDate": "2022-07-22T18:26:51.34",
      "DeletedDate": null,
      "ExternalId": "509e888f-398e-4fa0-b681-0292bd091a25",
      "Locale": "default",
      "Name": "EmailTemplate",
      "Version": 1
    },
    {
      "Content": "Verify Your Identity",
      "CreatedDate": "2022-07-22T18:26:51.34",
      "DeletedDate": null,
      "ExternalId": "19eb679e-4909-44b6-bad0-d094eb6f080d",
      "Locale": "default",
      "Name": "EmailSubject",
      "Version": 1
    },
    {
      "Content": "{...truncated JSON content...}",
      "CreatedDate": "2022-07-22T18:29:13.9566667",
      "DeletedDate": null,
      "ExternalId": "247ed258-31ed-4c91-9336-64f143d93988",
      "Locale": "default",
      "Name": "ExecForm",
      "Version": 6
    }
  ]
},
...
For a list of all the custom operations for your tenant, call the GetCustomOperations API endpoint. The example response body below shows the template structure for biometric identity confirmation transactions.
Example response body:
...,
{
  "CreatedDate": "2022-07-22T18:26:53.027",
  "CustomerName": "Test Customer",
  "CustomerNumber": "TestCustomer",
  "DeletedDate": null,
  "Description": "",
  "Enabled": true,
  "ExternalId": "7b841eac-de10-4d0b-82eb-6e3474c0c8f8",
  "IsForeign": true,
  "IsNotification": false,
  "Name": "Verify_Identity",
  "Parameters": [],
  "Resources": [
    {
      "Content": "Authorize Transaction",
      "CreatedDate": "2022-07-22T18:26:53.0266667",
      "DeletedDate": null,
      "ExternalId": "fbcda537-fefe-47bd-ab25-16ae230ec029",
      "Locale": "default",
      "Name": "EmailSubject",
      "Version": 0
    },
    {
      "Content": "<html>...truncated HTML content...</html>",
      "CreatedDate": "2022-07-22T18:26:53.0266667",
      "DeletedDate": null,
      "ExternalId": "50cfad96-e8ac-4f56-b885-5fc654388303",
      "Locale": "default",
      "Name": "EmailTemplate",
      "Version": 0
    },
    {
      "Content": "{...truncated JSON content...}",
      "CreatedDate": "2022-09-13T18:19:32.09",
      "DeletedDate": null,
      "ExternalId": "875cb231-8128-47e1-a24b-a8f6cf0256e8",
      "Locale": "default",
      "Name": "ExecForm",
      "Version": 0
    },
    {
      "Content": "Please confirm Transaction\r\n\r\nhttps://id.authid.ai/?t=%Transaction.Id%&s=%ForeignUser.OneTimeSecret%&c=%ForeignUser.NeedCodeword%&b=%ForeignUser.NeedBiometry%",
      "CreatedDate": "2022-07-22T18:26:53.0266667",
      "DeletedDate": null,
      "ExternalId": "6bf224f5-91c3-41d6-8b6f-4a5424d0259b",
      "Locale": "default",
      "Name": "SmsTemplate",
      "Version": 0
    }
  ]
},
...
You can access a specific template's details by using the ExternalId in conjunction with either the GetCustomOperation or the GetPredefinedOperationByExternalId API endpoint.
Standard Resources for Templates
All transaction templates have associated child resources to help control behavior for different UX scenarios. Using the template's ExternalId and the resource's ExternalId from the response body above, you can view the resources associated with a template by calling either the GetCustomOperationResource or the GetPredefinedOperationResource API endpoint.
Below is a description of the default resources. Note that the names are reserved and are case-sensitive:
ExecForm
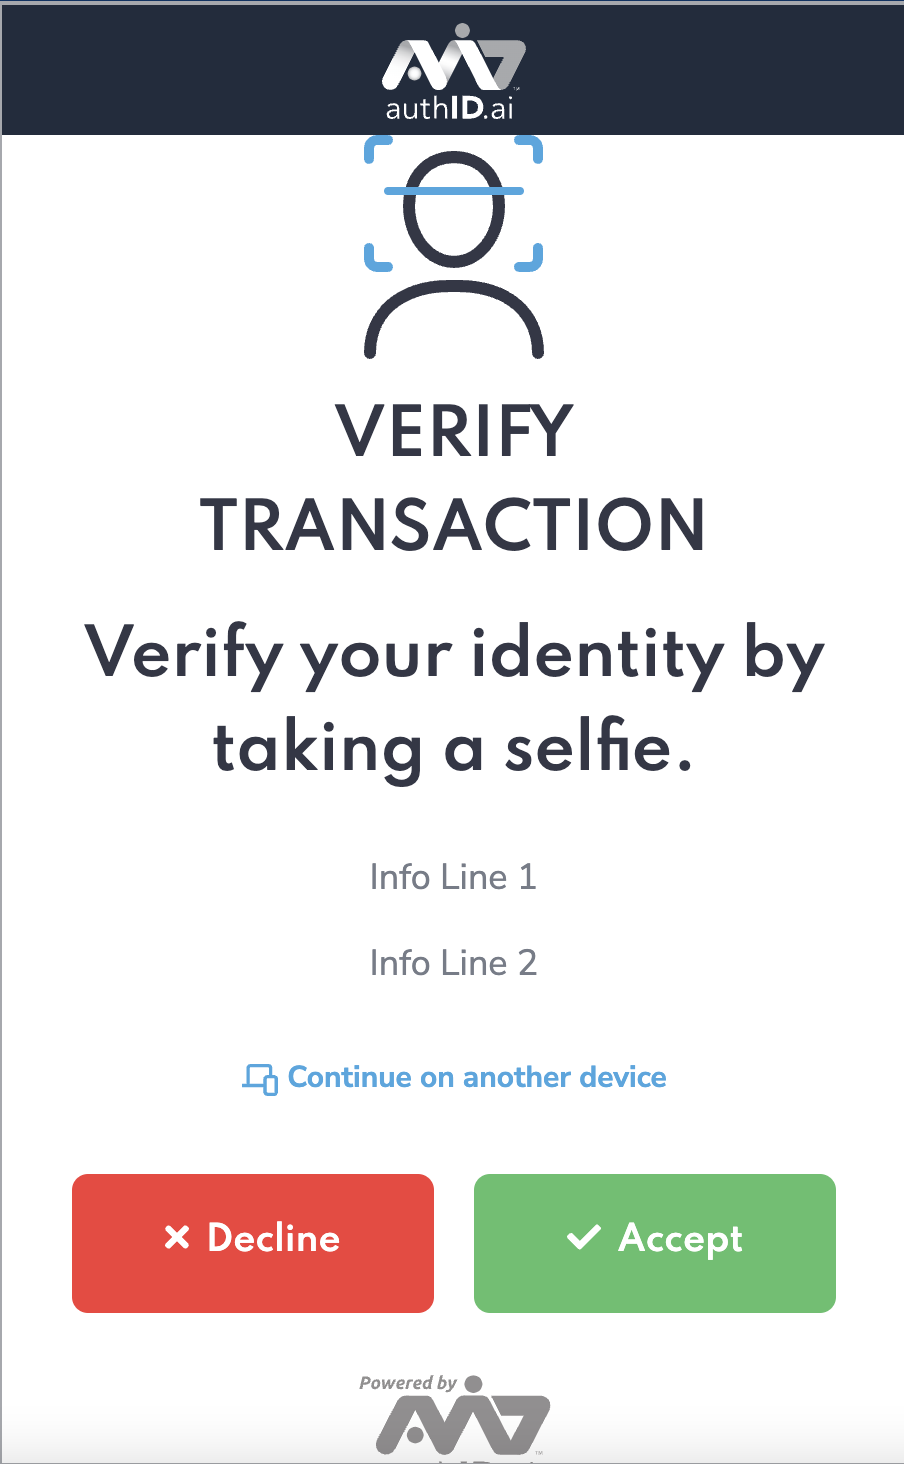
The ExecForm resource is used to control the appearance and behavior of the user experience within the browser. Below is an example of the JSON you can use and customize:
Example response body:
{
  "Content": "{\n\t\"main\": {\n\t\t\"titlecolor\": \"\",\n\t\t\"titlebgcolor\": \"\",\n\t\t\"bordercolor\" : \"\",\n\t\t\"title\": \"VERIFY TRANSACTION\",\n\t\t\"approve\": 0,\n\t\t\"message\": \"Verify your identity by taking a selfie.\",\n\t\t\"info1\": \"Info Line 1\",\n\t\t\"info2\": \"Info Line 2\"\n\t},\n\t\n\t\"FaceLok\": {\n\t\t\"Passive\": {\n\t\t\t\"Enabled\": true,\n\t\t\t\"MaxDelay\": 6\n\t\t}\n\t},\n\t\n\t\"header\": {\n\t\t\"hide\": false,\n\t\t\"logo\": \"\"\n\t},\n\t\n\t\"footer\": {\n\t\t\"hide\": false\n\t},\n\n\t\"accept\": {\n\t\t\"title\": \"Transaction approved.\",\n\t\t\"custom_html\": \"\",\n\t\t\"target_url\": {\n\t\t\t\"web\": \"\",\n\t\t\t\"ios\": \"\",\n\t\t\t\"android\": \"\"\n\t\t}\n\t},\n\n\t\"reject\": {\n\t\t\"title\": \"Transaction declined.\",\n\t\t\"custom_html\": \"\",\n\t\t\"target_url\": {\n\t\t\t\"web\": \"\",\n\t\t\t\"ios\": \"\",\n\t\t\t\"android\": \"\"\n\t\t}\n\t}\n}",
  "CreatedDate": "2022-09-13T18:19:32.09",
  "DeletedDate": null,
  "ExternalId": "875cb231-8128-47e1-a24b-a8f6cf0256e8",
  "Locale": "default",
  "Name": "ExecForm",
  "Version": 0
}
Output:
You can update this content by calling either the UpdateCustomOperationResource or the UpdatePredefinedOperationResource API endpoint.
Note that to update the template resource correctly, the "Content" JSON value must have line breaks and tabs/spaces escaped as seen above. However, converting the content to a single line will also satisfy this requirement.
SmsTemplate
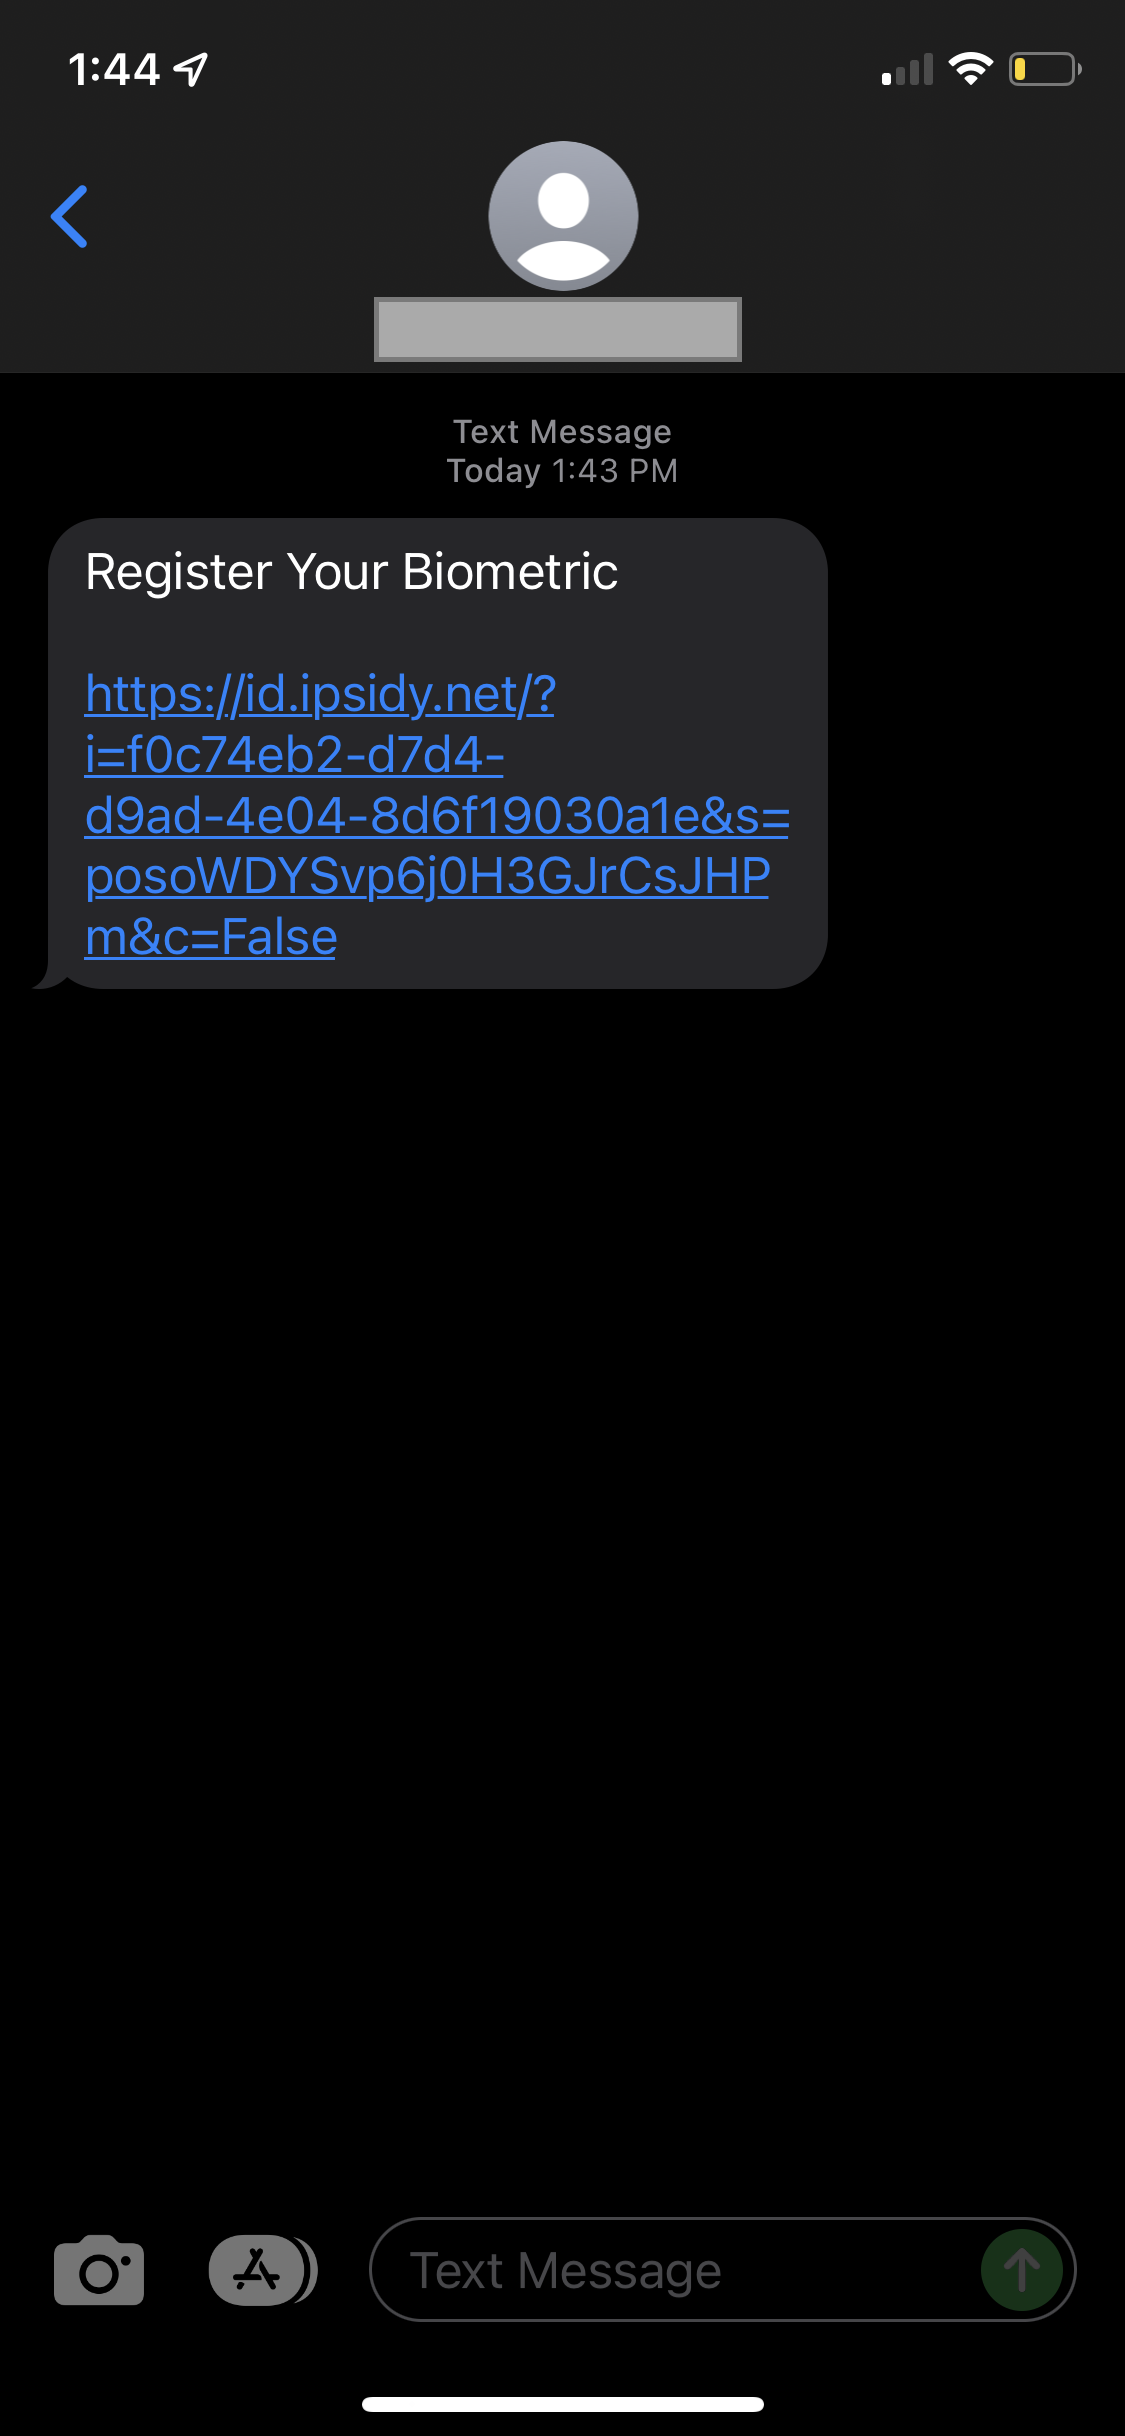
The SmsTemplate resource is used to customize the message and magic link that is sent to a user. Below is an example of the content you can use and customize:
Register Your Biometric

https://id.authid.ai/?i=%Operation.Id%&s=%ForeignUser.OneTimeSecret%&c=%ForeignUser.NeedCodeword%
Output: This example shows how to use the built-in transaction variables.
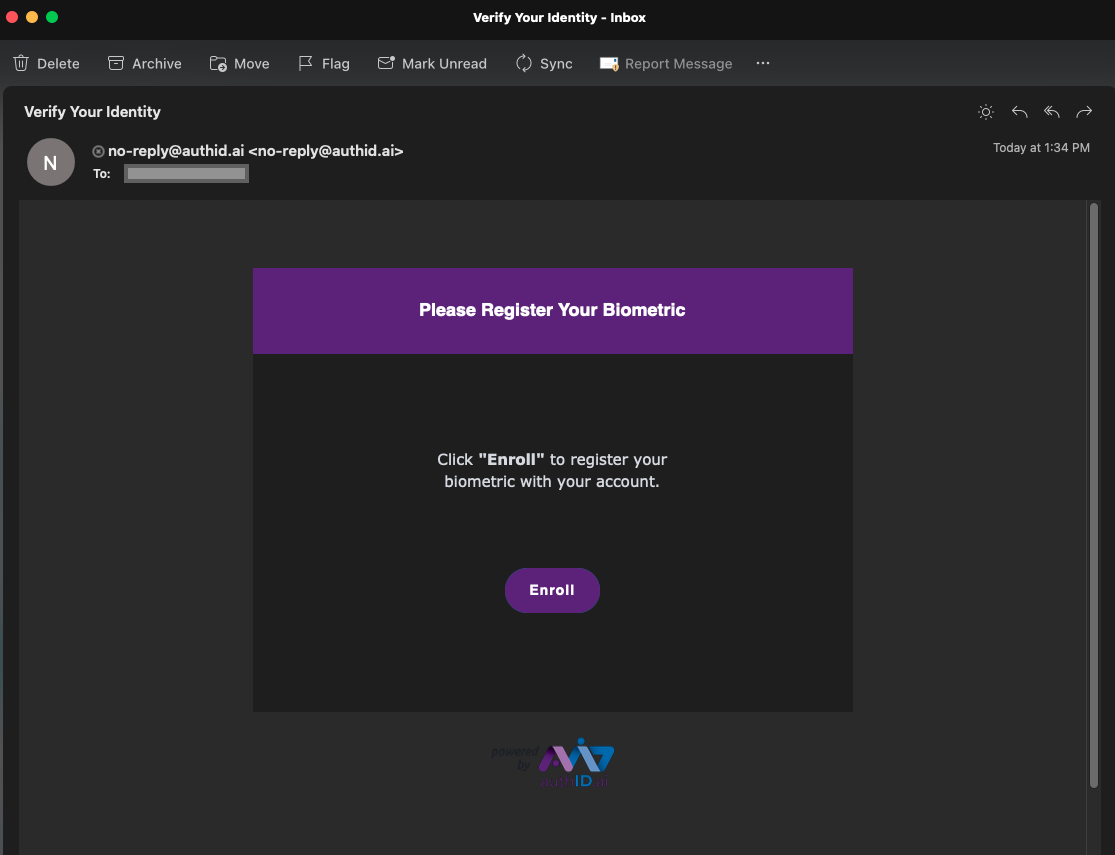
EmailTemplate
The EmailTemplate resource is used to customize the content of an email sent to a user to perform a transaction. Below is an example of the default HTML you can use and customize:
<!doctype html>
<html>
<head>
<meta charset="UTF-8">
<!-- utf-8 works for most cases -->
<meta name="viewport" content="width=device-width, initial-scale=1.0">
<!-- Forcing initial-scale shouldn't be necessary -->
<meta http-equiv="X-UA-Compatible" content="IE=edge">
<!-- Use the latest (edge) version of IE rendering engine -->
<title>Biometric Enrollment</title>
<!-- The title tag shows in email notifications, like Android 4.4. -->
<!-- Please use an inliner tool to convert all CSS to inline as inpage or external CSS is removed by email clients -->
<!-- important in CSS is used to prevent the styles of currently inline CSS from overriding the ones mentioned in media queries when corresponding screen sizes are encountered -->
<!-- CSS Reset -->
<style type="text/css">
/* What it does: Remove spaces around the email design added by some email clients. */
/* Beware: It can remove the padding / margin and add a background color to the compose a reply window. */
html, body {
font-family: "Lucida Sans", "DejaVu Sans", Verdana, "sans-serif" !important;
margin: 0 !important;
padding: 0 !important;
height: 100% !important;
width: 100% !important;
}
/* What it does: Stops email clients resizing small text. */
* {
-ms-text-size-adjust: 100%;
-webkit-text-size-adjust: 100%;
}
/* What it does: Forces Outlook.com to display emails full width. */
.ExternalClass {
width: 100%;
}
/* What is does: Centers email on Android 4.4 */
div[style*="margin: 16px 0"] {
margin: 0 !important;
}
/* What it does: Stops Outlook from adding extra spacing to tables. */
table, td {
mso-table-lspace: 0pt !important;
mso-table-rspace: 0pt !important;
}
/* What it does: Fixes webkit padding issue. Fix for Yahoo mail table alignment bug. Applies table-layout to the first 2 tables then removes for anything nested deeper. */
table {
border-spacing: 0 !important;
border-collapse: collapse !important;
table-layout: fixed !important;
margin: 0 auto !important;
}
table table table {
table-layout: auto;
}
/* What it does: Uses a better rendering method when resizing images in IE. */
img {
-ms-interpolation-mode: bicubic;
}
/* What it does: Overrides styles added when Yahoo's auto-senses a link. */
.yshortcuts a {
border-bottom: none !important;
}
/* What it does: Another work-around for iOS meddling in triggered links. */
a[x-apple-data-detectors] {
color: inherit !important;
}
</style>
<!-- Progressive Enhancements -->
<style type="text/css">
/* What it does: Hover styles for buttons */
.button-td,
.button-a {
transition: all 100ms ease-in;
}
.button-td:hover,
.button-a:hover {
background: #9238c7!important;
border-color: #9238c7!important;
}
/* Media Queries */
@media screen and (max-width: 600px) {
.email-container {
width: 100% !important;
}
/* What it does: Forces elements to resize to the full width of their container. Useful for resizing images beyond their max-width. */
.fluid,
.fluid-centered {
max-width: 100% !important;
height: auto !important;
margin-left: auto !important;
margin-right: auto !important;
}
/* And center justify these ones. */
.fluid-centered {
margin-left: auto !important;
margin-right: auto !important;
}
/* What it does: Forces table cells into full-width rows. */
.stack-column,
.stack-column-center {
display: block !important;
width: 100% !important;
max-width: 100% !important;
direction: ltr !important;
}
/* And center justify these ones. */
.stack-column-center {
text-align: center !important;
}
/* What it does: Generic utility class for centering. Useful for images, buttons, and nested tables. */
.center-on-narrow {
text-align: center !important;
display: block !important;
margin-left: auto !important;
margin-right: auto !important;
float: none !important;
}
table.center-on-narrow {
display: inline-block !important;
}
}
</style>
</head>
<body bgcolor="#e0e0e0" width="100%" style="margin: 0;" yahoo="yahoo">
<table bgcolor="#e0e0e0" cellpadding="0" cellspacing="0" border="0" height="100%" width="100%" style="border-collapse:collapse;">
<tr>
<td><center style="width: 100%;">
<!-- Visually Hidden Preheader Text : BEGIN -->
<div style="display:none;font-size:1px;line-height:1px;max-height:0px;max-width:0px;opacity:0;overflow:hidden;mso-hide:all;font-family: sans-serif;">Important: </div>
<!-- Visually Hidden Preheader Text : END -->
<!-- Email Body : BEGIN -->
<table cellspacing="0" cellpadding="0" border="0" align="center" bgcolor="#ffffff" width="600" class="email-container">
<!-- Hero Image, Flush : BEGIN -->
<!-- Hero Image, Flush : END -->
<!-- 1 Column Text : BEGIN -->
<tr>
<td style="padding: 10px 40px 10px 40px; text-align: center; font-family: 'Lucida Sans', sans-serif !important; mso-height-rule: exactly; background-color: #5B217D;"><p style="color:#fff; font-size: 18px; font-weight:bold; margin-bottom:20px; line-height: 1.6;">Please Register Your Biometric
</tr>
<!-- 1 Column Text : BEGIN -->
<!-- Background Image with Text : BEGIN -->
<!-- Background Image with Text : END -->
<!-- Two Even Columns : BEGIN -->
<tr>
<td align="center" valign="top" style="padding: 10px; background-color: #fff;">
<table cellspacing="0" cellpadding="0" border="0" width="80%">
</table>
<br>
<br>
<tr style="background-color: #fff; ">
<td style="padding: 10px; text-align: center; padding:0px 30px 80px;"><span style="color:#5B217D; font-size: 18px; font-weight:bold; margin-bottom:20px; line-height: 2;"></span><br>
<span style="color:#272A37; font-size: 15px; font-weight:normal; line-height: 1.5; margin-bottom:60px;">Click <strong>"Enroll"</strong> to register your<br>biometric with your account.<br>
</span><br>
<br>
<br>
<br>
<!-- Button 2 : Begin -->
<table cellspacing="0" cellpadding="0" border="0" align="center" style="margin: auto">
<tr>
<td style="border-radius: 50px; background: #44a3d8 !important; text-align: center;" class="button-td"><a href="https://id.authid.ai/?i=%Operation.Id%&s=%ForeignUser.OneTimeSecret%&c=%ForeignUser.NeedCodeword%" style="background: #5B217D; border: 15px solid #5B217D; padding: 0 10px;color: #ffffff; font-family: sans-serif; font-size: 14px; line-height: 1.1; text-align: center; text-decoration: none; display: block; border-radius: 50px; font-weight: bold; letter-spacing:1px;" class="button-a">
<!--[if mso]> <![endif]-->Enroll<!--[if mso]> <![endif]-->
</a></td>
</tr>
</table>
<!-- Button 2 : END -->
<br>
</td>
</tr>
</table>
<a href="https://authid.ai/"><img src="https://authid.ai/wp-content/uploads/2021/authid-graphics/AuthID-poweredby-logo_dark_small.png" width="130 "height="60" alt="authID" title="authID" style="margin-top:20px"/></a>
</td>
</tr>
<!-- Two Even Columns : END -->
</table>
<!-- Email Body : END -->
<!-- Email Footer : BEGIN -->
<table align="center" width="600" class="email-container">
<tr>
<td style="padding: 40px 10px;width: 100%;font-size: 12px; font-family: sans-serif; mso-height-rule: exactly; line-height:18px; text-align: center; color: #888888;"><!--<webversion style="color:#cccccc; text-decoration:underline; font-weight: bold;">View as a Web Page</webversion>
<br>
<unsubscribe style="color:#888888; text-decoration:underline;">unsubscribe</unsubscribe>--></td>
</tr>
</table>
<!-- Email Footer : END -->
</center></td>
</tr>
</table>
</body>
</html>
Output:
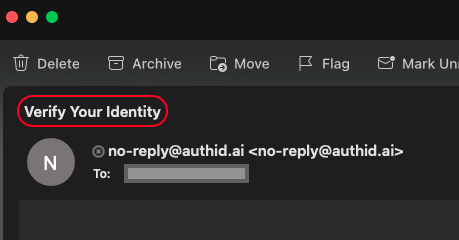
EmailSubject
The EmailSubject resource is used to customize the subject of an email sent to a user to perform a transaction. Below is an example of the content you can use and customize:
Verify Your Identity
Output:
Transaction Variables
Custom operations support the ability to send variables within API requests to appear as part of the user experience. This feature is helpful when customizing the user experience on a per-transaction basis. For example, if you are protecting a banking wire transfer with biometrics, you would ideally show the user how much is being transferred. Since this amount can change each time, you can use variables to display the amount within the capture UI.
Using the Verify_Identity resource above, the existing template contains a key called Parameters:
...,
  "ExternalId": "7b841eac-de10-4d0b-82eb-6e3474c0c8f8",
  "IsForeign": true,
  "IsNotification": false,
  "Name": "Verify_Identity",
  "Parameters": [],
...
Using the UpdateCustomOperation API endpoint, you can add objects to this array that can then be used by template resources.
Object definition
- Name: the name of the variable that will be passed into the resource(s)
- Description: a description for the variable's purpose
Example parameter array:
...,
  "ExternalId": "7b841eac-de10-4d0b-82eb-6e3474c0c8f8",
  "IsForeign": true,
  "IsNotification": false,
  "Name": "Verify_Identity",
  "Parameters": [
    {
      "Name": "TransferAmount",
      "Description": "Dollar amount to show to user"
    }
  ],
...
To use this parameter, update your desired resource with the variable name wrapped in the percent % symbol. Below is an example for the SmsTemplate used on the Verify_Identity template:
{
  "Content": "Please confirm transfer of %TransferAmount%:\r\n\r\nhttps://id.authid.ai/?t=%Transaction.Id%&s=%ForeignUser.OneTimeSecret%&c=%ForeignUser.NeedCodeword%&b=%ForeignUser.NeedBiometry%",
  "CreatedDate": "2022-07-22T18:26:53.0266667",
  "DeletedDate": null,
  "ExternalId": "6bf224f5-91c3-41d6-8b6f-4a5424d0259b",
  "Locale": "default",
  "Name": "SmsTemplate",
  "Version": 0
}
Now that your templates and resources have been updated, they can be used via the API. For example, when asking a user to verify a transaction with their biometrics, you can pass a value to the resource using the CustomData property as seen below:
{
  "AccountNumber": "AccountV2",
  "Timeout": 3600,
  "ConfirmationPolicy": {
    "TransportType": 0,
    "CredentialType": 1
  },
  "Name": "Verify_Identity",
  "CustomData": [
    {
      "Key": "TransferAmount",
      "Value": "$50,000"
    }
  ]
}
The value will be interpolated into the template, resulting in the following SMS message to a user:
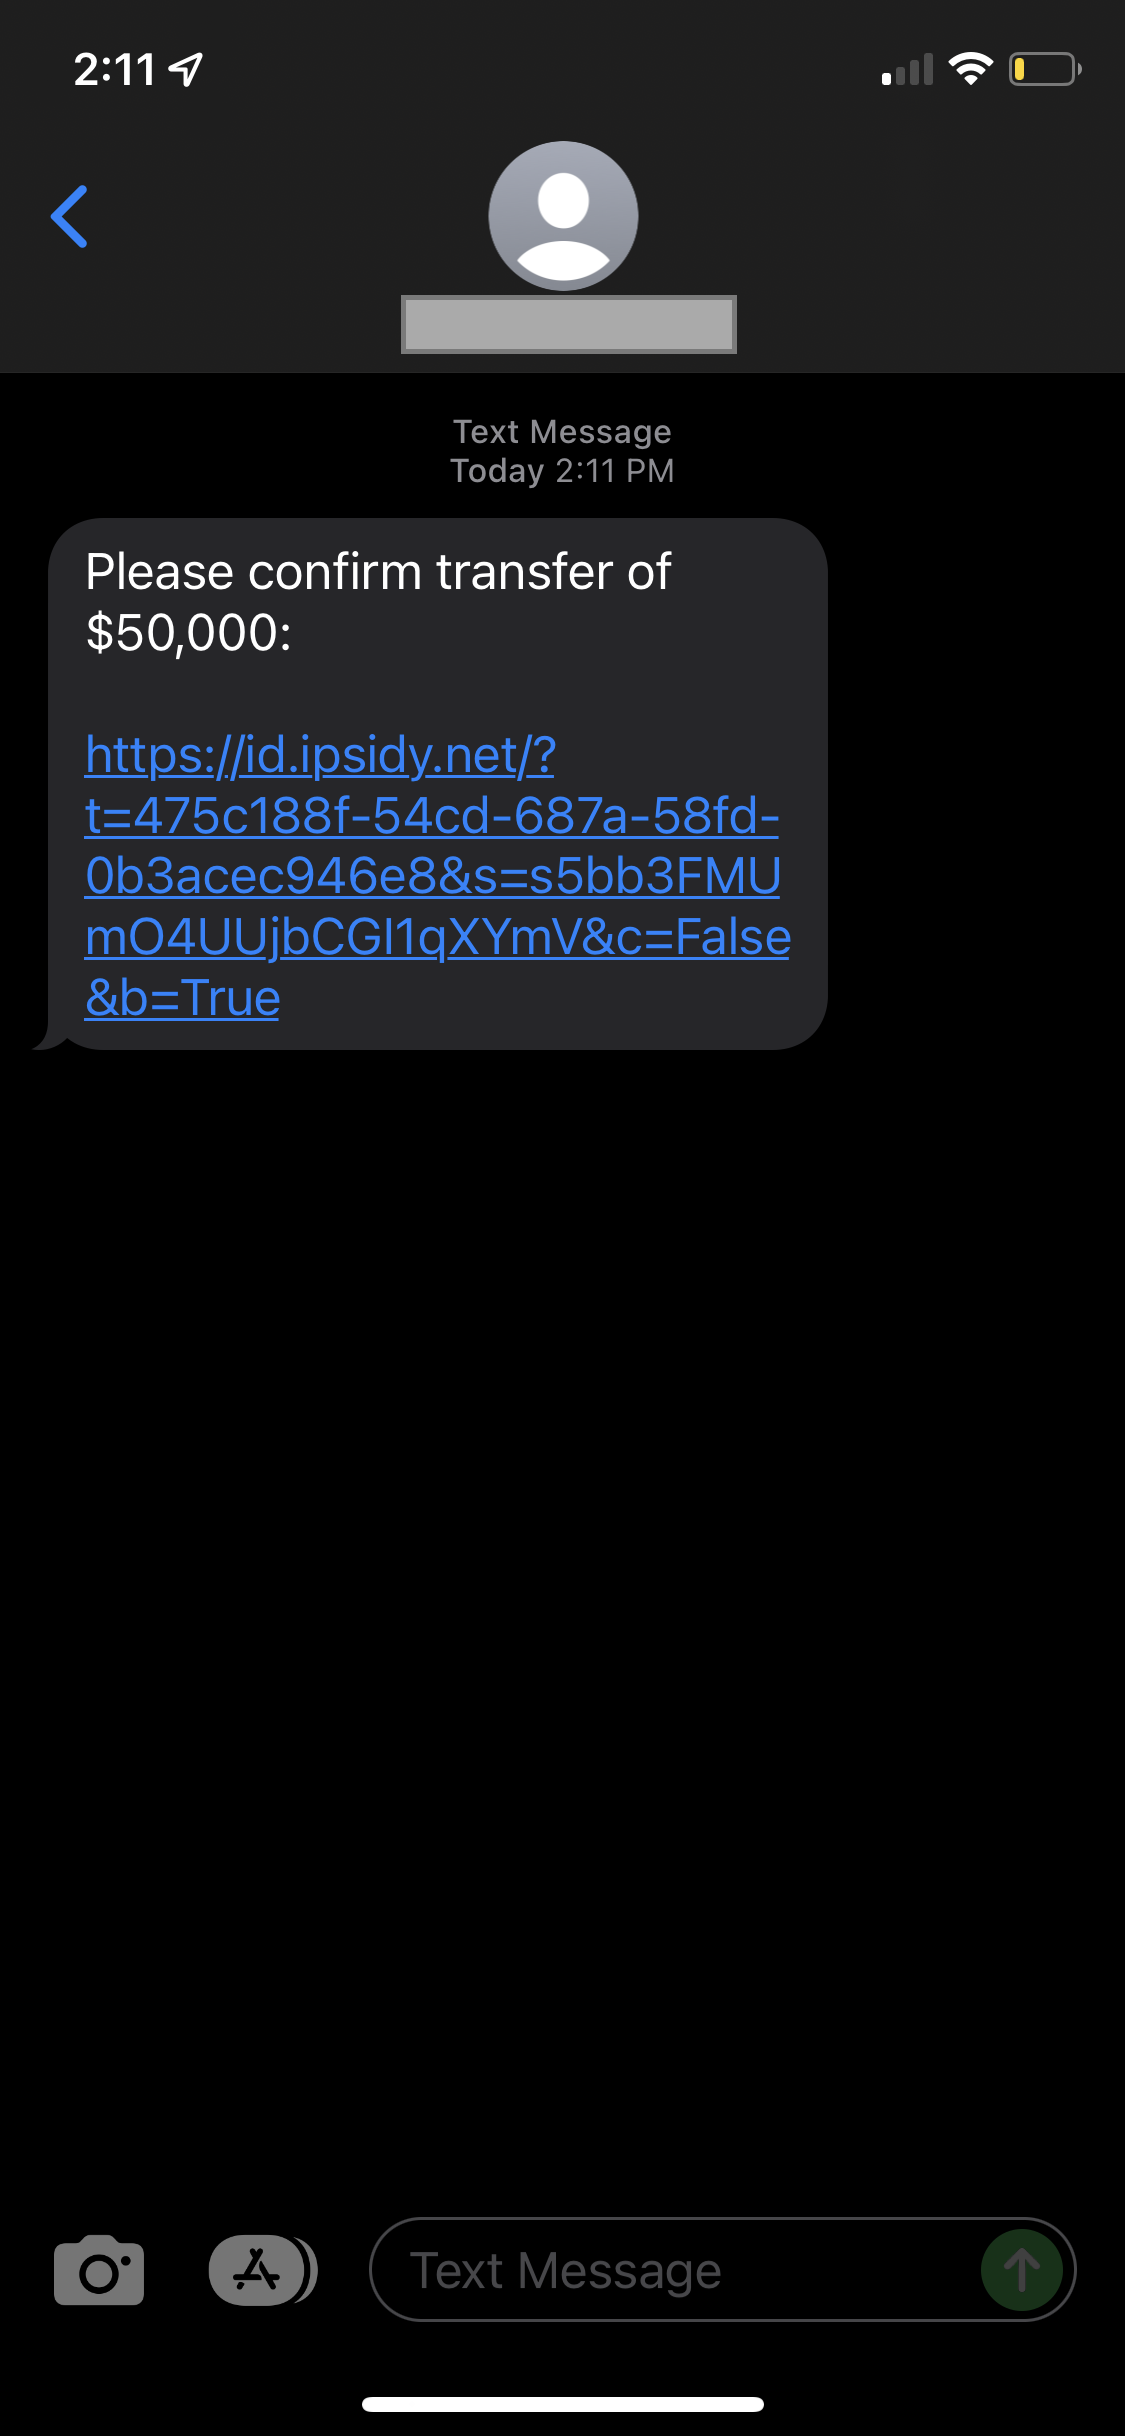
Predefined operations do not support custom variables.
Finally, there are some variables reserved by the system. They will be automatically interpolated into transactions as needed, but remember to wrap them using the percent % symbol:
| Variable Name | Description |
|---|---|
| Operation.Id | Internal identifier for an operation. Use with &i= querystring |
| Transaction.Id | Internal identifier for a transaction. Use with &i= querystring |
| ForeignUser.OneTimeSecret | System-generated key used to sign transaction. Use with &s= querystring |
ExecForm Details
Since ExecForm contains the largest amount of potential customization, this section is dedicated to explaining the various parameters and the effects that they have on the user experience. Although this is mainly designed to customize custom operations, there are certain sections which can be used to control predefined operations as well.
Formatted JSON object:
{
  "main": {
    "titlecolor": "",
    "titlebgcolor": "",
    "bordercolor": "",
    "title": "VERIFY TRANSACTION",
    "approve": 0,
    "message": "Verify your identity by taking a selfie.",
    "info1": "Info Line 1",
    "info2": "Info Line 2"
  },
  "FaceLok": {
    "Passive": {
      "Enabled": true,
      "MaxDelay": 6
    }
  },
  "header": {
    "hide": false,
    "logo": ""
  },
  "footer": {
    "hide": false
  },
  "accept": {
    "title": "Transaction approved.",
    "custom_html": "",
    "target_url": {
      "web": "",
      "ios": "",
      "android": ""
    }
  },
  "reject": {
    "title": "Transaction declined.",
    "custom_html": "",
    "target_url": {
      "web": "",
      "ios": "",
      "android": ""
    }
  }
}
main
This section is only affects custom operations, not predefined operations.
The main section is used to control appearance of the screen that a user sees before their device camera is activated.
- titlecolor: Hex color for the
titleelement - titlebgcolor: Hex color to display behind the header logo
- bordercolor: Hex color for the application border
- title: Main title to display to a user
- approve: For use with mobile app integrations. Skips the need to press 'Accept'
- message: Subtitle to display to a user
- info1: First line of optional information
- info2: Second line of optional information
FaceLok
The FaceLok section is used to control the user experience when capturing their selfie. It can be used to enable passive consent so that a user doesn't need to smile for their facial biometrics to be captured.
- Enabled: turns the passive consent feature on or off
- MaxDelay: the maximum time in seconds that the system will scan for a face before capturing a frame
header
The header section controls the presence of the header area along with the logo that appears within it.
- hide: hides or shows the entire header section, including the logo
- logo: HTTPS link to your static logo. Note that the UI does not constrain the dimensions of the logo. We generally recommend an image size of roughly 400 x 60.
footer
The footer section controls whether or not the authID versioning and branding appears at the bottom of the UI.
- hide: hides or shows the entire footer section. This will hide the language selection feature.
accept
The accept section controls application behavior after a user successfully completes a transaction. This could involve capturing a selfie, confirming with biometrics, adding a FIDO2 passkey, or other such scenarios.
- title: Text to display after a transaction succeeds
- custom_html: For use with mobile app integrations. Loads custom page design after transaction succeeds.
- target_url: This object defines the destination to redirect to once the transaction has successfully completed
- web: Post-success redirect location for users accessing via web browser
- ios: iOS-specific destination for post-success redirect
- android: Android-specific destination for post-success redirect
reject
The reject section controls application behavior after a transaction fails. This could be from a user declining a transaction, a selfie not matching the biometric credential, or some other failure.
- title: Text to display after a transaction fails
- custom_html: For use with mobile app integrations. Loads custom page design after transaction fails.
- target_url: This object defines the destination to redirect to after the transaction has failed
- web: Post-failure redirect location for users accessing via web browser
- ios: iOS-specific destination for post-failure redirect
- android: Android-specific destination for post-failure redirect
Predefined Operations
This section details exactly what parts of the predefined operations can be controlled with the ExecForm options.
Document Proofing
Template name: ForeignOperation/GetForeignIDDocument
Used for: document proofing with a comparison of the user selfie to the document facial image to determine match probability.
Sections that can be customized:
- main
- titlecolor
- titlebgcolor
- bordercolor
- FaceLok
- header
- footer
- accept
- reject
Biometric Capture
Template name: ForeignOperation/GetForeignBiometry
Used for: capturing user biometrics for various use cases.
Sections that can be customized:
- main
- titlecolor
- titlebgcolor
- bordercolor
- FaceLok
- header
- footer
- accept
- reject
FIDO2 Passkey Enrollment
Template name: ForeignOperation/EnrollFido2Credential
Used for: adding FIDO2 passkey to an account.
Sections that can be customized:
- main
- titlecolor
- titlebgcolor
- bordercolor
- header
- footer
- accept
- reject
Biometric Credential Creation
Template name: ForeignOperation/EnrollBioCredential
Used for: capturing user biometrics to associate with an account. Can only be called once per account.
Sections that can be customized:
- main
- titlecolor
- titlebgcolor
- bordercolor
- FaceLok
- header
- footer
- accept
- reject
Custom Operations
This section details exactly what parts of the custom operations can be controlled with the ExecForm options.
Identity verification
Template name: Verify_Identity
Used for: document proofing with a comparison of the user selfie to the document facial image to determine match probability.
All sections of the ExecForm can be customized for custom operations.