Dynamic Enrollment
Not only does the Verified platform provide an unmatched level of identity assurance and help to solve ongoing verification needs, it can also serve as a drop-in replacement to your existing OTP provider.
Organizations can then leverage Verified's ability to dynamically offer users the chance to enroll their biometrics for use in future authentication challenges. Depending on an organization's needs, a configurable percentage of their users can be offered the benefits gained by securing transactions with their own biometrics, while others can seamlessly continue to receive one-time passcodes. The following page details the technical specifications and requirements you need to implement this functionality.
Postman Sample
For your convenience we have provided sample Postman collections demonstrating the API sequence. Within the collection, the numbered requests correspond directly to the numbered sections below. Download the collection here.
API Sequence
OpenAPI specs can be downloaded here: MFA Service
| Sequence Diagram |
|---|
 |
1 - Authenticate
In your backend, authenticate your access and store the AccessToken and RefreshToken from the response. Before every subsequent API call, implement logic to check if the token is expired and renew it if needed.
2 - Create Integration
If you do not have an integration associated to your tenant, any offer workflows will not function. You must complete this step at least once per tenant. Otherwise, this step is optional.
In your backend, call the POST endpoint to create an integration with the appropriate values set in the request body.
Example request body:
{
  "Name": "Integration Display Name",
  "Enabled": true,
  "BioTransactionMode": "Inline",
  "BioForce": false,
  "BioOfferingProbability": 0.50
}
3 - Initiate Workflow
In your backend, call the POST endpoint to initiate a flow with the appropriate values set in the request body.
Example request body:
{
  "AccountNumber": "MyAccount",
  "PhoneNumber": "11234567890",
  "Timeout": 3600,
  "Email": "test.user@example.com"
}
The response body will contain basic information about the workflow, including the ID of the workflow. This will be used to generate the UI that a user sees in the next step, as well as being used to check details during or after a workflow is completed.
Example response body:
{
  "FlowId": "da0fc6ac-9cb0-492a-92ed-37dd66a543da",
  "StartDate": "2022-06-07T14:40:39.383Z",
  "State": "Created"
}
4 - Display UI for User
Using the FlowId from the previous step, build a URL to use for either a redirect or one of our convenient, prebuilt UI options. The URL should conform to the following pattern (replacing the GUID with the correct value from the previous step):
https://id.authid.ai/mfa/dynamic/mfa/flow?flowId=da0fc6ac-9cb0-492a-92ed-37dd66a543da
From here, a user will either receive their one-time passcode as expected, or be offered a chance to enroll their biometrics for use in future authentication events.
5 - (Optional) Check Flow Result
If you need to check the results of a workflow, you can use ID from the response in step 3 and pass it to one of two endpoints:
- Flow result: gives basic information about the state of a worklow
- Audit flow result: gives step-by-step information about how a user interacted with a workflow
Identity Portal Usage
If you have the MFA Integrator role assigned to your user account, you will see an additional blade on the left-hand navigation of the Identity Portal labeled Dynamic Enrollment.
Configuration
In order to begin creating dynamic enrollment workflows, you must first create an integration for your user account. Clicking on the Configuration link reveals the following options panel:
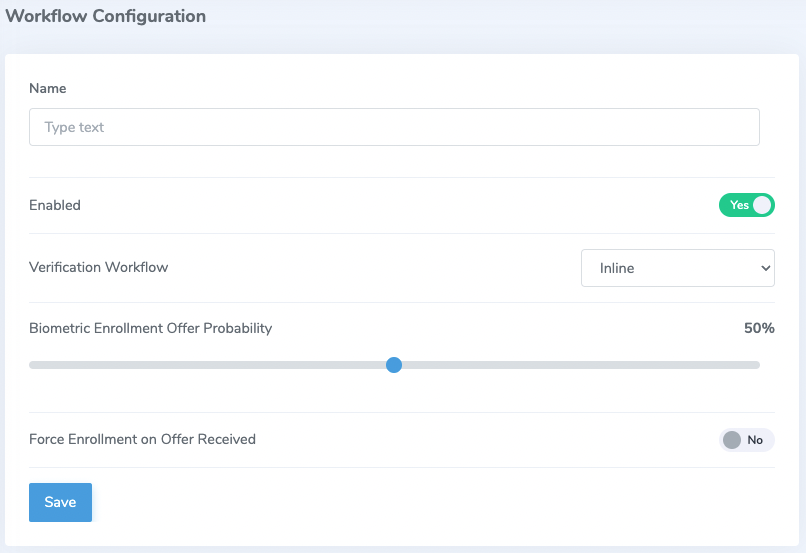
Parameter Descriptions
- Name: display name for the integration
- Enabled: enables or disables workflows from being initiated
- Verification Workflow: determines how a user can access the offer flow. Inline will allow them to complete the choice within the same window or browser, while SMS will send a link to a user's mobile phone
- Biometric Enrollment Offer Probability: likelihood of a user being offered to enroll their biometrics
- Force Enrollment on Offer Received: removes the ability to let a user choose to receive their pincode normally. Functions similarly to a selfie transaction
Workflows
The Identity Portal can be used to initiate and offer workflow by navigating to Dynamic Enrollment > Workflows > Create Workflow. You will be presented with the following screen:
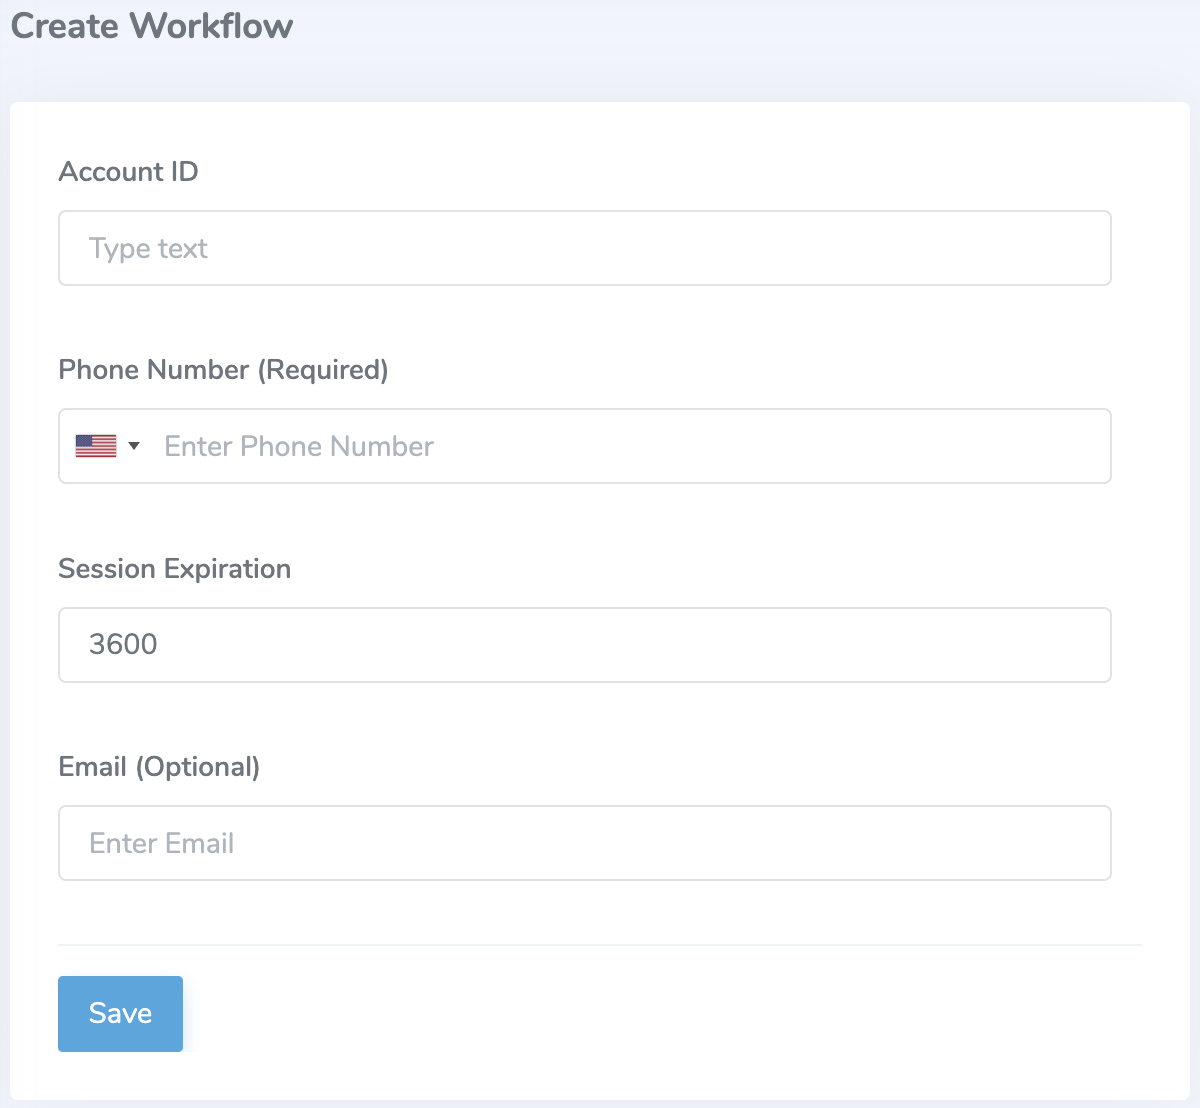
Parameter Descriptions
- Account ID: ID for a Verified user. Used to locate an existing biometric credential to authenticate against
- Phone Number (Required): phone number for a user. Required since they might not receive a biometric enrollment offer and will still need to receive their one-time passcode
- Session Expiration: time in seconds for a user to complete the flow
- Email (Optional): alternate transport mode for an offer flow