Auth0 Walkthrough
The following steps will demonstrate how to set up an OIDC connection within Auth0 that leverages AuthID's biometric authentication platform.
Create Auth0 application (Optional)
If you haven't already, you will need to create an application in Auth0. This will be used to handle authentication requests within your application. More information can be found on the Auth0 documentation page.
Create Enterprise Connection
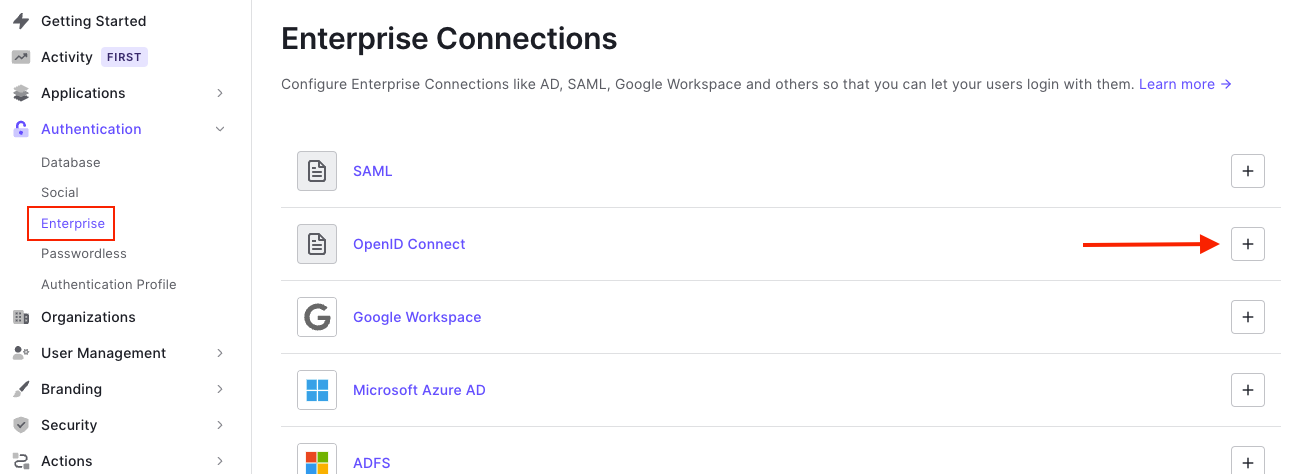
First, navigate to the Authentication > Enterprise page within your Auth0 dashboard. Click the + icon for the OpenID Connect section to create a new connection.
You will need to fill in the fields requested by the connection configuration as seen in the screenshot below:
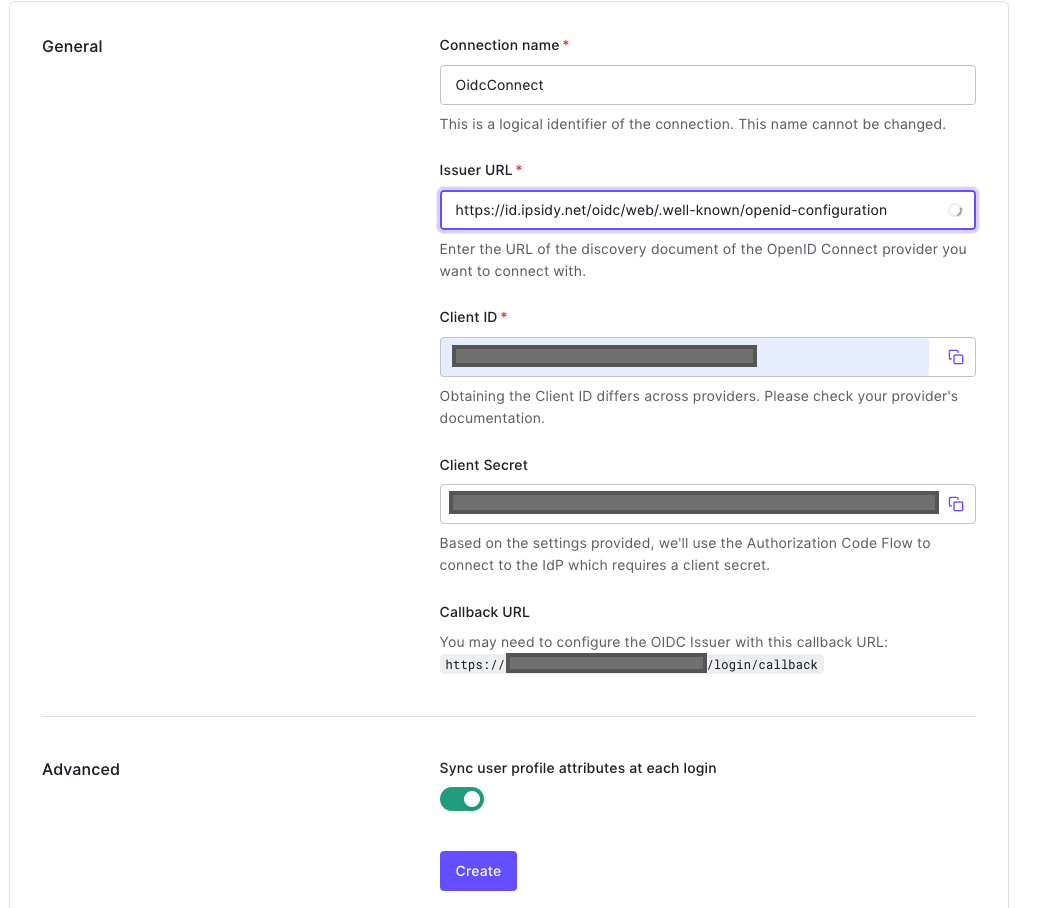
- Connection name: name used for your OIDC connection
- Issuer URL: URL of the OIDC configuration you wish to use. Fill out this field using https://id.authid.ai/oidc/web/.well-known/openid-configuration
- Client ID: use the value you copied when creating the AuthID integration from the Identity Portal
- Client Secret: use the value you copied when creating the AuthID integration from the Identity Portal
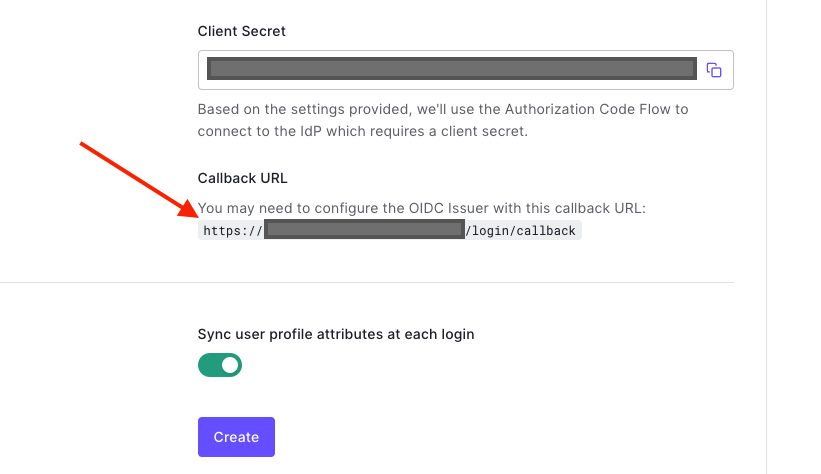
When creating the enterprise connection, you must ensure that at least one value from the Login redirect Urls parameter for your authID integration matches the Callback URL shown in the connection details. This value can be found just after the input field for the Client Secret:
Once you click Create, navigate back to the Settings tab and ensure that the Back Channel radio button is selected. You can also specify the identity scopes to request from the issuer at this time.
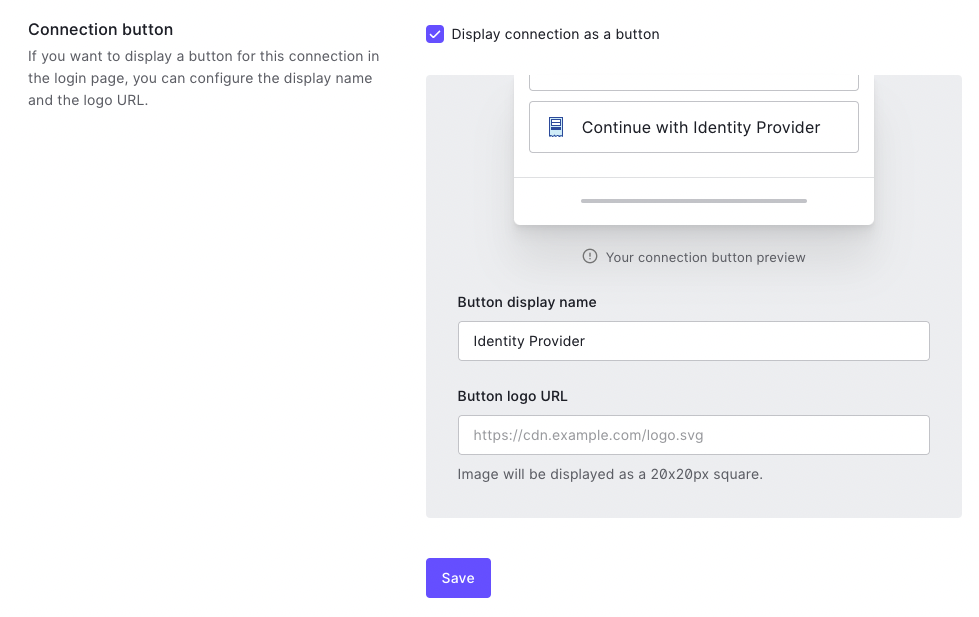
Next, navigate to the Login Experience tab and check the box marked Display connection as button. This will ensure that your users can see the OIDC option when logging in. The button can be customized with your unique text and logo.
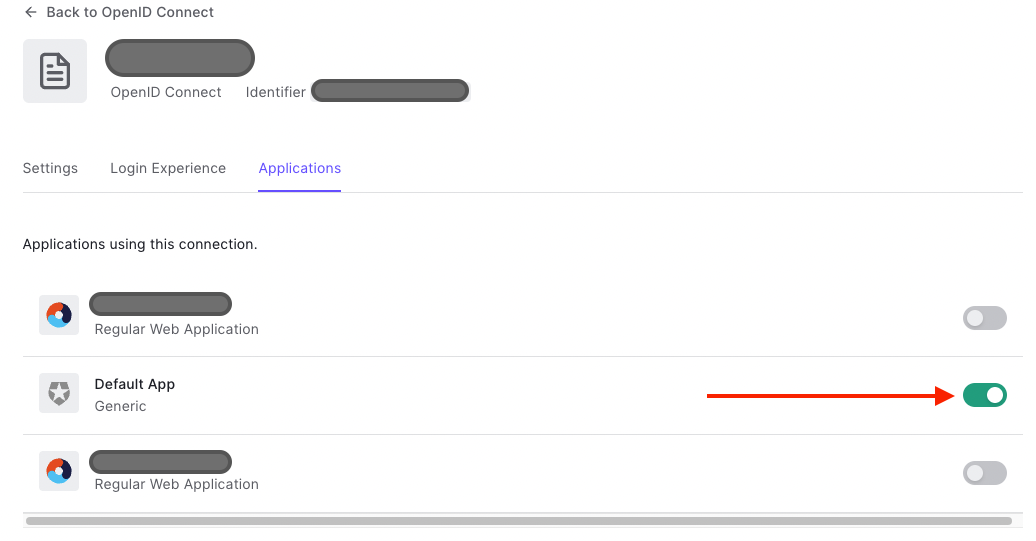
Finally, navigate to the Applications tab and toggle on the Auth0 applications for which you want to use this connection.
Video Walkthrough
The following video demonstrates the previous setup steps.
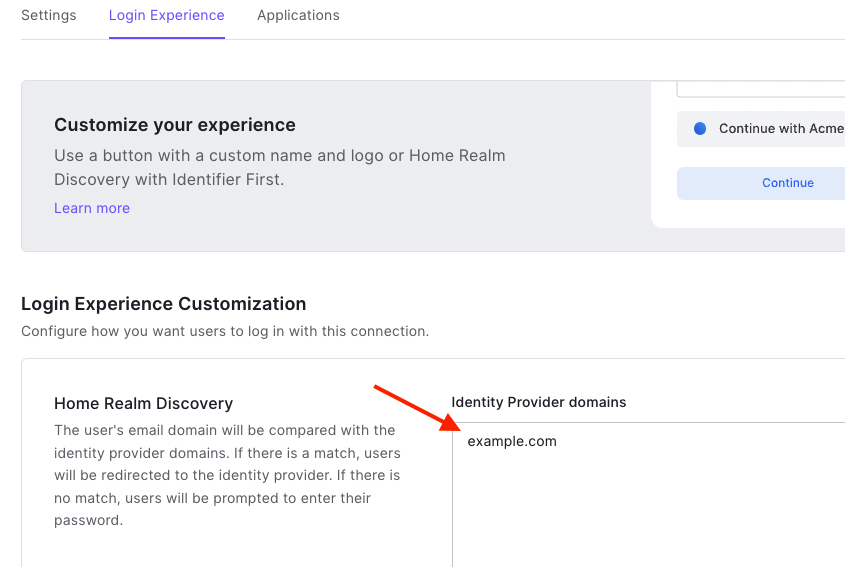
Enable Home Realm Discovery (Optional)
Home realm discovery is a process that allows a user to authenticate with an identity provider that matches their email domain. For instance, a user signing in with an email address ending @example.com will not be prompted for a password if @example.com is configured as an identity provider domain. They will instead be redirected to use the OIDC connection you have configured.
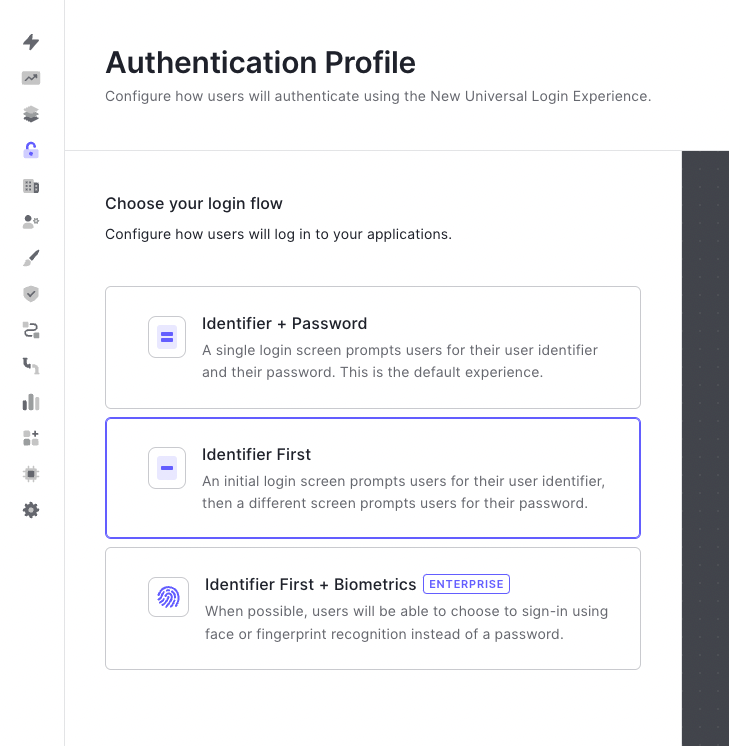
You must first enable the Identifier First login flow under the Authentication Profile page for your tenant.
You can add domains by opening the connection details and navigating to the Login Experience tab. Add as many domains as you require, then save your changes.