BeyondTrust Walkthrough
The following steps will demonstrate how to set up an OIDC connection within BeyondTrust that leverages AuthID's biometric authentication platform.
Video Walkthroughs
Setup BeyondTrust Policies
The following video demonstrates how to set up rules and policies that will activate authID to perform biometric authentication on an endpoint:
End User Experience
The following video demonstrates what a user sees when authenticating with authID.
Install Privilege Management
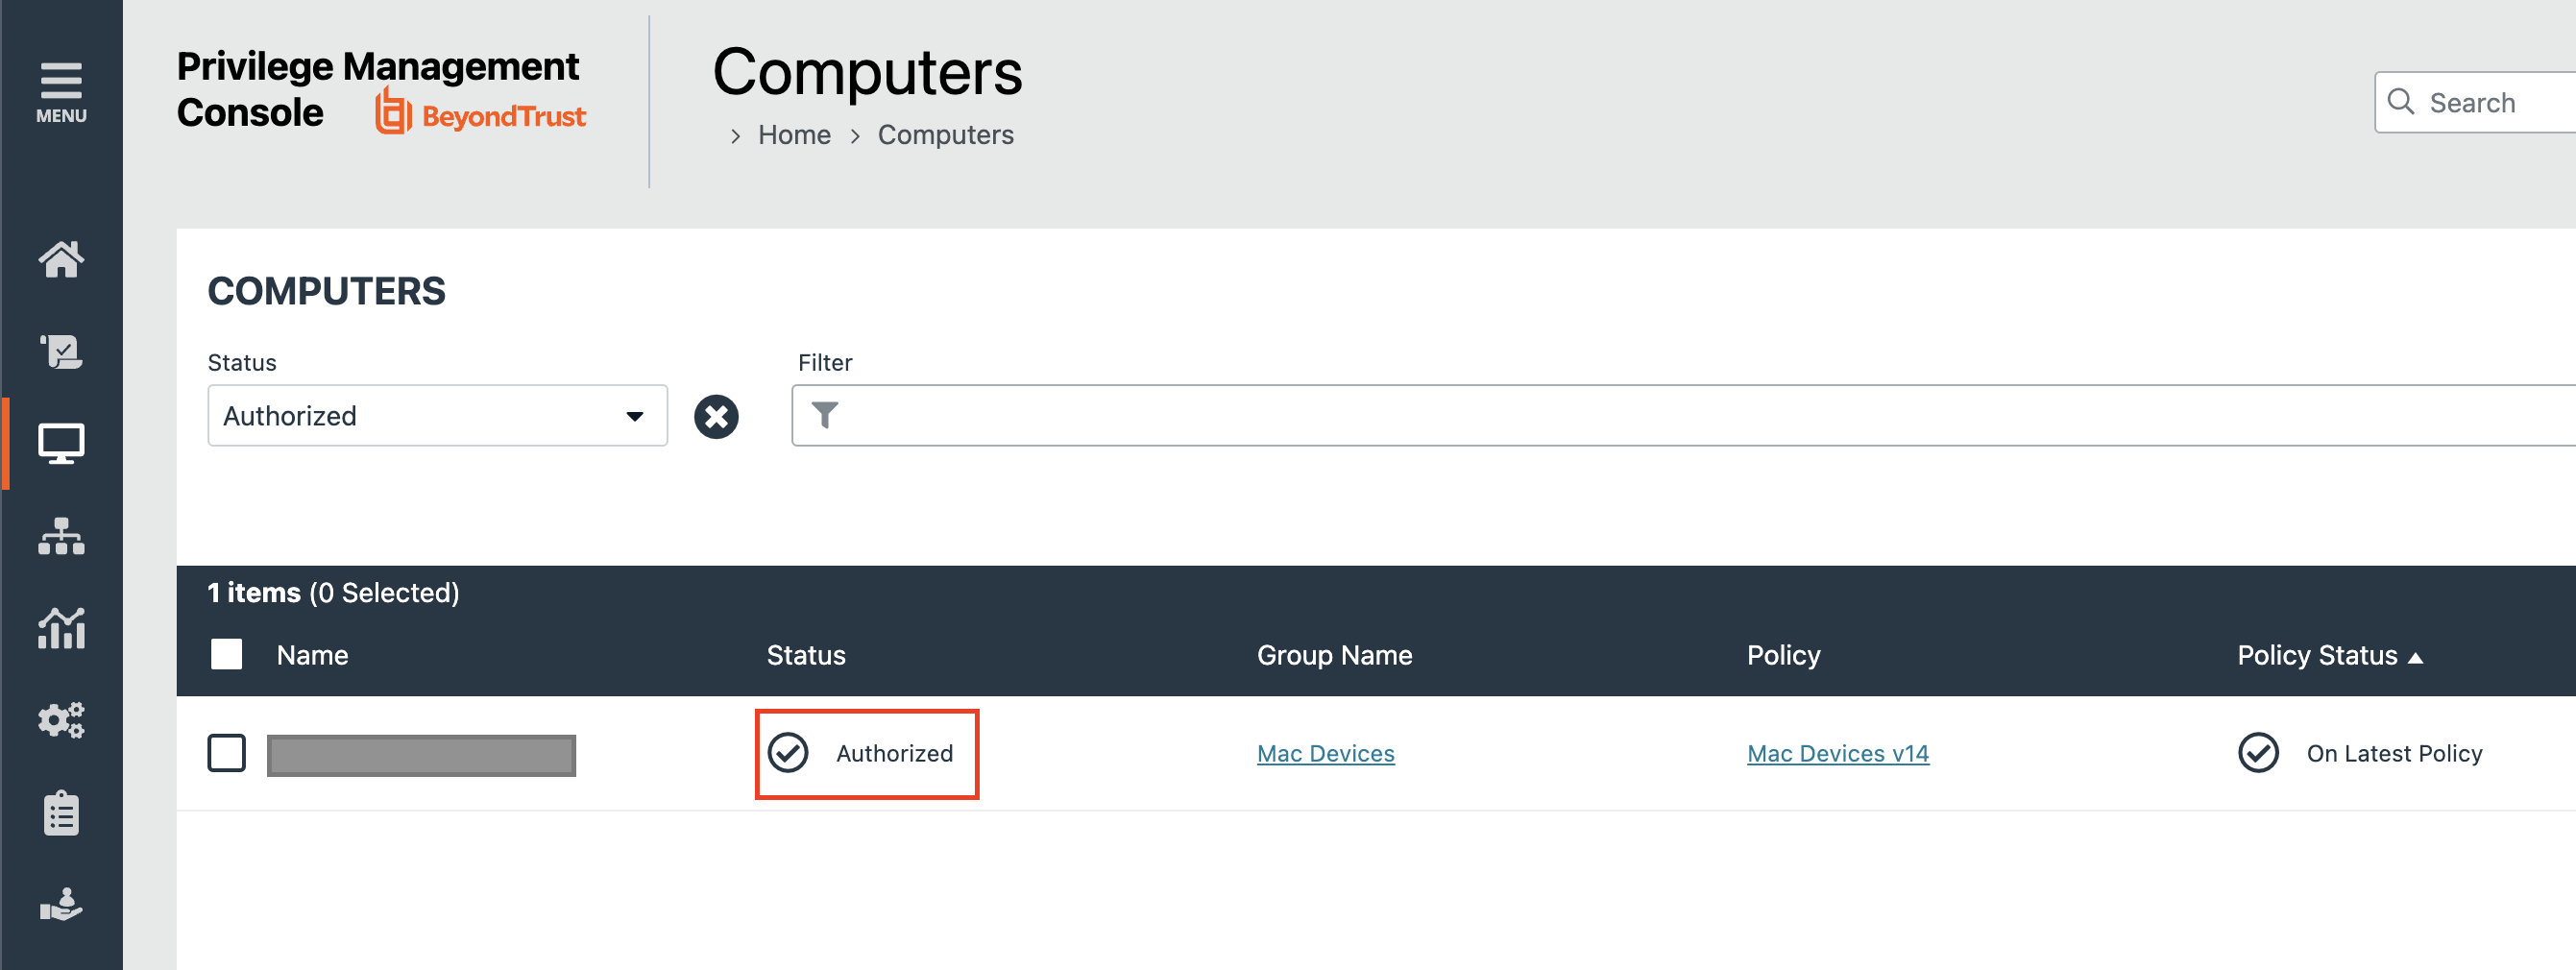
Using the appropriate installation guide for Windows or Mac devices, ensure that endpoints have the BeyondTrust endpoint management software installed and that the computers/groups are synchronized in the Privilege Management Console:
Create AuthID Integration
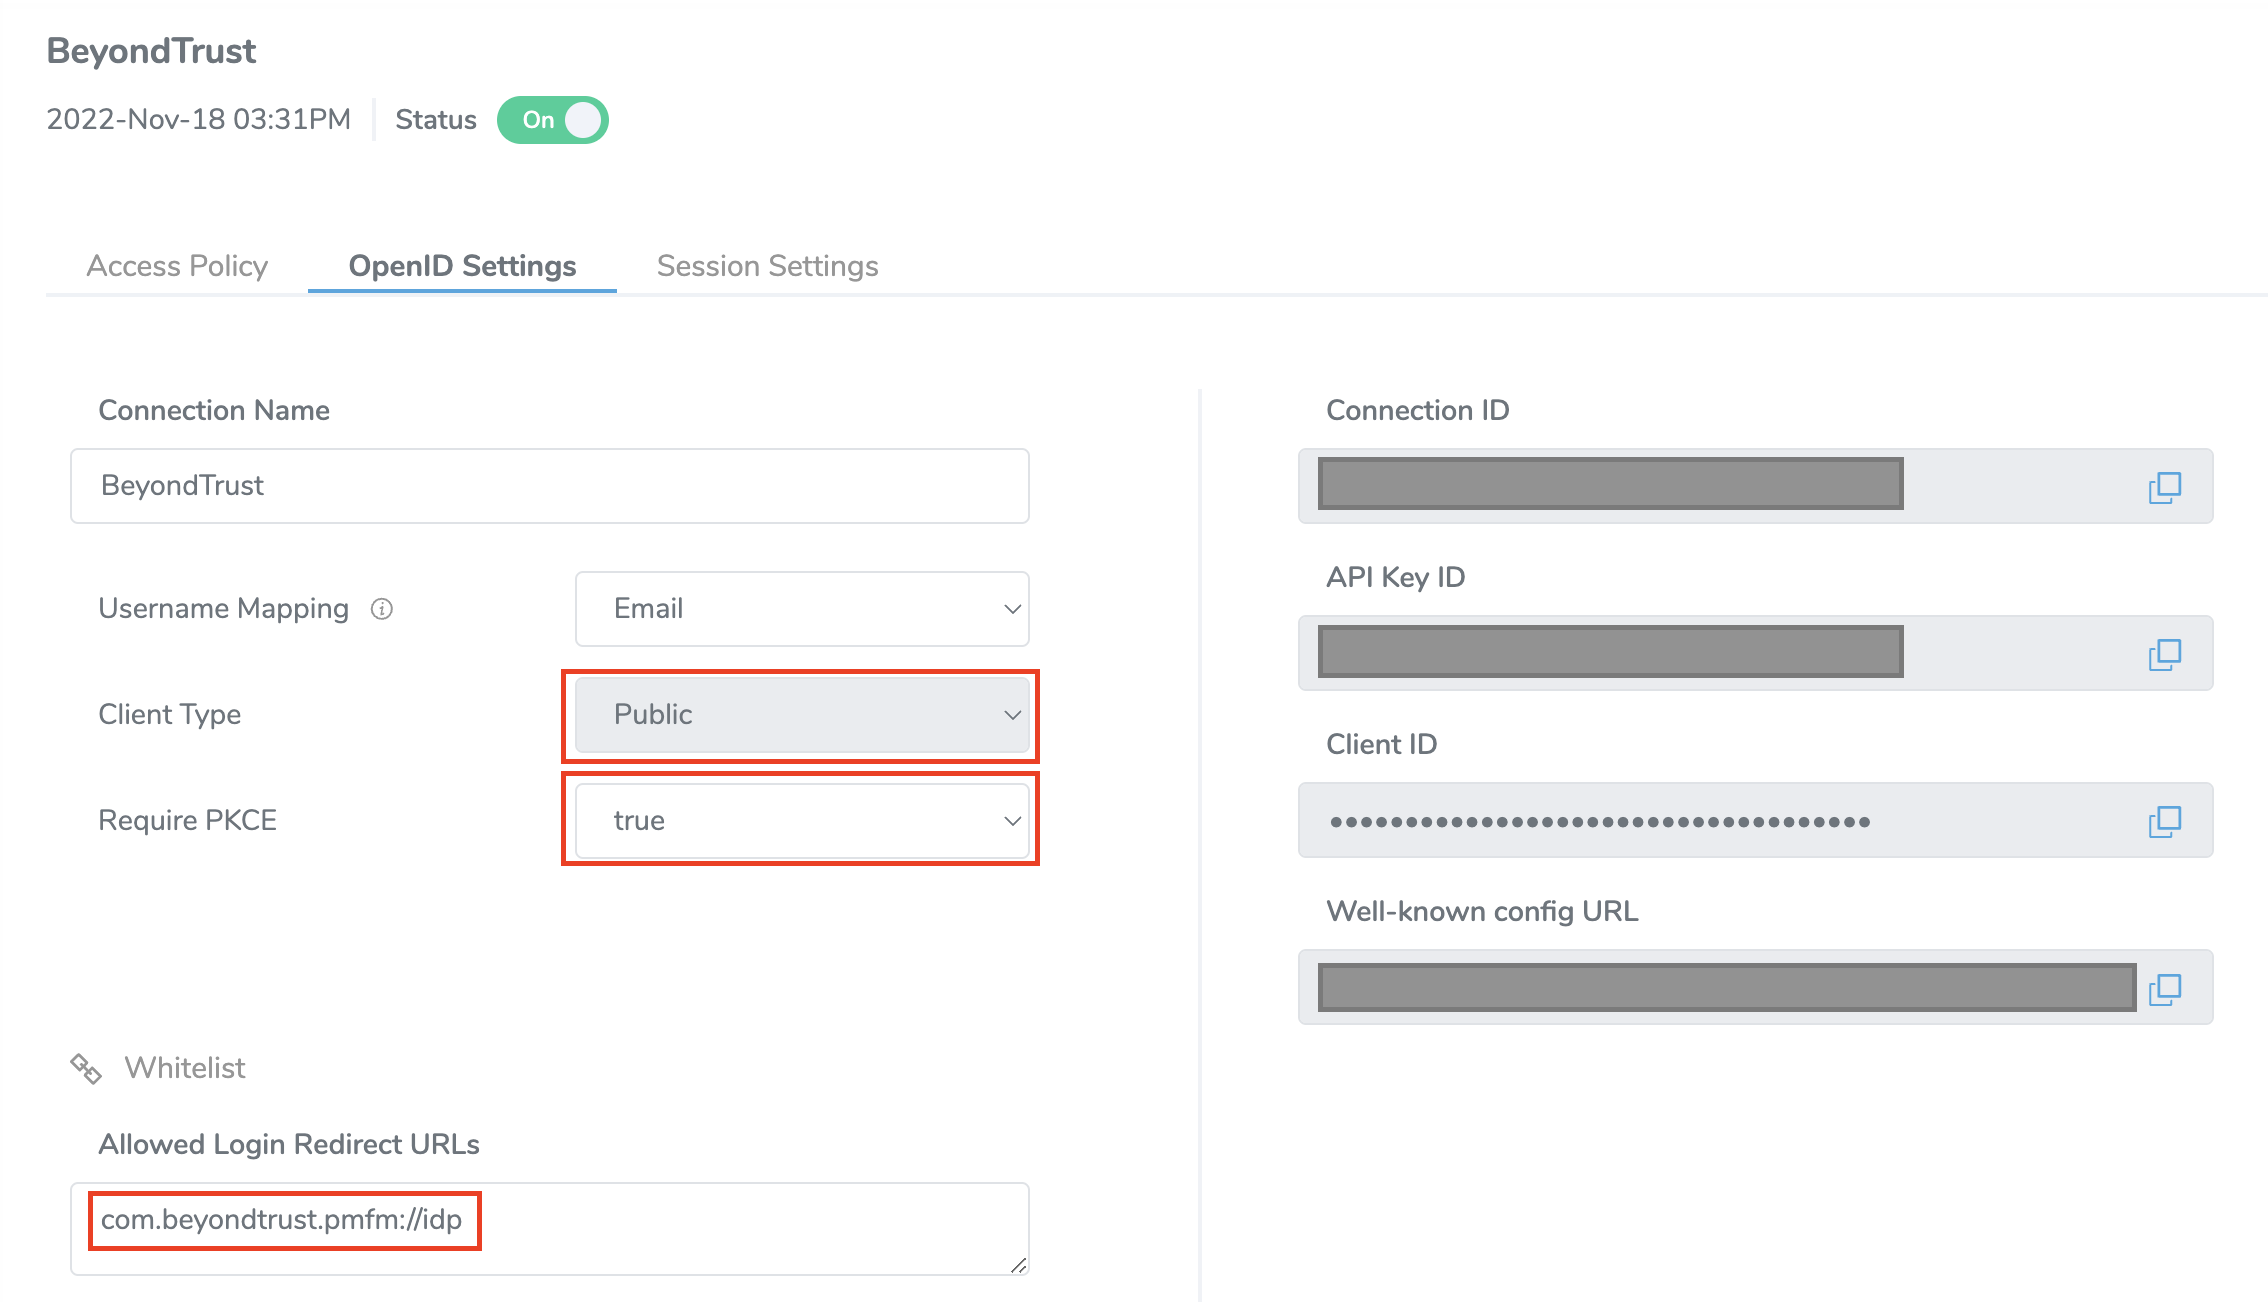
Follow the steps in the integration guide to create a new identity provider, but be sure to set the Client Type to Public, and Require PKCE to true. This will not generate a client secret but will ensure that the integration remains secure using PCKE. Finally, set the login redirect URL to com.beyondtrust.pmfm://idp.
Update Policy
If you have correctly configured and deployed a policy for Windows or Mac, you will want to modify the policy to use the authID identity provider you created in the previous step.
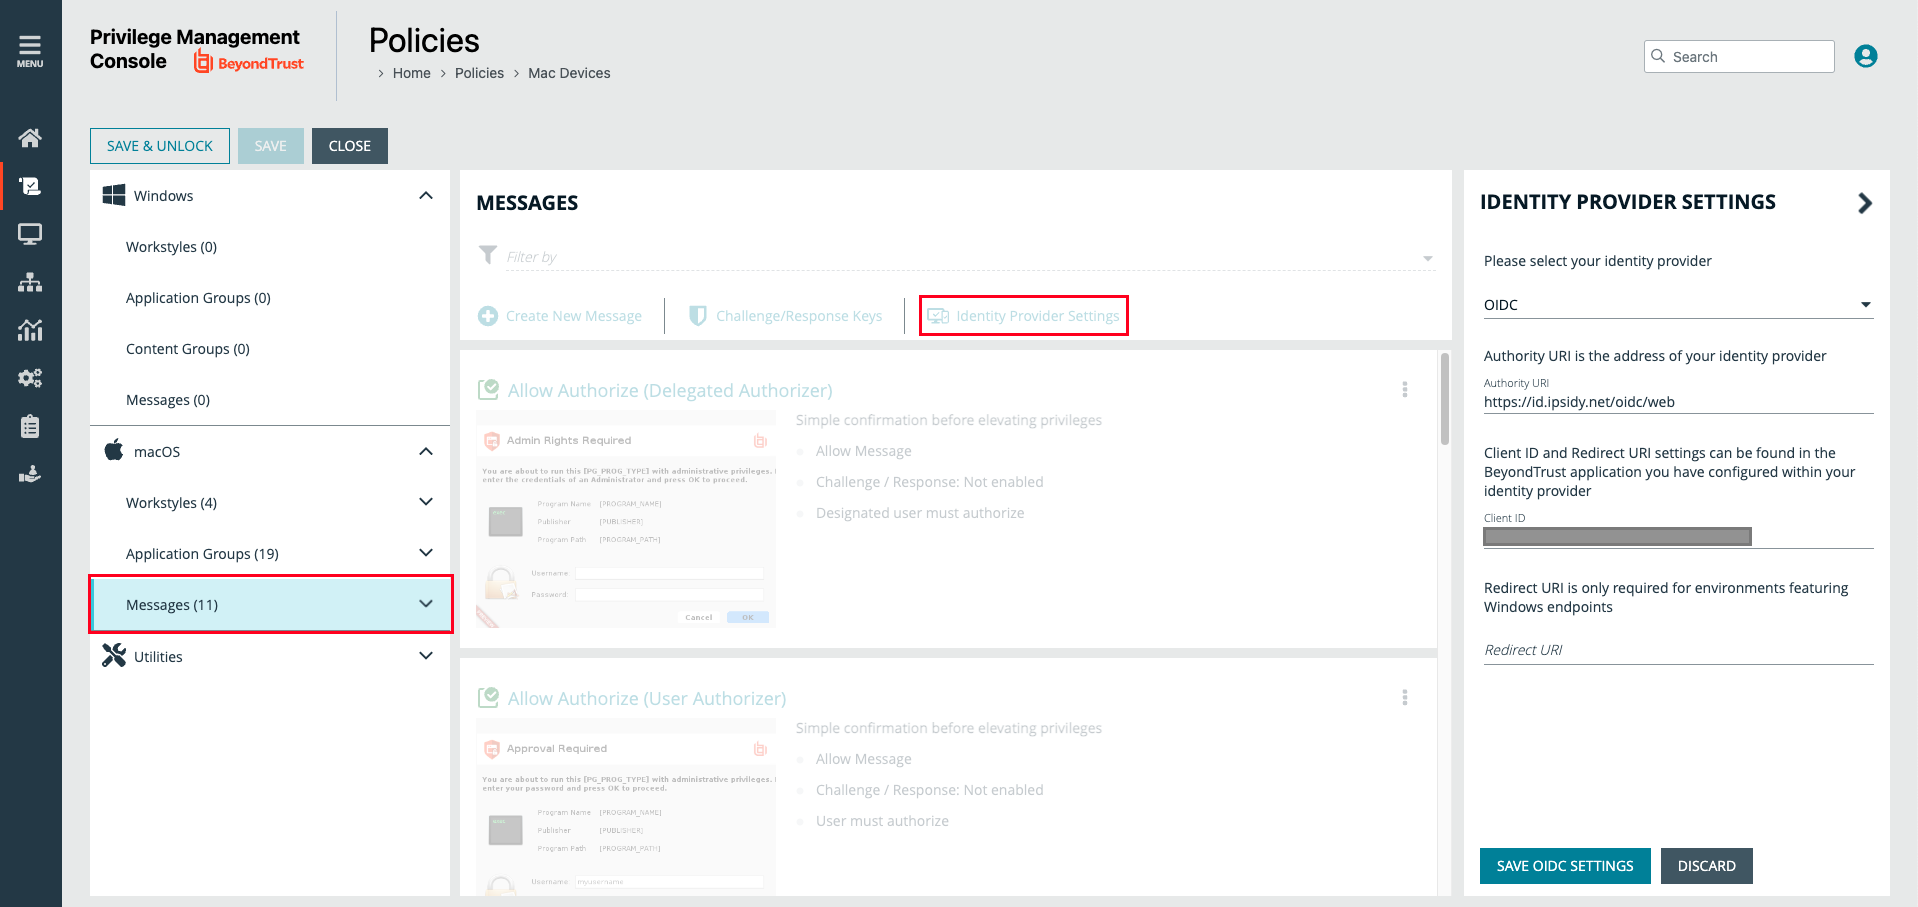
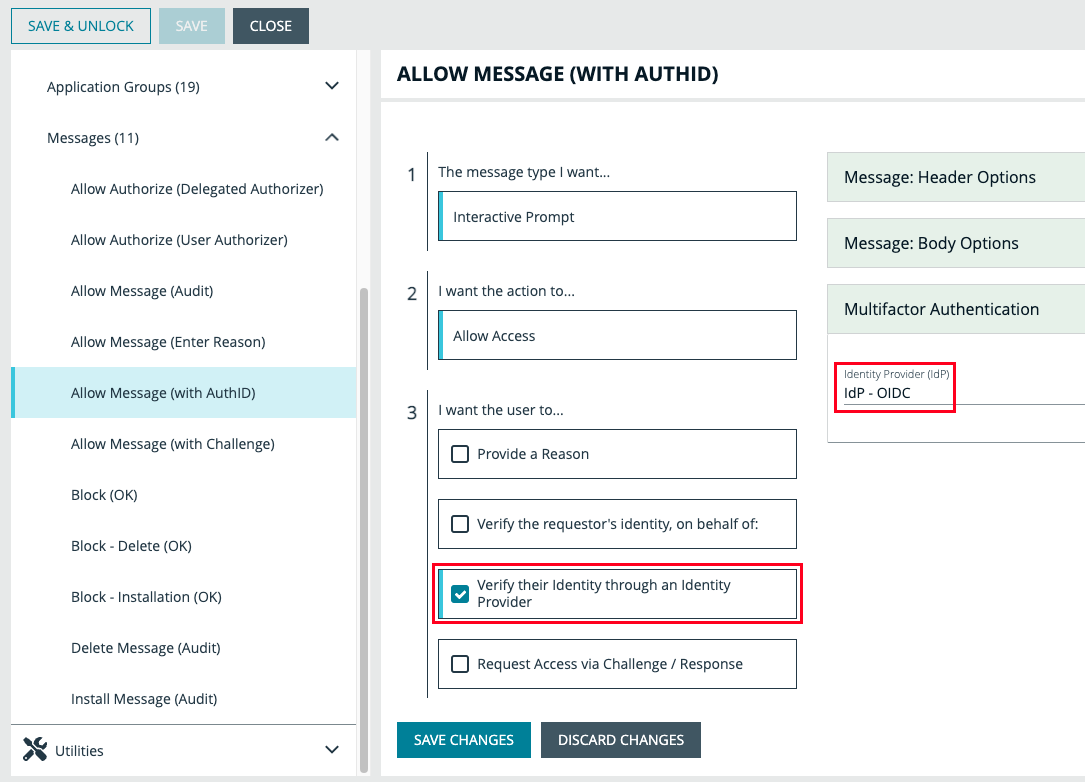
Edit and unlock the relevant policy in the policy list, then navigate to Messages underneath either Windows or macOS. Select the Identity Provider Settings button to enter in the following details for the integration:
- Identity provider: OIDC
- Authority URI:
https://id.authid.ai/oidc/web - Client ID: use the value from the previous step
- Redirect URI: enter the redirect URI used for Windows endpoints
As an optional step, you can create a new message type or modify an existing one in order to activate the IdP authentication. In the third section, check the box that says Verify their Identity through an Identity Provider and select the Idp - OIDC from the dropdown under Multifactor Authentication.
Test Policy (Optional)
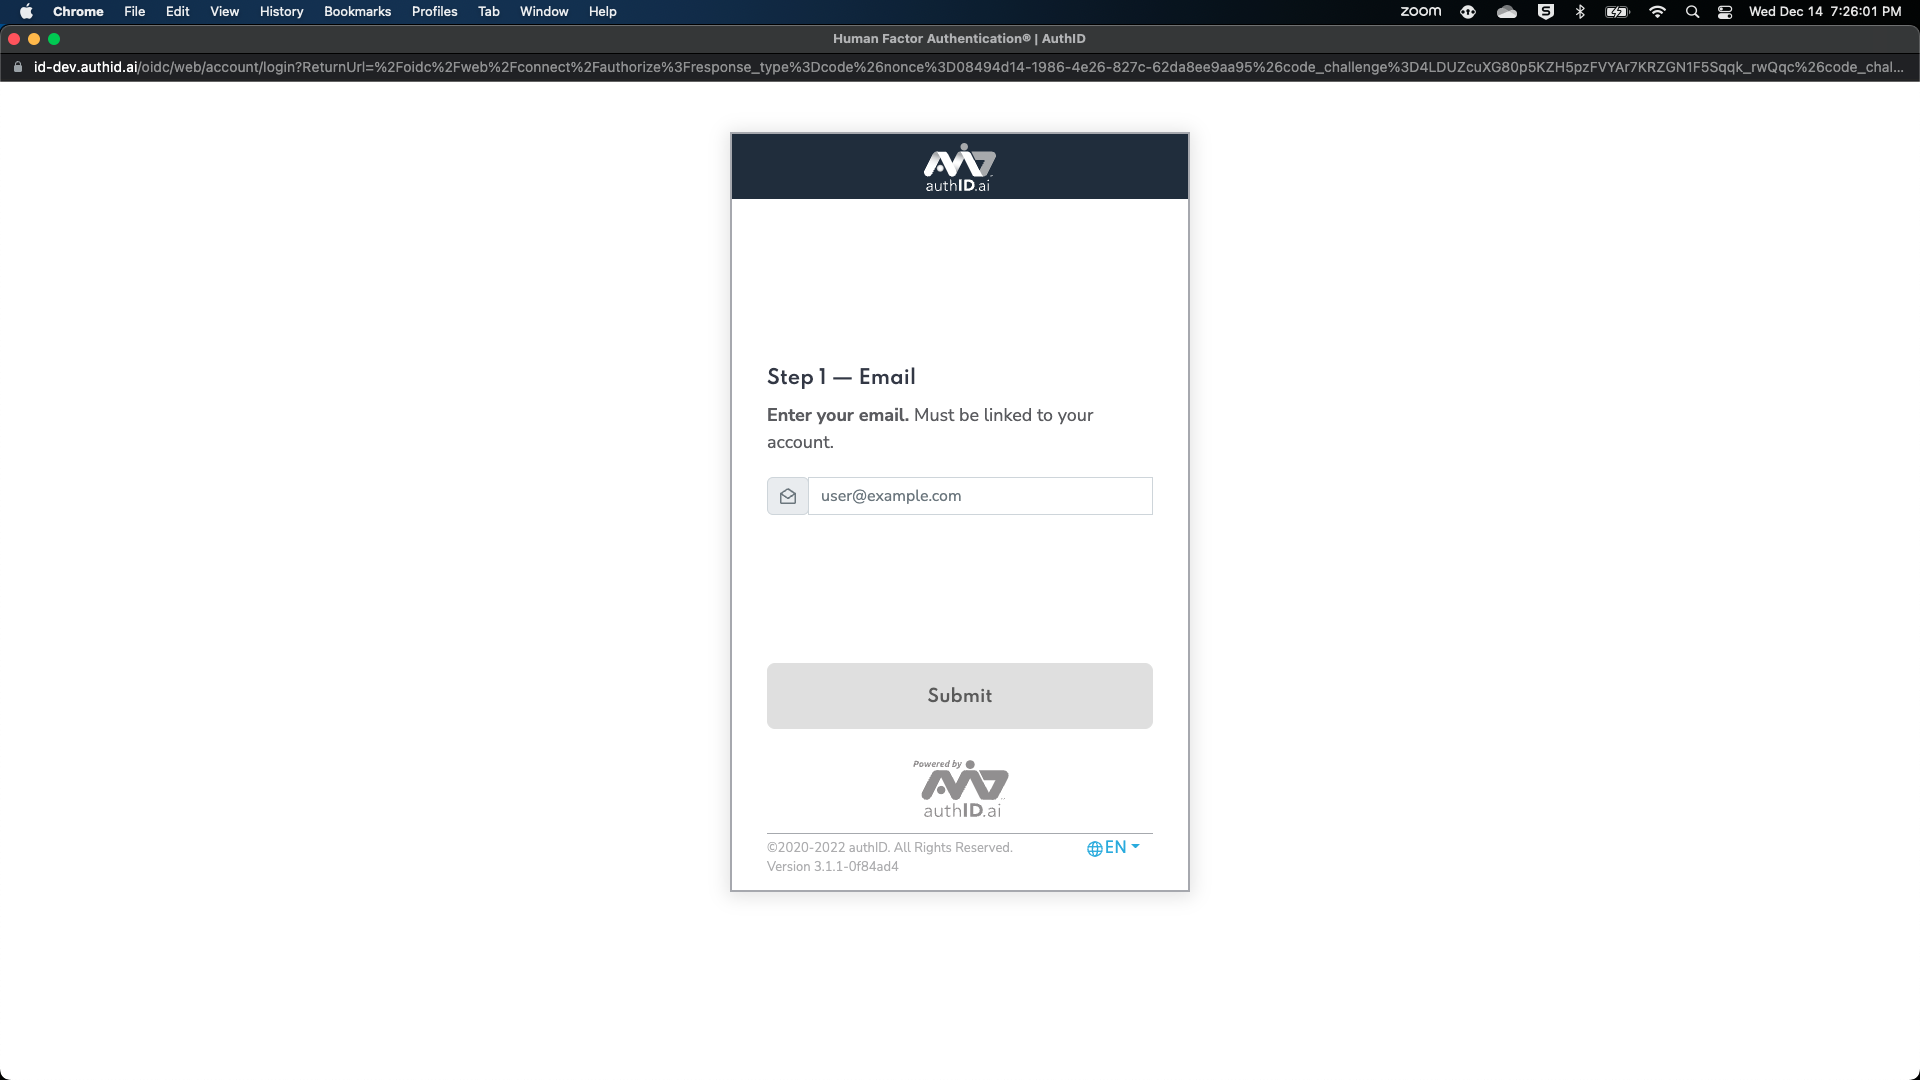
You can test that the policy functions corrctly by having a user engage in an activity that would activate the message you created/modified. This will show a dialog that will let the user enter their details in the authID system to complete the authentication.
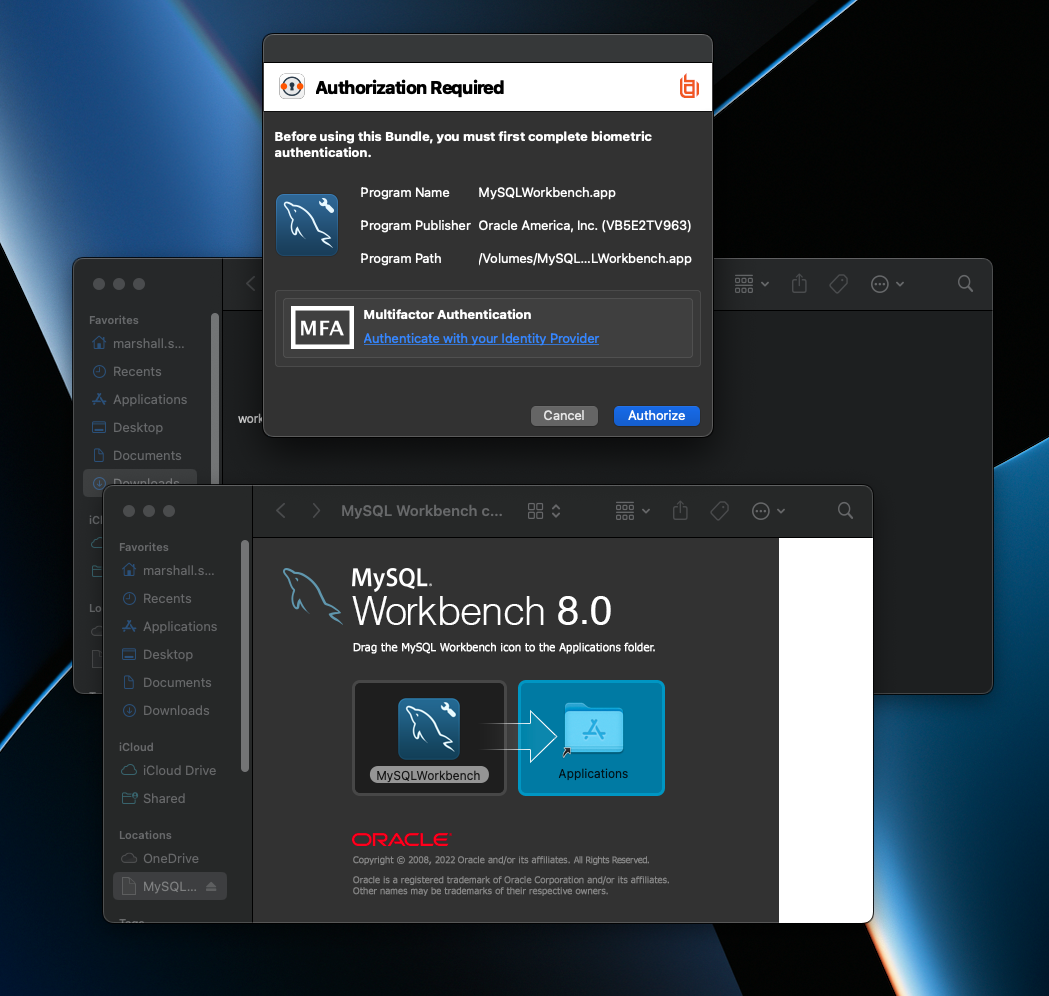
From here, the default browser will appear and a user is prompted to continue their authentication with authID: