PingIdentity Walkthrough
The following steps will demonstrate how to set up an OIDC connection within the PingIdentity PingOne Console that leverages AuthID's biometric authentication platform. The steps to fully integrate authID are as follows:
- Create a new integration in the authID Identity Portal
- Configure authID as an External IDP within the PingOne console
- Create an access policy using the IDP
- Apply the access policy to an application
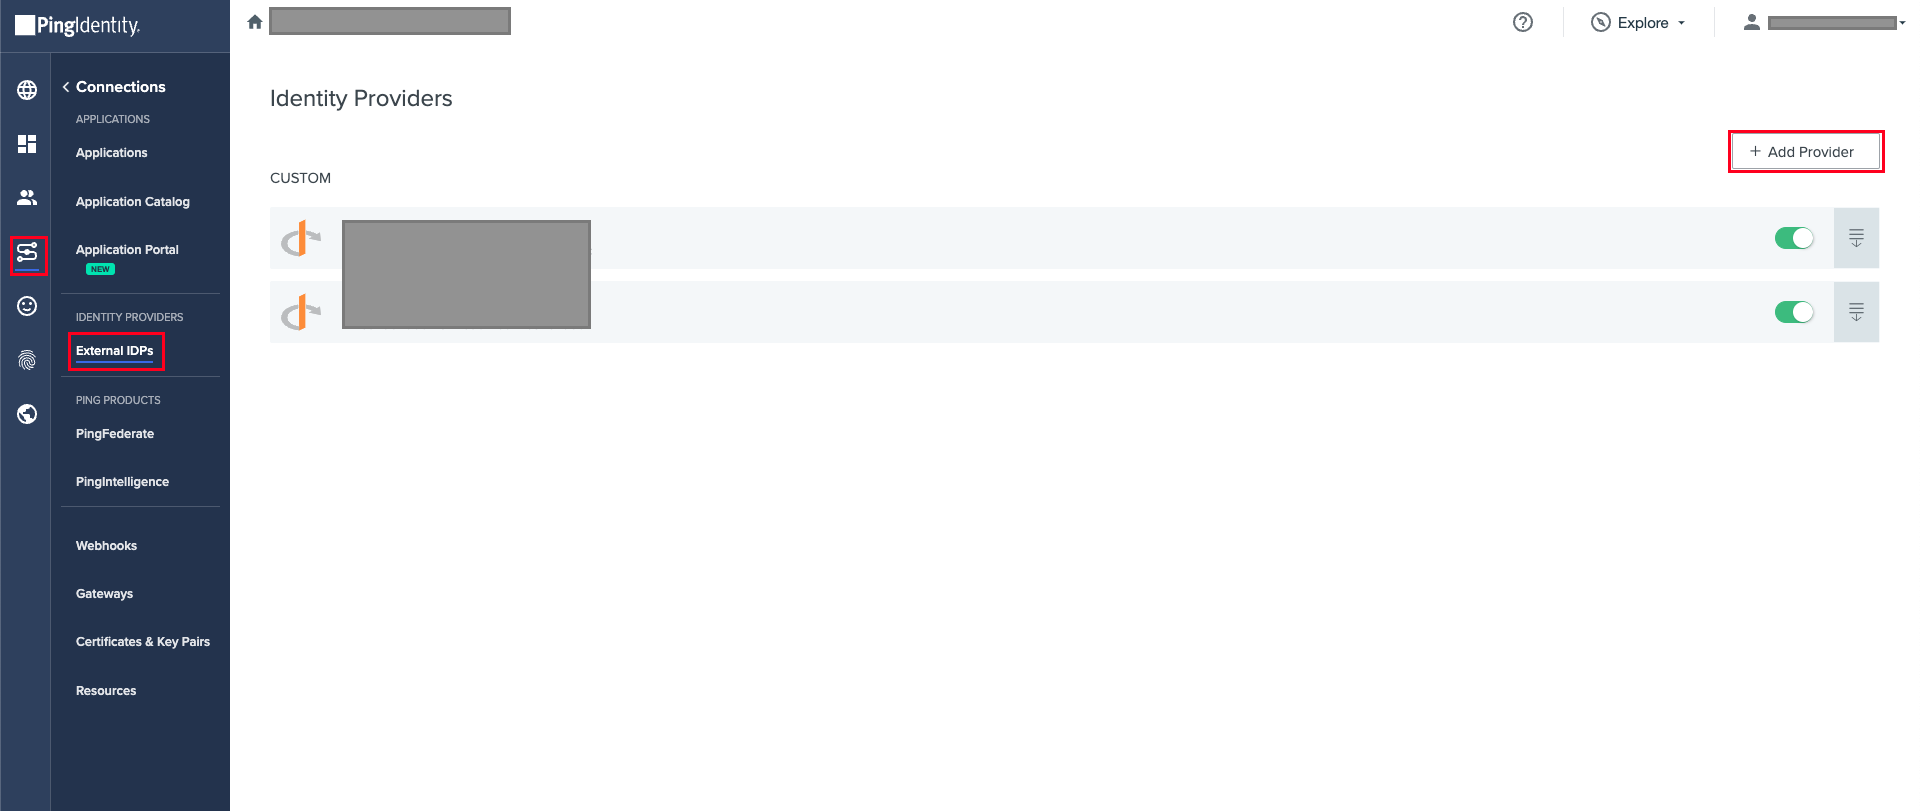
Add Identity Provider
First, navigate to the Connections > External IDPs section of your dashboard and click the button labeled Add Provider.
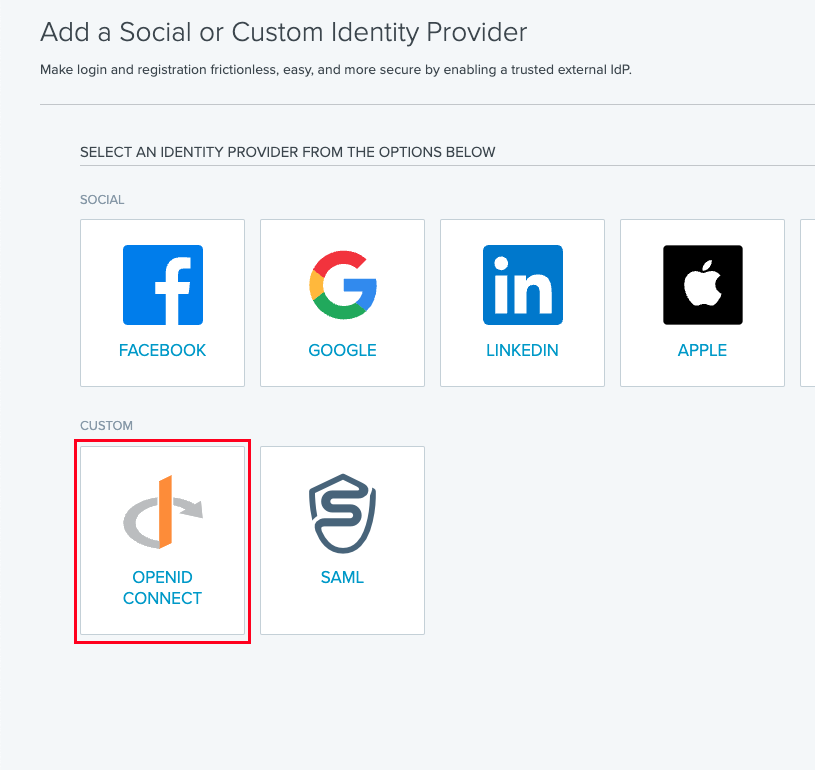
Select the tile marked OpenID Connect.
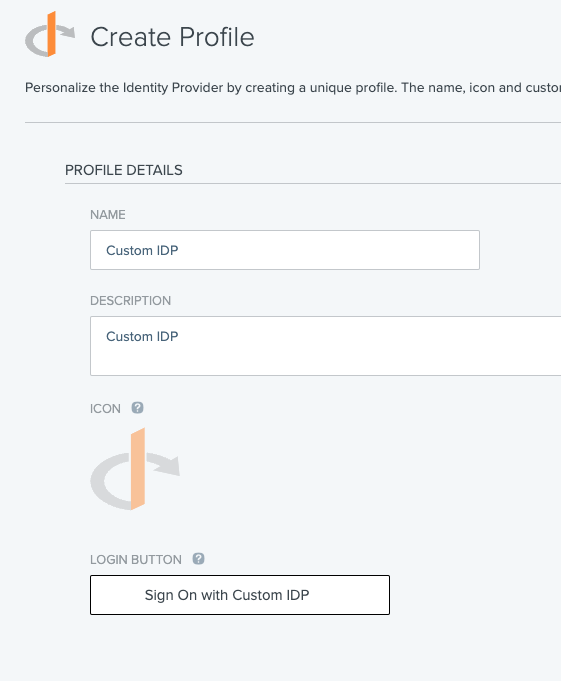
Enter a name for the IDP. The description, icon, and login button configuration is optional.
Use the saved values from your AuthID integration to fill out the Client ID and the Client Secret fields. Use the following value for the Discovery Document URI, or fill out the fields manually. The authID OIDC service supports both Basic and POST for token authentication, so choose the best option to suit your needs.
https://id.authid.ai/oidc/web/.well-known/openid-configuration
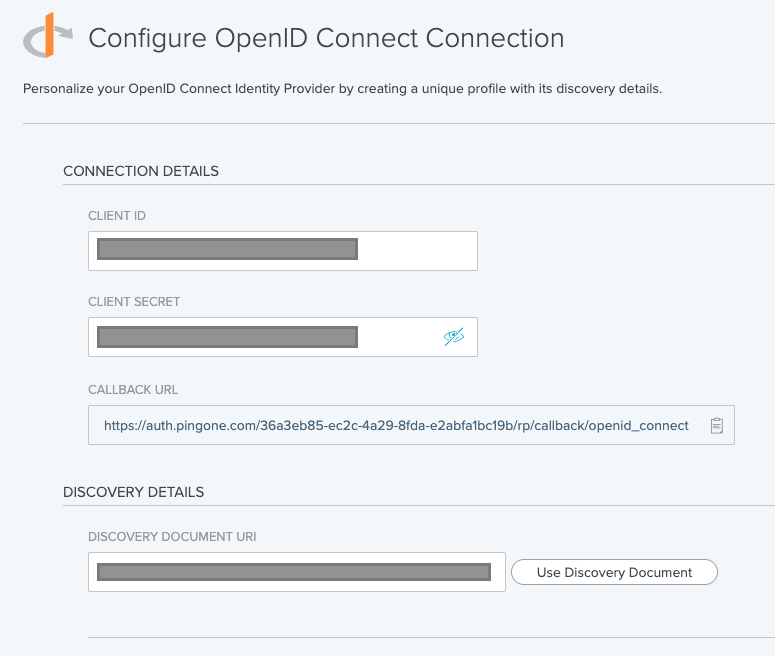
Next, you can map any attributes you would like to use. Click Save & Finish to complete the setup.

Be sure to enable the Identity Provider after completing the setup by clicking the toggle on the right-hand side.

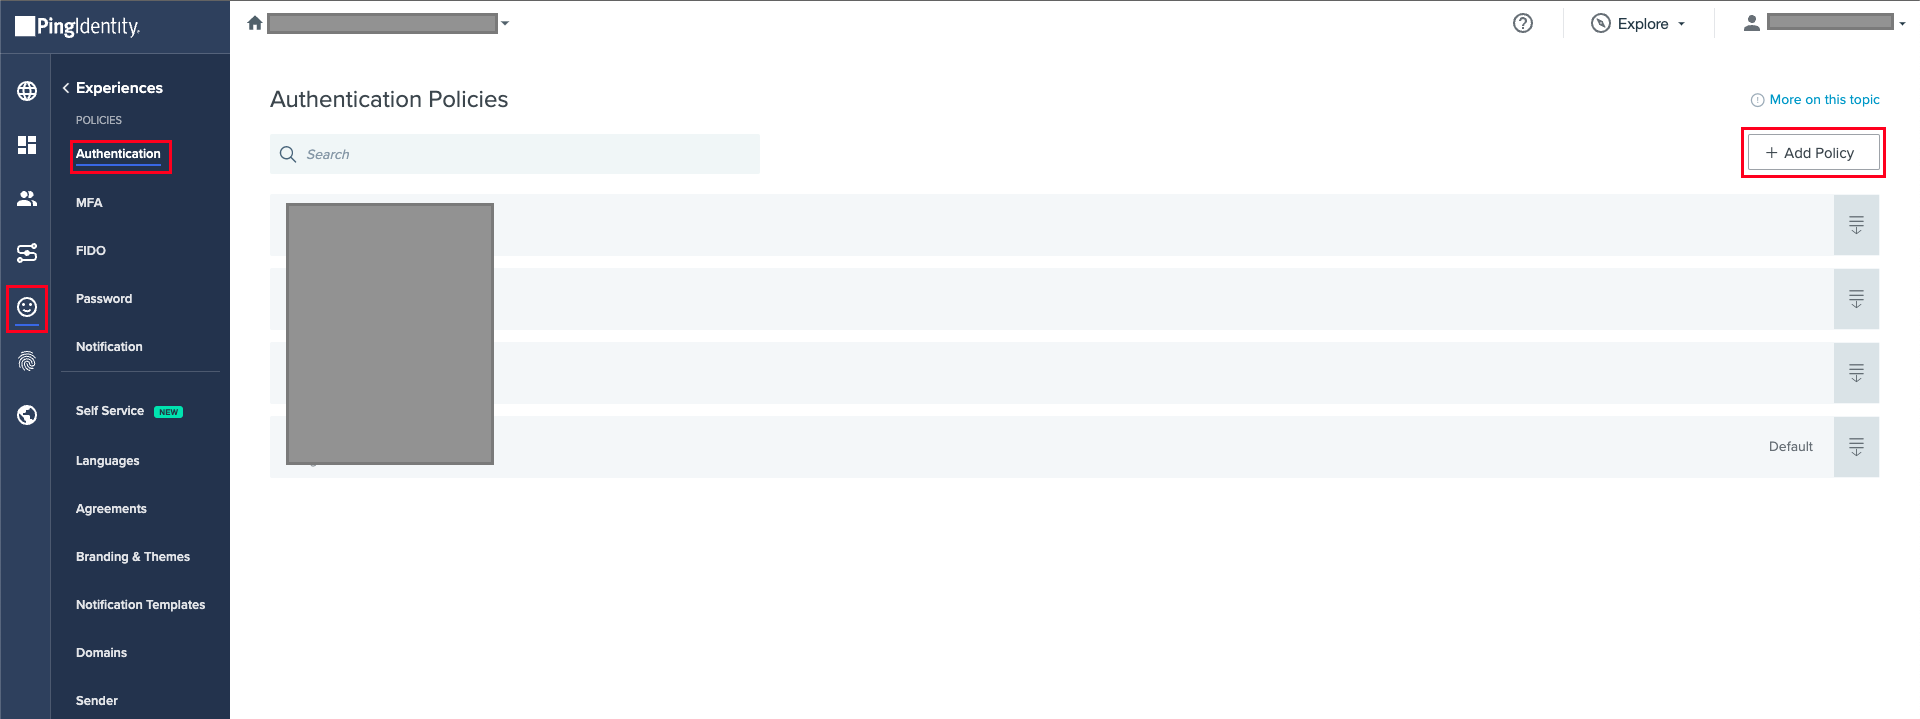
Add Authentication Policy
Authentication policies are used to control access to applications using the identity provider you have just created. You have flexibility depending on when and where you want the policy to be applied. This section will cover two experiences: Identifier First and External Identity Provider. To begin, navigate to the Experiences > Policies > Authentication section of your dashboard and click the Add Policy button. You can also edit existing policies if you prefer.
Identifier First
This mode will prompt a user to click the button for the external IDP that was created earlier by selecting it from the list under Presented Identity Providers.
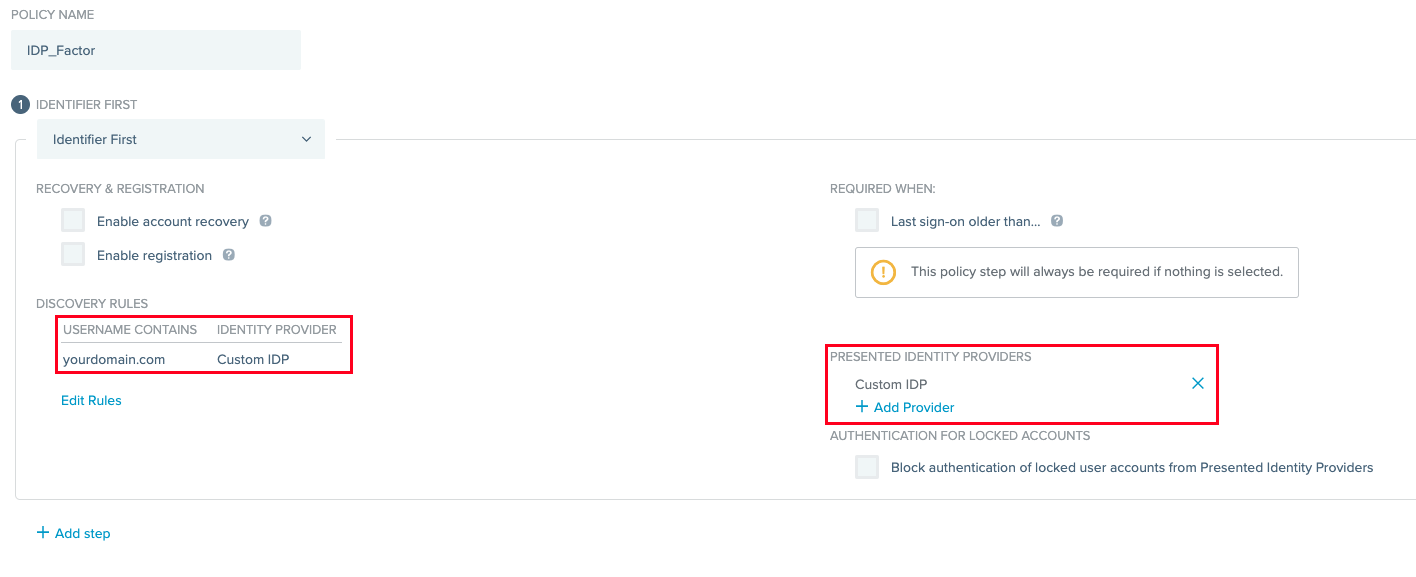
Alternatively, you can turn on Discovery Rules to automatically route to the IDP if a user's email address matches a given domain.
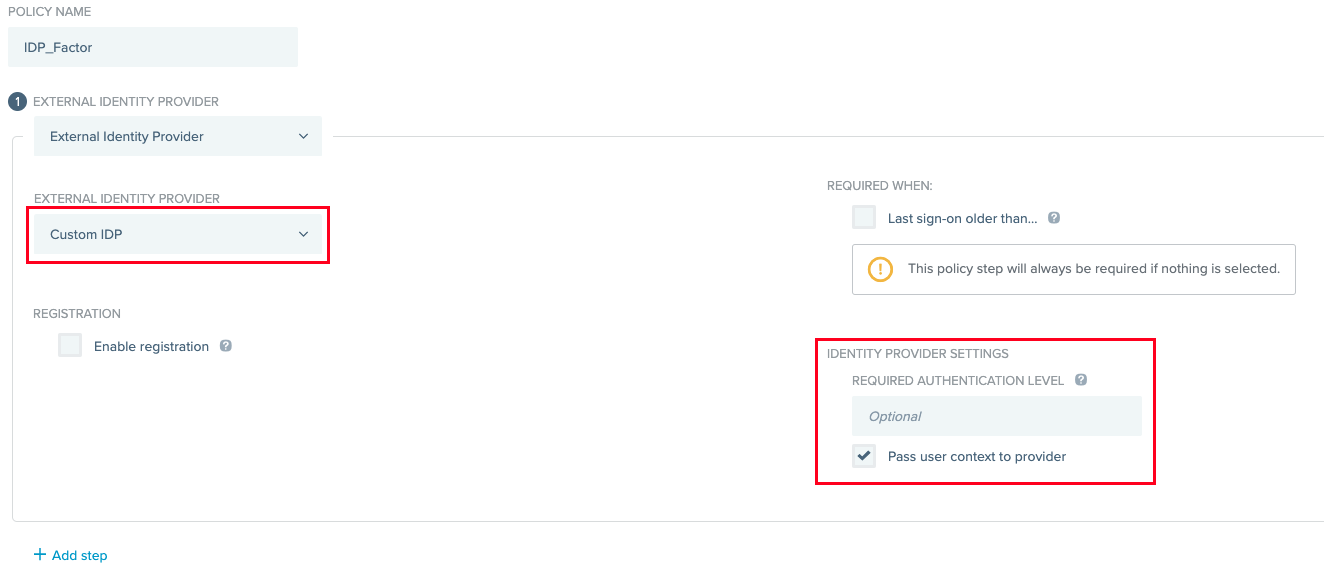
External Identity Provider
This mode will present the IDP immediately instead of showing the Ping login experience. This is useful for requiring additional biometric authentication for individual applications without prompting users for additional input.
Select the IDP that was created earlier by selecting it from the list under External Identity Provider. If you are using this mode, be sure to check the box labeled Pass user context to provider so that users do not have to enter their identifier twice.
Apply the Policy
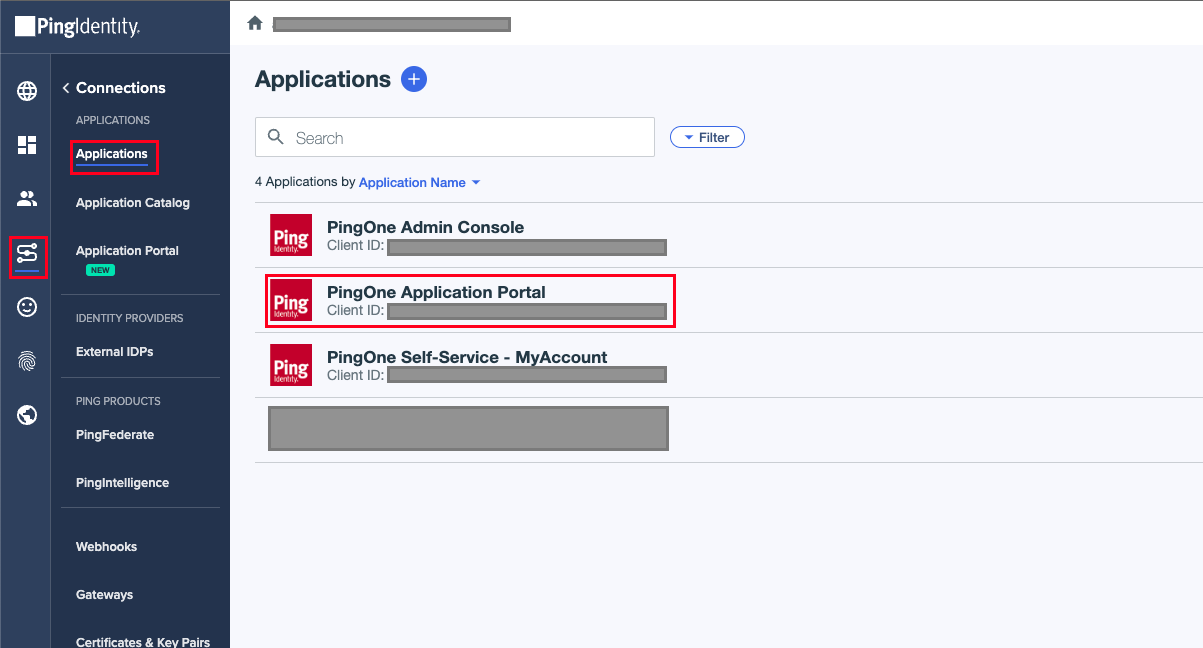
To test the effect of the policy, you can assign it to an application where it will automatically go into effect. For this example, we will apply the policy to the Application Portal. Navigate to the Connections > Applications section on your dashboard and click the PingOne Application Portal from the list to open up the editor.
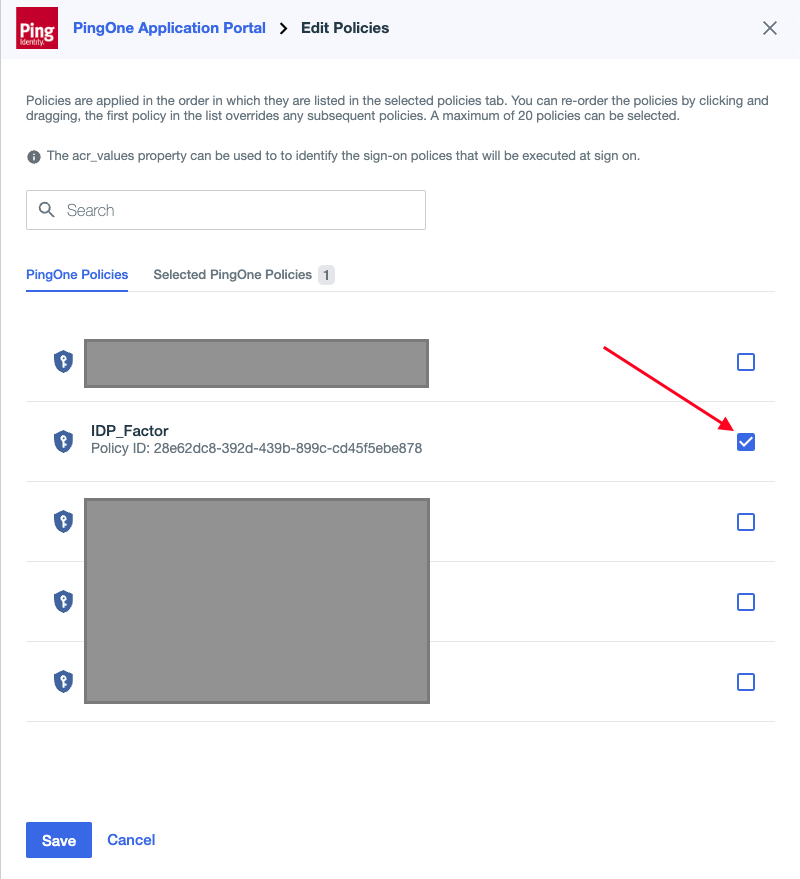
Select the policy you created earlier by checking the box, and click save to apply it.
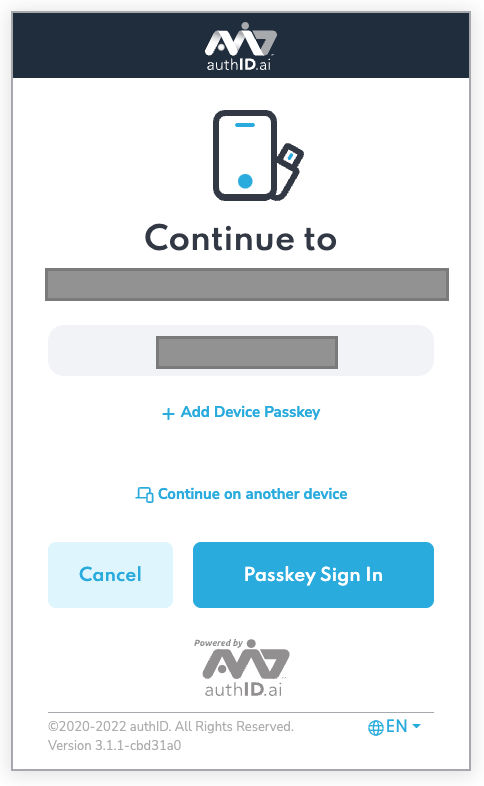
Test your new policy by navigating to the Application Portal and signing in. You should see the authID experience presented, where users are then guided to complete their authentication.