
Auth0 Actions
The following steps demonstrate setting up an OIDC connection within Auth0 that leverages AuthID's biometric authentication platform.
New Auth0 Connection
Add New Connection
To add a new connection, follow the below procedure:
- Start login to the Identity Portal and navigate to the Cloud Connections -> Auth0 Actions -> New Auth0 Connection blade of the menu:
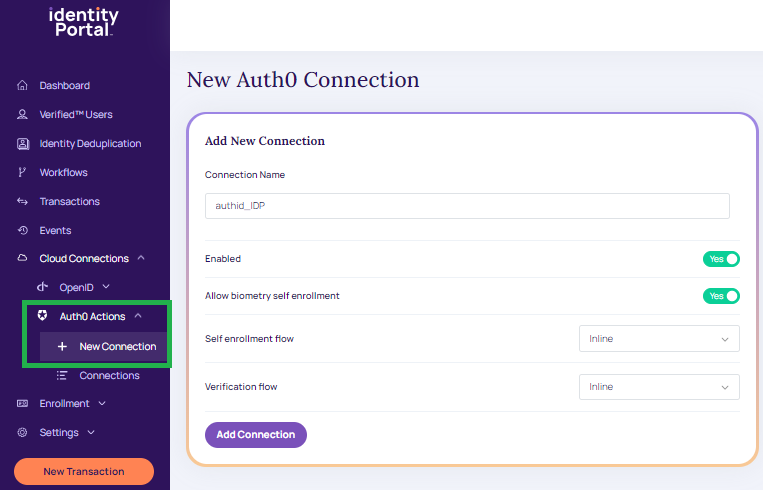
New Auth0 Connections.
- Enter the Connection Name.
- Select YES or NO radio button to enable or disable the connection.
- Select YES or NO radio button to enable or disable the biometry self-enrollment.
- From the drop-down select the appropriate self-enrollment flow:
- Inline
- From the drop-down select the appropriate self-enrollment flow:
- Inline
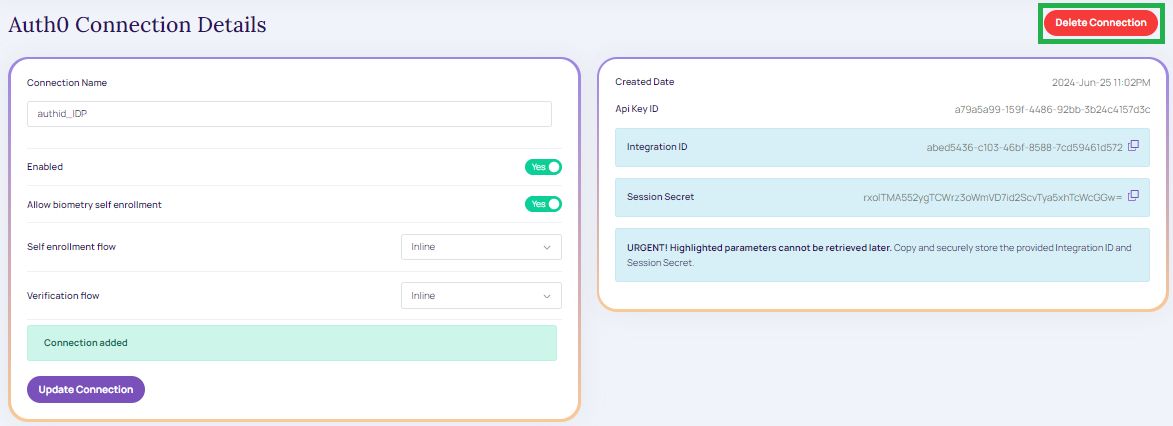
- Click Add Connection. The Auth0 connection details are displayed in the below screen,
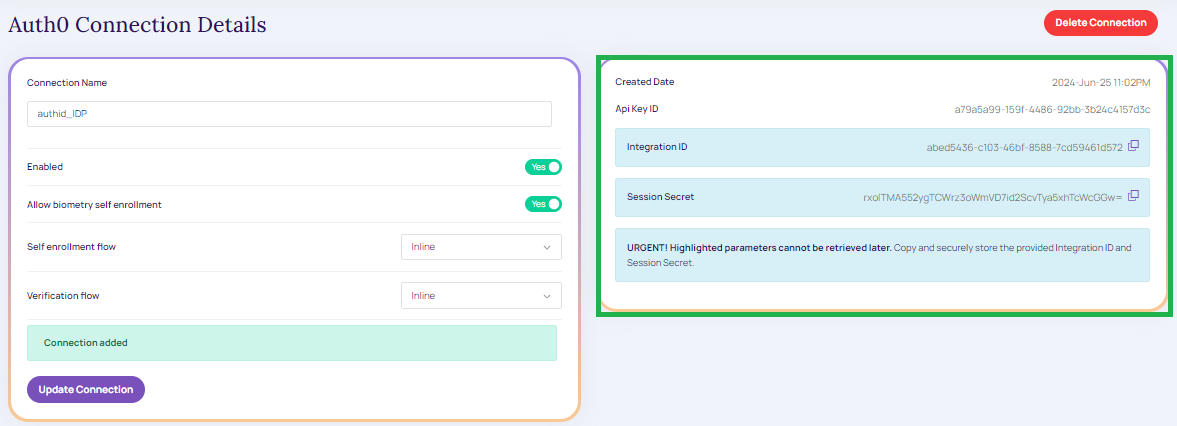
Auth0 Connection Details.
Auth0 Connections
- The created Auth0 connections details are displayed under the Auth0 Actions -> Connections section.
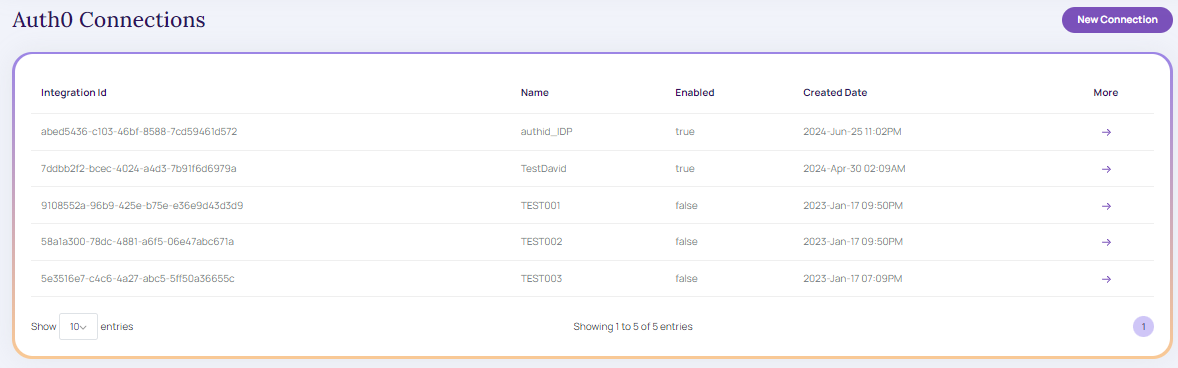
Auth0 Connections.
Modify Auth0 connection
To modify the Auth0 connection, follow the below procedure:
- From the create connection grid table, click on the appropriate integration ID the Connection details screen displays,
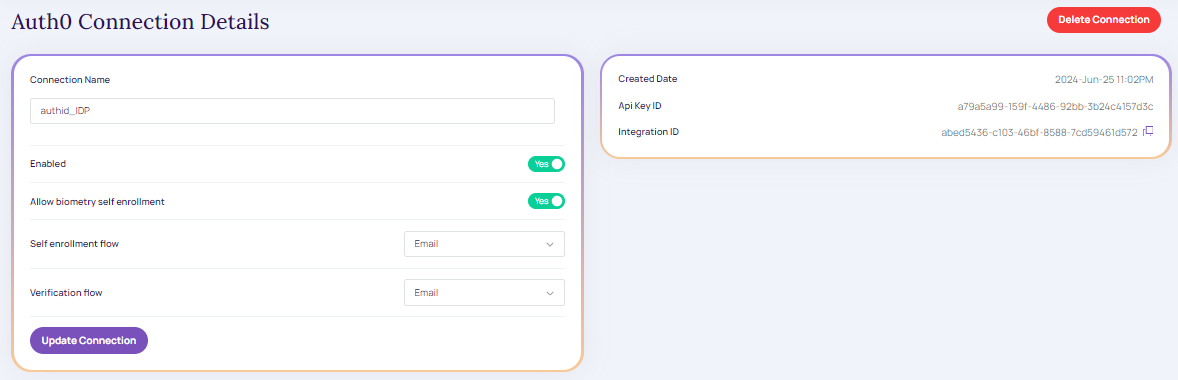
Modify Auth0 Connections.
- Once the appropriate modification is updated click Update Connection. A message displays Connection Updated, as below.
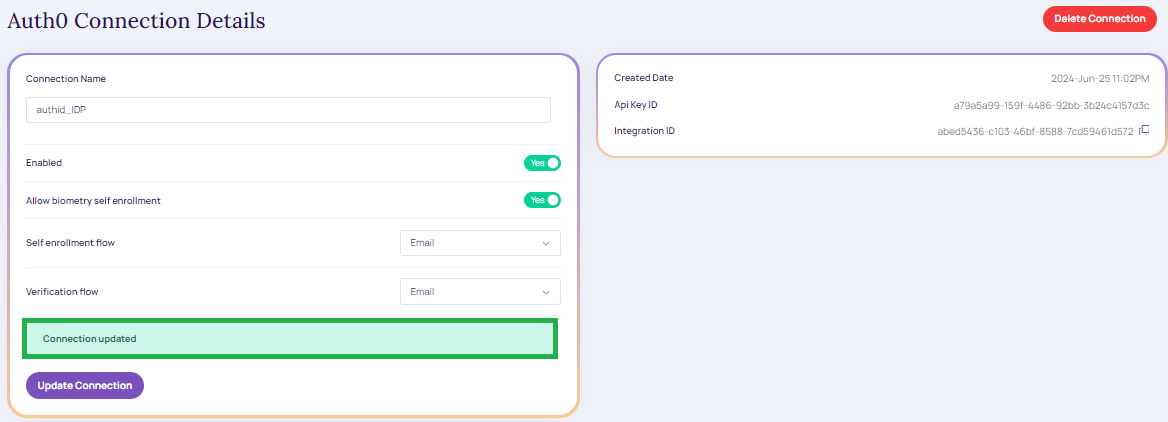
Connection Updated.
Delete Auth0 Connection
To delete Auth0 connection,
- From the existing Auth0 connection grid table, click on the appropriate integration ID the Connection Details screen displays,
Delete Auth0 Connections.
- Click Delete Connection. The below message window displays.
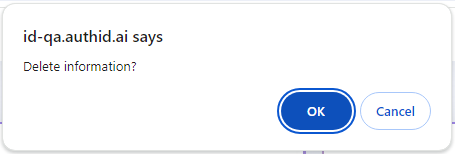
Delete Conformation.
- Click OK to continue to delete the created or existing Auth0 connections.
- Click Cancel to cancel the " Auth0 connections details" screen.
Video Walkthrough
Updated 8 months ago
Did this page help you?