Dynamic User Enrollment
V.1
To create dynamic enrollment workflows, the user must first set up an integration for their account. Click on the Configuration link to reveal the following options panel.
Parameter Descriptions:
- Name: Display name for the integration.
- Enabled: Enables or disables workflows from being initiated.
- Verification Workflow: Defines how users can access the offer flow. 'Inline' allows them to complete the process within the same window or browser, while 'SMS' sends a link to their mobile phone.
- Biometric Enrollment Offer Probability: Likelihood of a user being offered to enroll their biometrics.
- Force Enrollment on Offer Received: Removes the ability to let a user choose to receive their pin code normally. Functions similarly to a Selfie Transaction.
Enrollment Configuration.
DUE – Create Workflow
The Identity Portal can be used to initiate and offer workflow by navigating to Dynamic Enrollment -> Workflows ->
Create Workflow.
Parameter Descriptions:
- Account ID: ID for a Verified user. Used to locate an existing biometric credential to authenticate against.
- Phone Number (Mandatory): Phone number for a user. Required, since they might not receive a biometric
enrollment offer and still need to receive their one-time passcode. - Session Expiration: Time in seconds for a user to complete the flow.
- Email (Optional): Alternate transport mode for an offer flow.
As shown in the screen below:
Create Workflow.
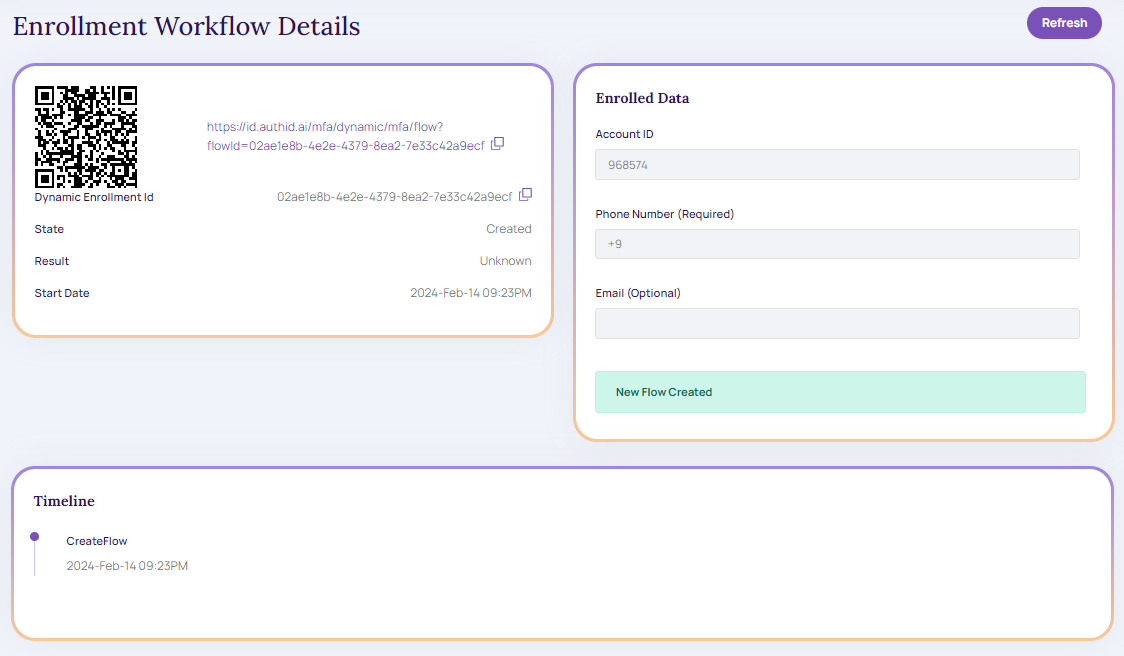
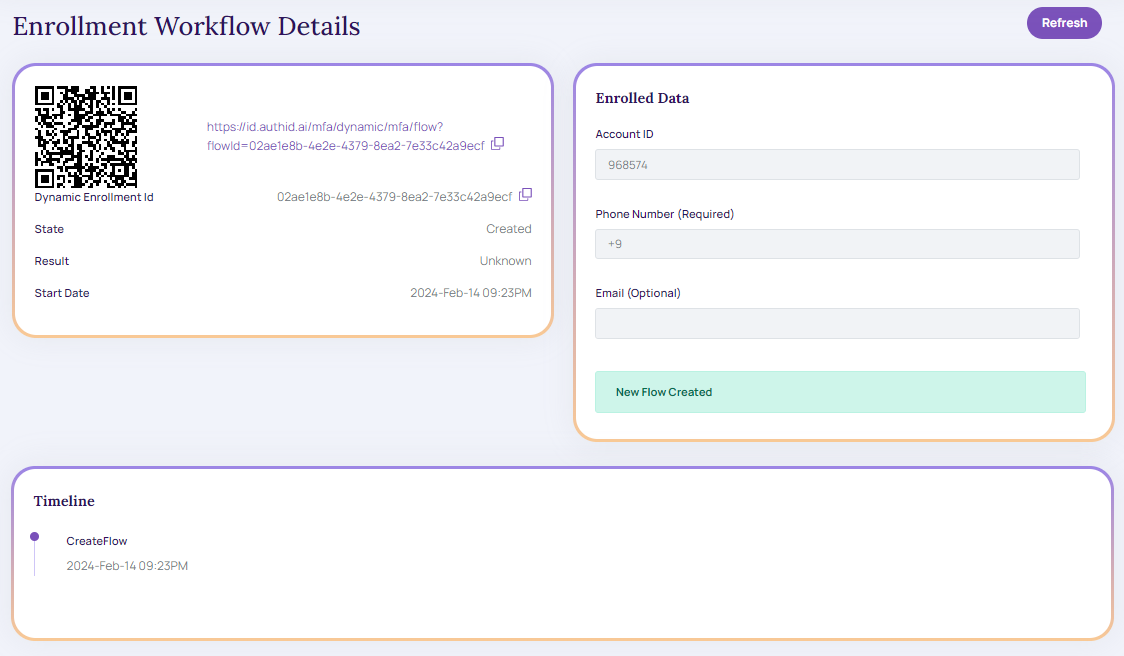
- Click Create. A new flow gets created as in the below screen.

Enrollment Workflow Details.
DUE – View Workflows
The control panel displays the recent transactions in the configured workflow.
Search appropriate Workflow
Users can search specific Enrollment Workflow Details using the below search criteria:
- Specify the search criteria to view the relevant workflows.
- Account ID: Enter the user's unique account ID to view the appropriate workflow.
- Phone Number: Enter the user's phone number.
- State: Choose the desired state from the dropdown list.
- All: It displays all the related status (created, finished, and expired).
- Created: It displays only the Created state workflow.
- Finished: It displays only the Finished state workflow.
- Expired: It displays only the Expired state workflow.
- Result: Select the appropriate result from the dropdown list.
- All: It displays all the results (unknown, success, failed, and error).
- Unknown: It displays only the Unknown Result workflow.
- Success: It displays only the Success Result workflow.
- Failed: It displays only the Failed Result workflow.
- Error: It displays only the Error Result workflow.
- Start Date: Specify the start date from the date picker for which the user wants to view the appropriate workflow.
- End Date: Specify the end date from the date picker for which the user wants to view the appropriate workflow.
- Click Search.
- Reset All: It clears all the filled fields.
Enrollment Workflows.
- Click the more arrow icon or on the dynamic enrollment, it redirects to view Enrollment Workflow Details.

Enrollment Workflow Details.
DUE – Authentication Method: SMS
When SMS authentication is used/selected customers receive an SMS text that contains a temporary password or verification code (OTP), after receiving customer must enter that code.
This is an infographic icon for customer to understand how much secure this method is.
SMS Verification.
Verified screen-print
Verified.
DUE – Authentication Method: Selfie
Selfie authentication offers customers a richer, more secure, and streamlined user experience for verification. Customers receive a text message on their mobile phone with a secure link to be authenticated it happens only once to be enrolled.
Authentication Method: Selfie.
Find the below is an infographic icon for customer to understand how much secure this method is.
Verified Selfie.
DUE – Verified Transaction
Once the customer enrolls using a selfie as an authID method, they only need to take a selfie to be verified.
Verified Transaction.
Updated 3 months ago