
Biometrics Enrollment
Enrollment Transaction Init
- Follow steps 1 to 2 under Initiate a Transaction in Proof Onboarding
- Tap to select the Product as "Enroll Biometry."
- Settings: Enable the 'Check Liveness' option (disabled by default)
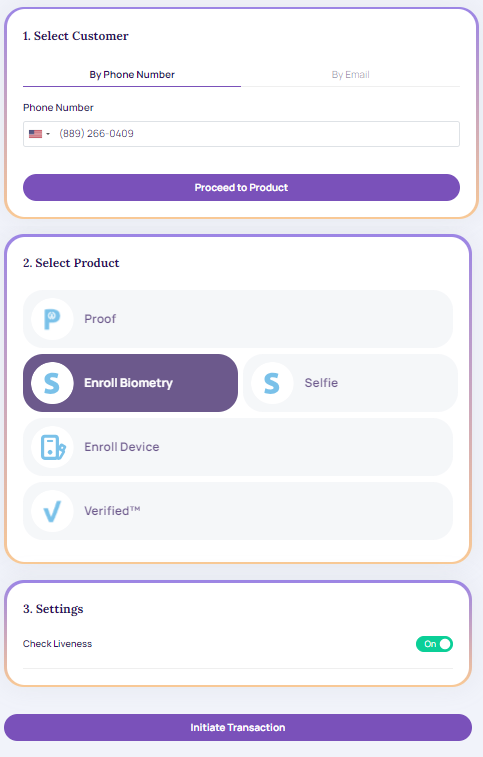
Enroll Biometry
- Click "Initiate Transaction." The developer options are enabled.
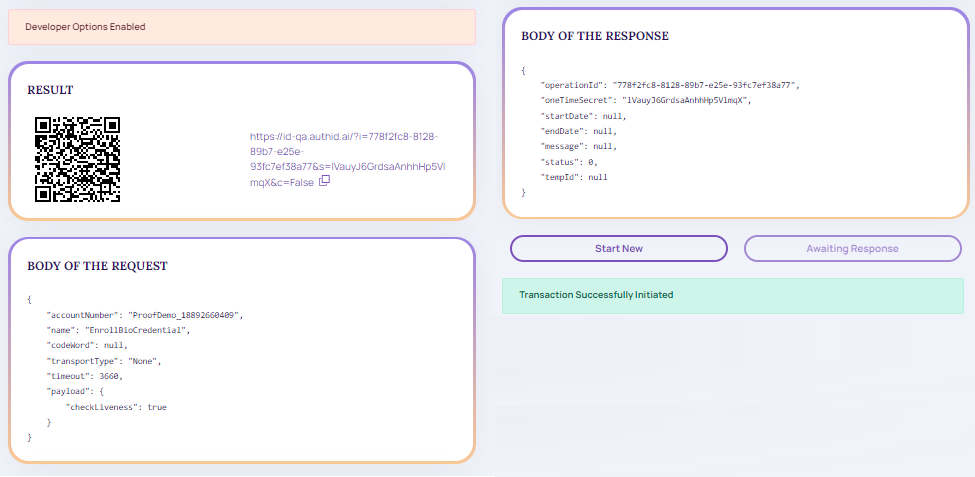
Biometry Developer Options Enabled
- Click the results link. The 'Take a Selfie' screen will appear.
- Click "Agree and Continue."
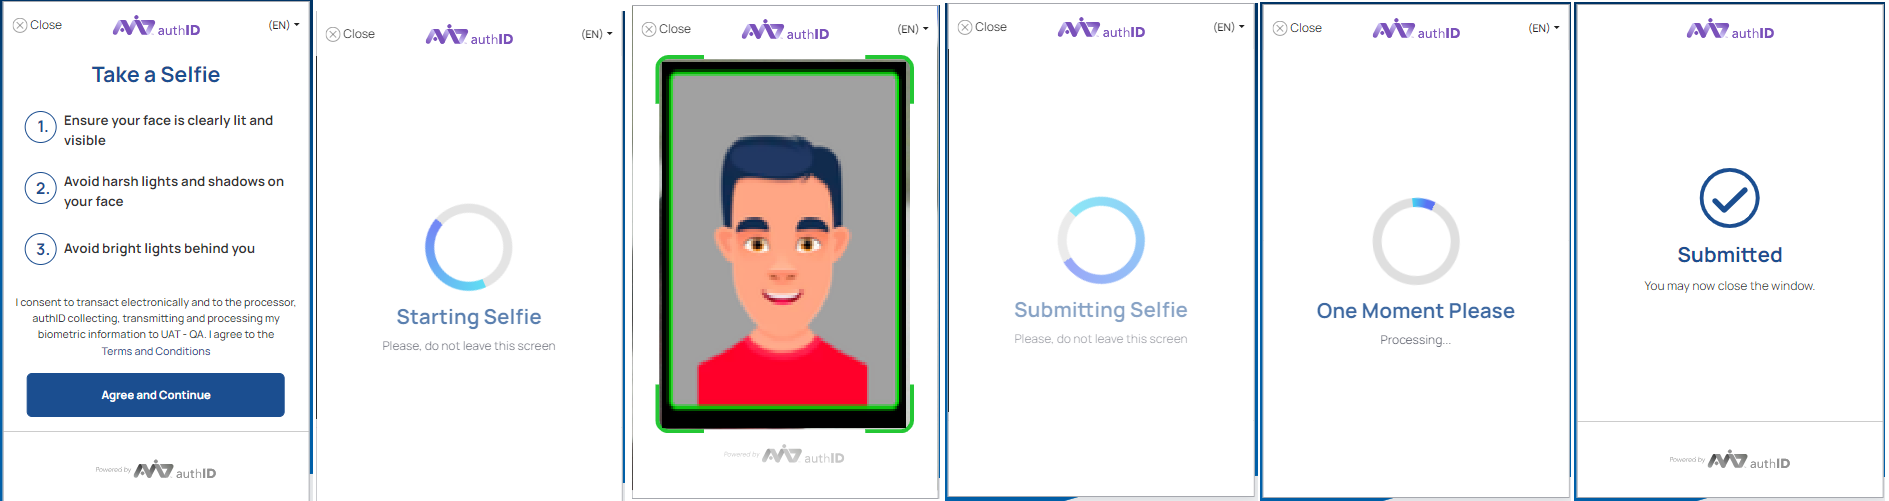
Take a Selfie
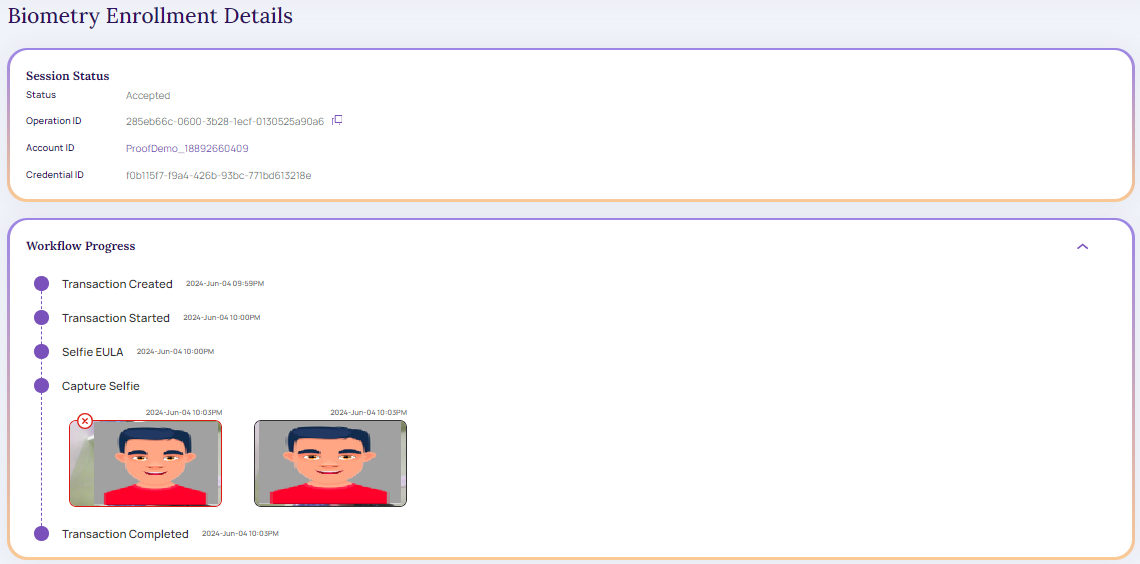
Enrollment Details Srceen
-
After successful selfie submission, the system redirects to the Biometry Enrollment Details screen.
-
On the Biometry Enrollment Details screen, the user can view the session status and workflow progress details.
Biometry Enrollment Details
-
Refer to the User Account for more details.
Updated 3 months ago
Did this page help you?