
Settings
General Settings
The Settings page is where you can configure and manage the services and options offered or displayed within the Identity Portal.

General Settings.
Verified
- Liveness Default Enabled: Enabling this option forces a liveness check when running a verification transaction through the Identity Portal.
- Allow Override Liveness Default Enabled: The user can disable the liveness check when running a verification transaction through the Identity Portal.
- Default Timeout, sec: The timeout for verification transactions initiated through the Identity Portal.

Verified.
Devices
- Push Notification Option Enabled: This allows transactions to be sent to a mobile device with the AuthID app installed.
- Allow Mobile Accounts Registration Enabled: A user can register for a Verified account when completing a transaction through the AuthID app.

Devices.
Account Lockout Options
- Enabled: Turns account lockout on or off.
- Max Failed Attempts: The number of failed attempts that triggers a lockout.
- Failed Attempts Timeout: The rolling window (in seconds) within which Max Failed Attempts is counted.
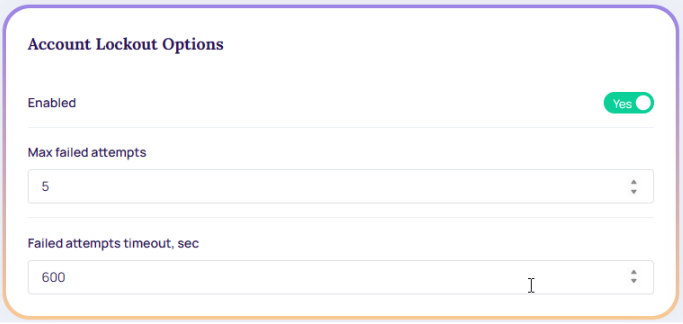
Account Lockout Options.
Lockout Behavior
If a user exceeds Max Failed Attempts within the Failed Attempts Timeout window, the account is deactivated and the corresponding Reason is recorded. Clicking Reason Why? displays "Reached the maximum transaction confirm attempts."
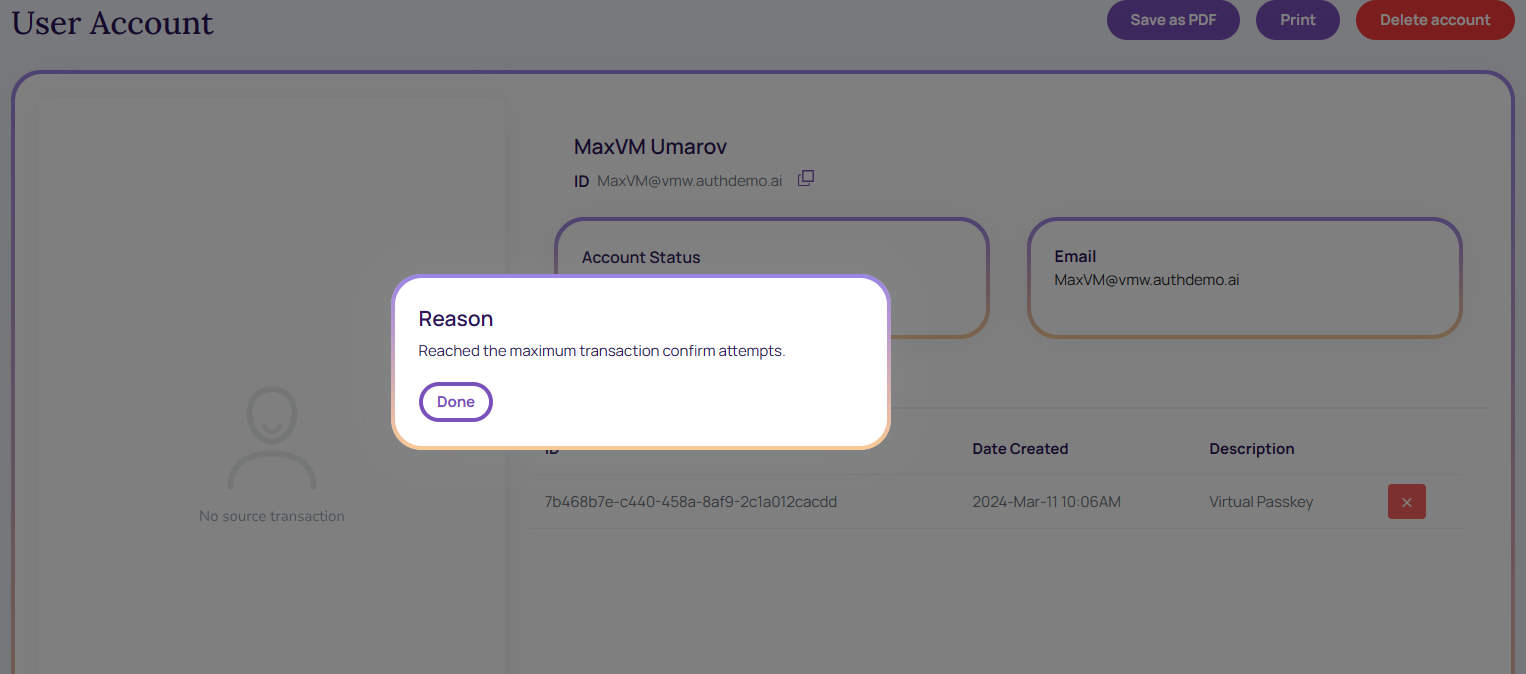
Corresponding Reason Message.
Disabled accounts can't be used for authentication:
- API: Creating an authentication transaction for a disabled account returns HTTP 409 Conflict.
- OIDC: The client application receives an error, and automatic authentication is rejected.
How to re-enable the account
A deactivated account can be reactivated through the API or from the Identity Portal.
- List disabled accounts — poll
GetAccountListwith the OData filterDeletedDate eq null and Enabled eq false. - Reactivate an account — call
EnableAccount, or in the Identity Portal open the user's account and switch Account Status from Deactivated to Active.
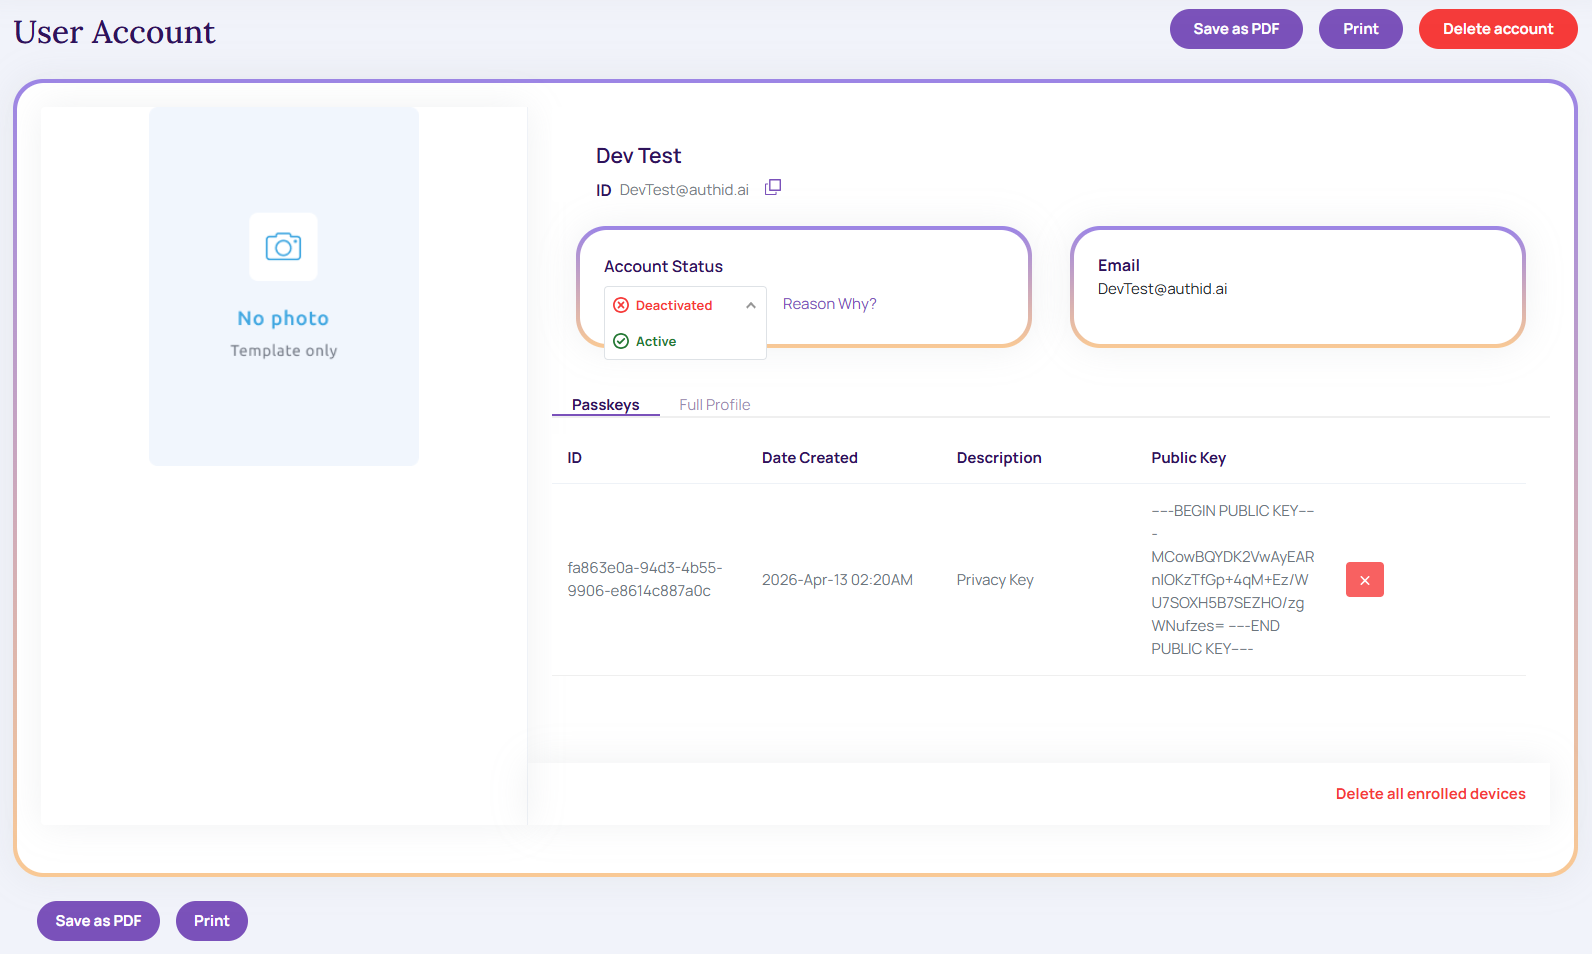
Activating an account in the Identity Portal.
Proof Portal Settings
- Additional Verification Default Enabled: It automatically runs additional document verifications when running a proof transaction through the Identity Portal.
- Auto Enroll on Proof Success: It enables automatically and creates a Verified account using a concatenated version of the phone number or email address when running a proof transaction through the Identity Portal.
- Default Document Type: By default, the documents are running a proof transaction through the Identity Portal.
- Allow Document Types: The configurable list of documents you can use in a proof transaction.
- Default Timeout, sec: The timeout for proof transactions initiated through the Identity Portal.
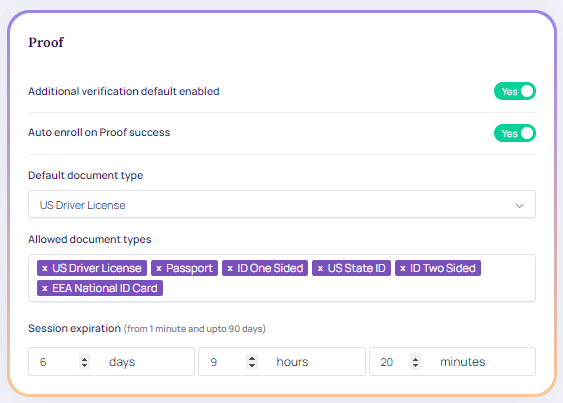
Proof.
Transactions (Verified) Portal Settings
- No prefix: (Portal only) Normally, the Identity Portal adds a prefix to designate accounts created via the portal versus accounts created elsewhere. Turning this off removes the prefix from any account going- forward.
- Alternative Contact Method Selection Enabled: It enables adding a new modality of delivery for transactions initiated through the Identity Portal, which only applies to Verified API V2 transactions.
- Enable Developer Options: Displays basic debugging data after initiating a transaction in the Identity Portal, e.g. request body content, QR codes, and web links to the BioWebApp interface.
Developer ModeDeveloper mode prevents the sending of transactions via SMS and email. Instead, the developer receives the URL within the authID Identity Portal.
- Default Country for Phone Number: The country code is to be appended to a phone number for transactions initiated through the Identity Portal.
- API Version: (Portal only) dictates whether the portal must use the V2 API.
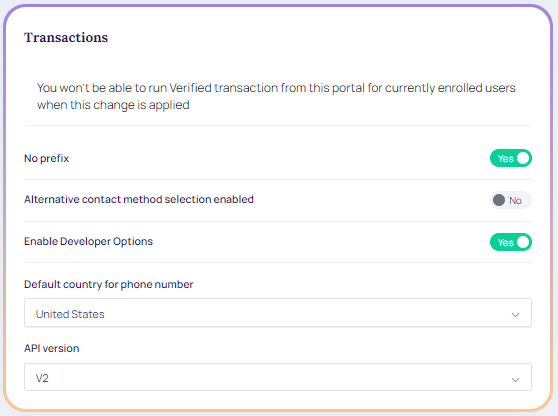
Transactions.
Upload Logo
On the Settings page, it is possible to upload the customer's logo and it is displayed at the top of the Identity Portal.
Return to Contents.
- Go to the Settings page.
- Click General.

Customize Logo Upload.
- In the Customer Logo field, click the Browse and select the appropriate image file.
Browse.
- Once the logo image is selected, click the Saveand a Success message is displayed.

Success.
- To View the uploaded logo at the top of the Identity Portal page.

Identity Portal Page.
My API Keys
Access to the authID Identity Portal is provided using passwordless credentials with cloud biometric authentication for credential recovery. These are user credentials and cannot be used for machine-to-machine API authentication. This is by design.
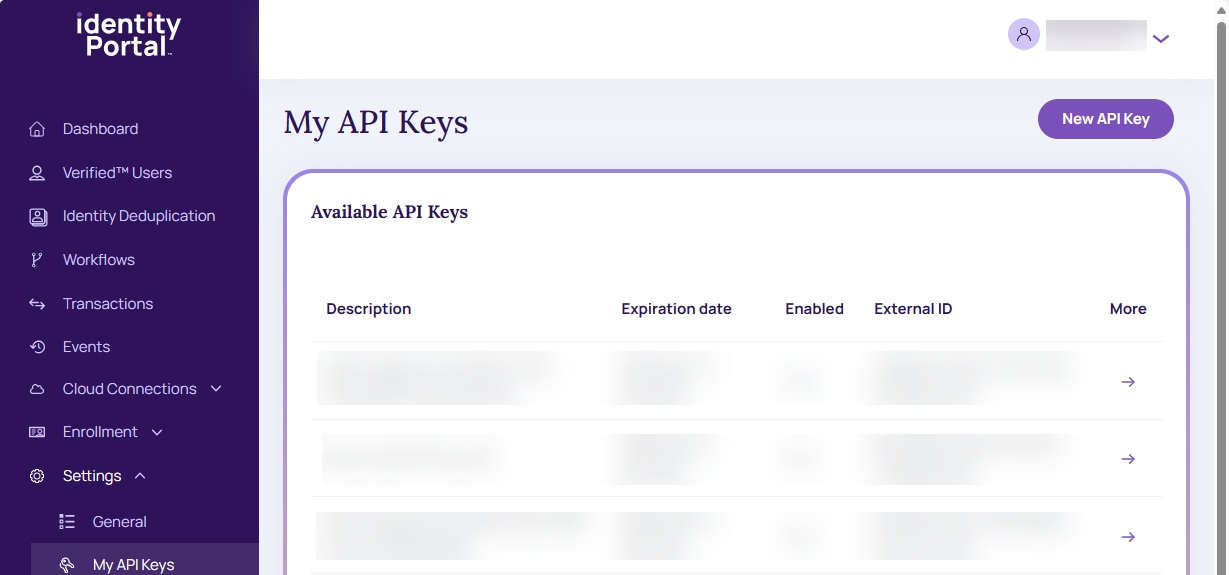
You can see the API Keys you've previously created and create new API keys using this portal page:

My APIKeys.
Create a New API Key
- To create a new API key, click the New API Key.
New API Key.
- The New Portal User API Key screen displays.
- Enter the description.
- Select the expiration date from the calendar.
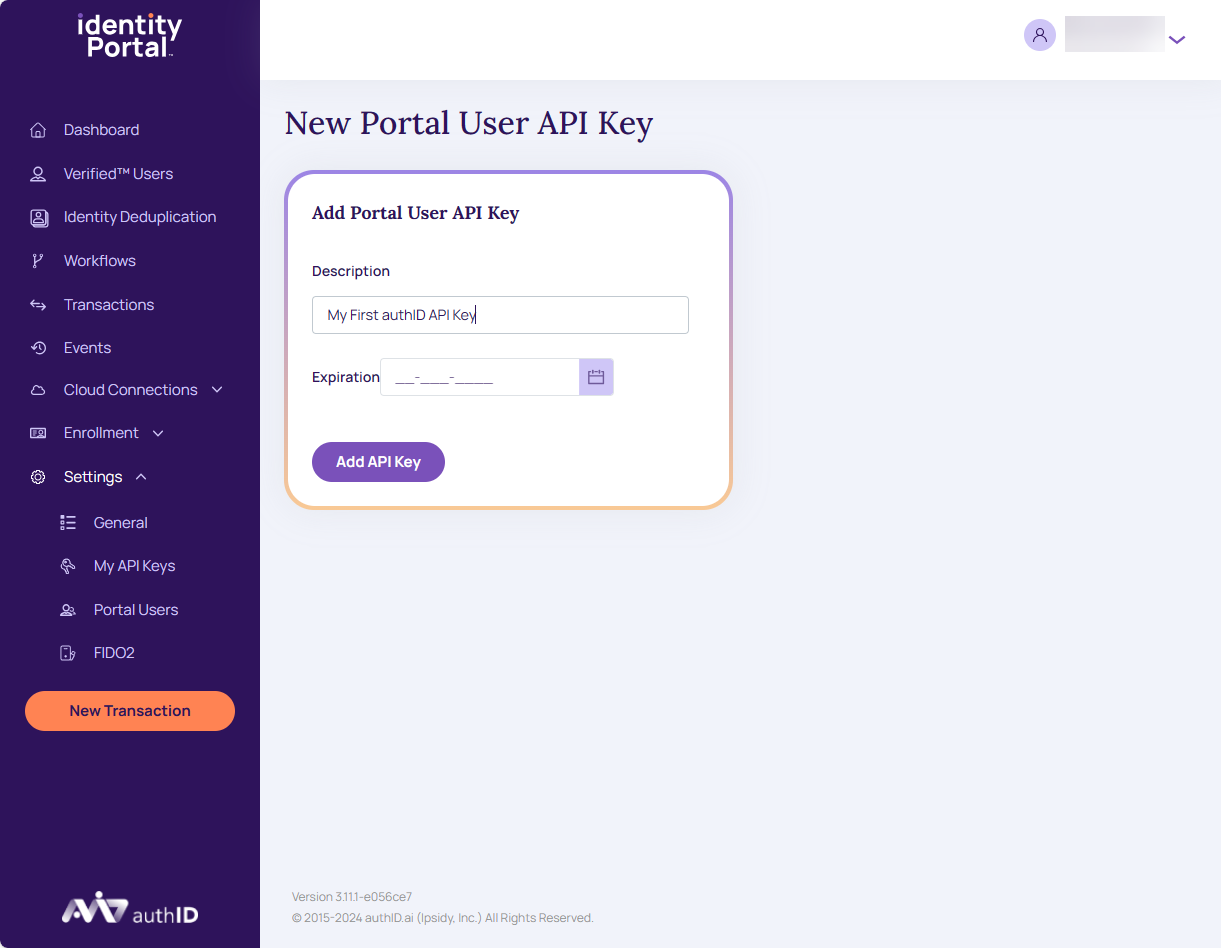
New Portal User API Key.
- Click Add APIKey.
- The portal displays the newly generated API Key ID (External ID) and Value that must be captured before navigating away since the Identity Portal does not retain these.
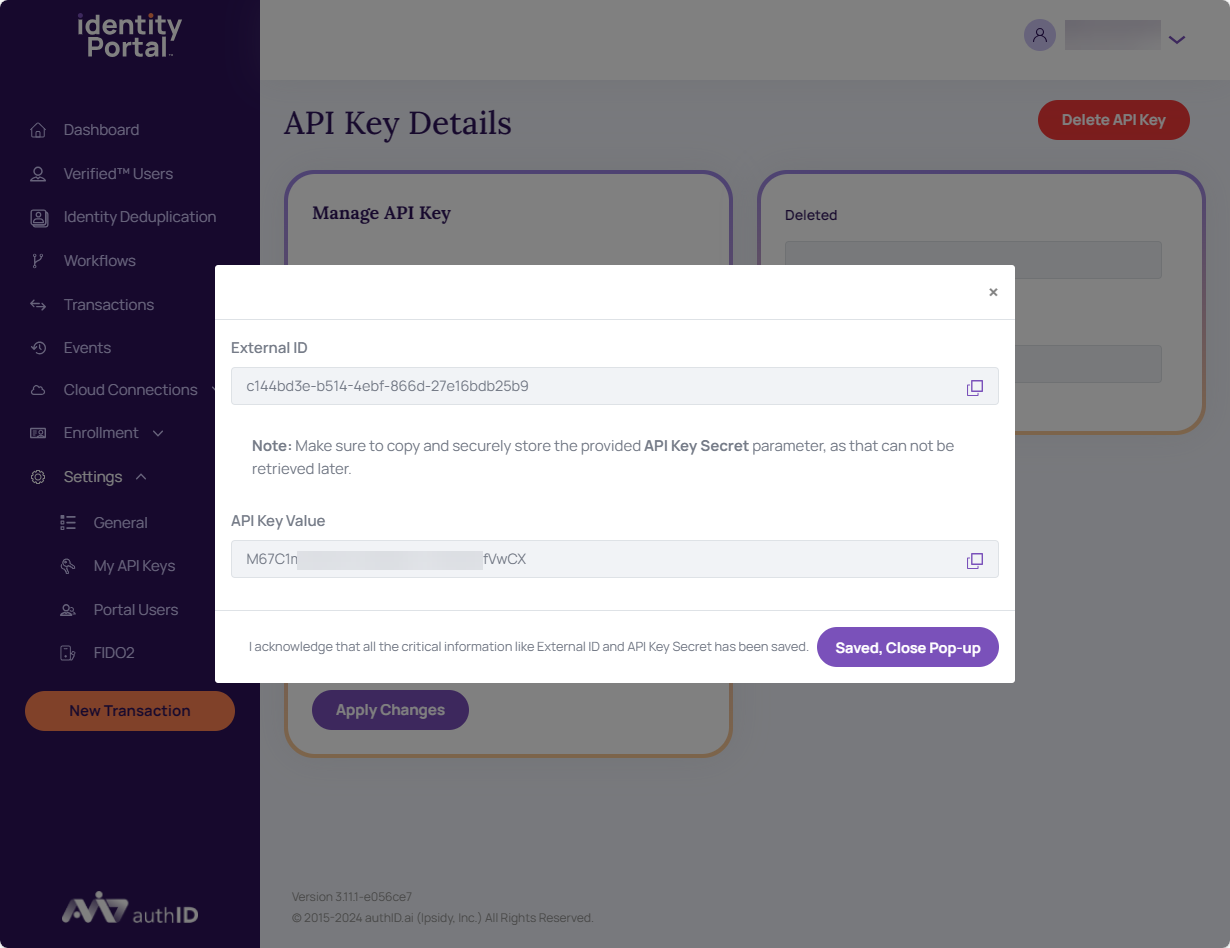
Added APIKey.
- From the created API Key, the user can copy the external ID and API Key Values. Click the close icon.
- The API Key Details screen displays

API Key Details.
- By default, the Manage API Key screen is Enabled.
- To Disable the Manage API Key, the user can click the radio button, provide the Disabled Reason, and click Apply Changes.

Apply Changes.
- Once created, the API Key appears in the Available API Keys screen.

Available API Keys.
Delete the API Key
To delete the API Key,
- Click Delete API Key,

Delete API Key.
- A confirmation pop-up displays: Delete Information.
- To confirm the deletion, click OK.
- Click Cancel. It redirects to the API Key Details screen.
Portal Users
Access to a specific online platform or portal is granted to users who are identified as Portal Users. Portal Users are those who can access a specific portal or web-based application. This access is often granted based on user roles, permissions, or other criteria defined by the organization or system administrator.
Create a New User
- Navigate to Settings -> Portal Users.
- Click New User.
- In the General Profile section, in the left panel
Enter the email ID in the Email field. - Enter the User Login.
- Enter the Name.
- Enter a Description.
- Enter a Phone number.
- Toggle Send Email Notification between Yes or No.
- In the right panel:
From the drop-down select the appropriate Roles. - Choose the Password expiration date UTC.
Note: Password Lifetime (in days, 0 - infinite password)
- Select First Factor Authentication as Password or Passwordless.
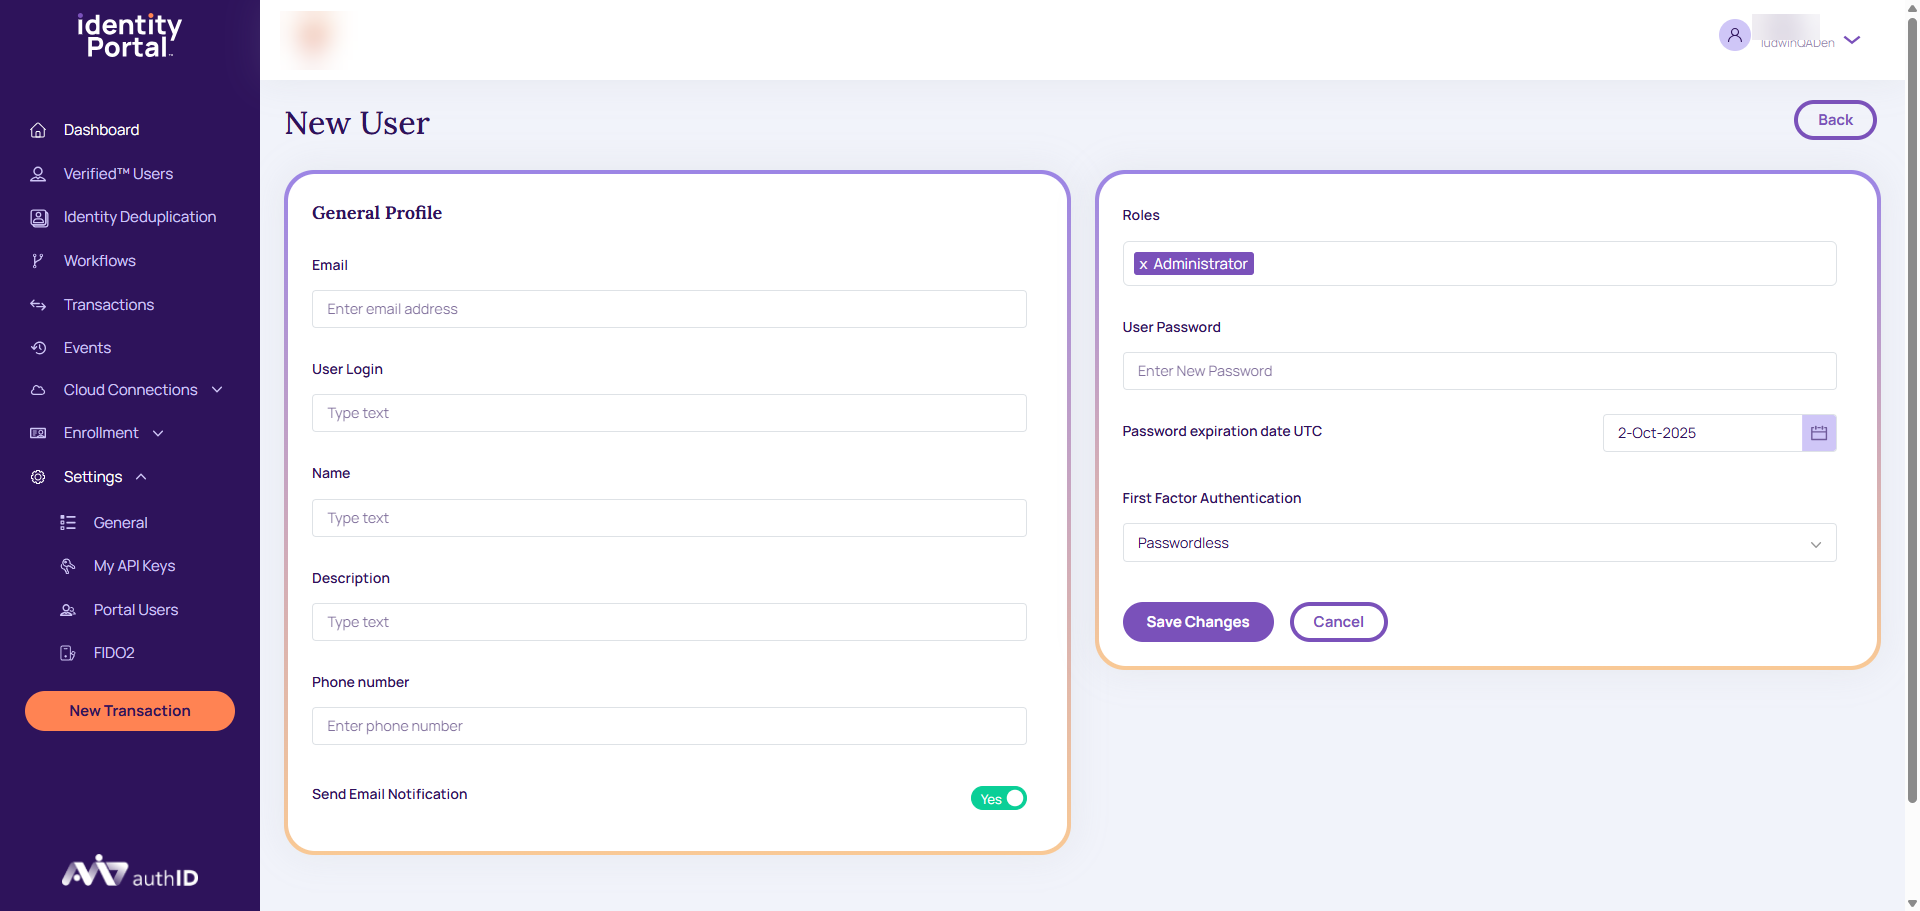
New User
- Click Save Changes. The user gets created, as in the below screen.

Portal Users.
Note:When seeing a user, you will also see the External ID, along with the date of creation and deletion, if any.
Search Portal User Database
Users can search specific Portal User Database details using the below search criteria:
- Specify user search criteria to view the appropriate workflows,
- User Login: It displays the logged-in user name.
- Email: Email ID of the logged-in user.
- Enabled: To enable the logged user.
- Disabled: To disable the logged-in user.
- Include Deleted Users: If Yes, it displays the deleted user. If No, it do not display the deleted user.
- Click Search.
- Reset All: It clears all the filled fields.
FIDO2 Server Settings
Along with support for all FIDO2-compliant passkeys, the Identity Portal now provides the ability to set global overrides for your FIDO2 enrollment or authentication transactions.
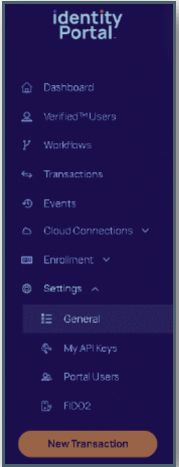
These settings are found under Settings > FIDO2 in the Identity Portal. Below is a screenshot showing the options available to override:

FIDO2.
Override Global Default
To change the default settings for each FIDO2 transaction, the user must override the settings for each transaction.
User Enrollment
The following settings apply to FIDO2 enrollment transactions.
Allowed Authenticator Type
- All: Instructs the browser to accept all forms of authenticators. When this option is turned on, the user must be able to sign up for cross-platform authenticators like external security keys or native authenticators like phones and desktop computers.
- Platform: Instructs the browser to allow the enrollment of a platform authenticator only.
- Cross-platform: Instructs the browser to allow the enrollment of an external authenticator only.
User Attestation
- None: The FIDO server will not request metadata attestation from the authenticator.
- Direct: Convey the authenticator's AAGUID and attestation statement, un-altered, to the Relying Party.
- Indirect: The client MAY replace the AAGUID and attestation statement with a more privacy-friendly and/or more easily verifiable version of the same data (for example, by employing an Anonymization CA).
User Verification
These values today are ignored by most devices, and despite what the server says, get overridden to required. The only time these apply is for custom CTAP clients.
Register with Resident Key
- Not Required: The authenticator will generate a non-resident key.
- Required: The authenticator will generate a resident key. Generally, when it is enabled not ask for a username.
For more information refer to FIDO2 - Enroll
User Authentication
The following settings apply to FIDO2 authentication transactions.
User Verification
These values today are ignored by most devices and despite what the server says, get overridden to required. The only time these apply is for custom CTAP clients.
Relying Party ID
This is the domain where users will register their FIDO2 passkeys with. This domain must match the location where the transaction is being hosted. For example, if you are hosting the FIDO2 enrollment on example.com, you must set the relying party ID to that value. Be sure to include the protocol, i.e. HTTPS.
For more information refer to FIDO2 - Enroll
Updated 2 months ago