
Enroll FIDO2 Credential (Passkey)
Device Enrollment Procedure
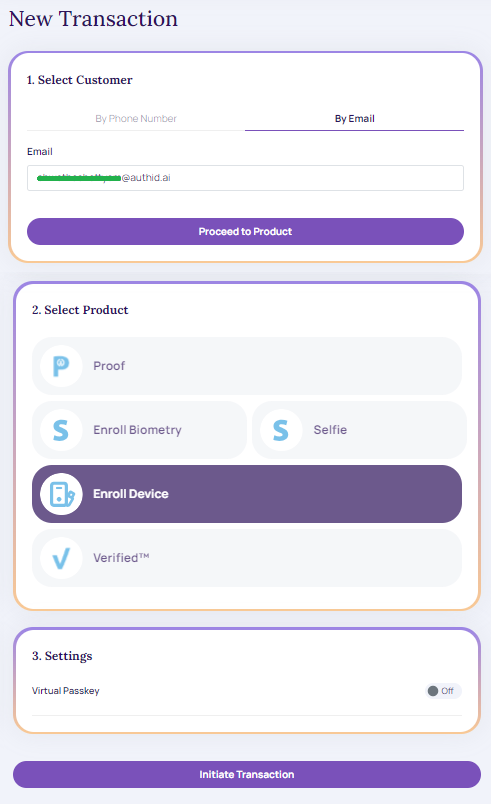
- Follow steps 1 to 2 under Initiate a Transaction in Proof Onboarding
- Tap to select the Product as "Enroll Device."
- Settings: The Virtual Passkey option is disabled by default.
.
Device Enrollment
- Click "Initiate Transaction" to enable developer options.
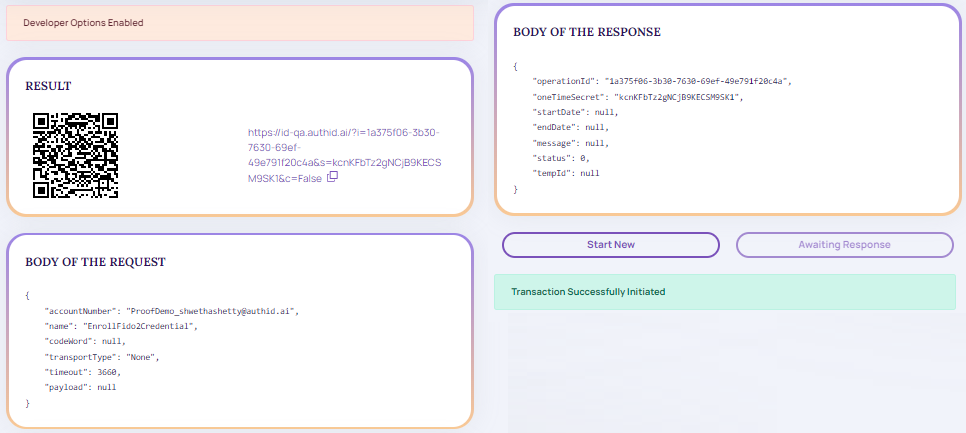
Developer Options: Enabled
- Click the results link to display the 'Add Device' screen.
- Click "Add Device Passkey" to view the confirmation screen.
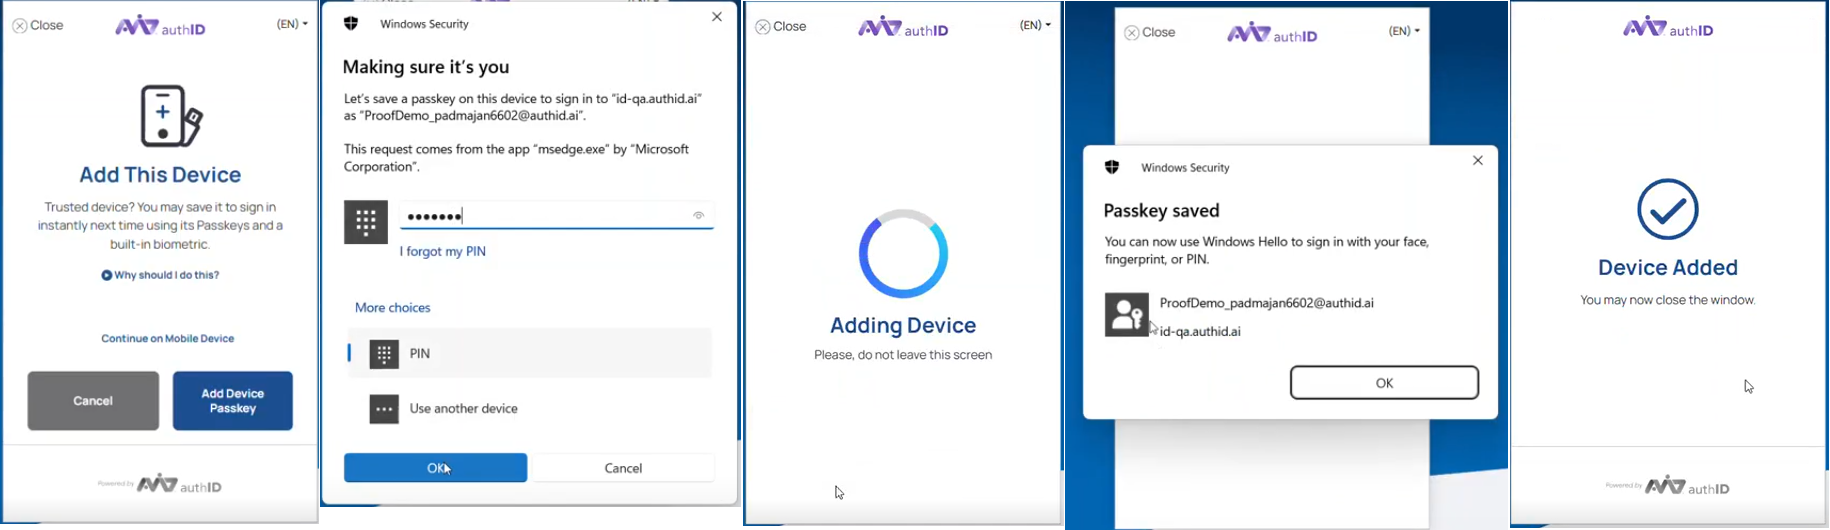
Device Added
- After successful device addition, the system redirects to Device Enrollment Details. as shown on the screen below.
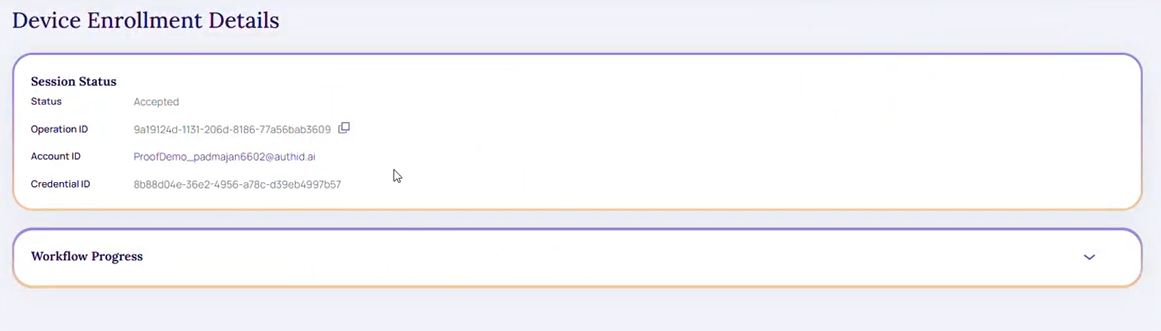
Device Enrollment Details
- Click the Account ID link to access the User Account section.