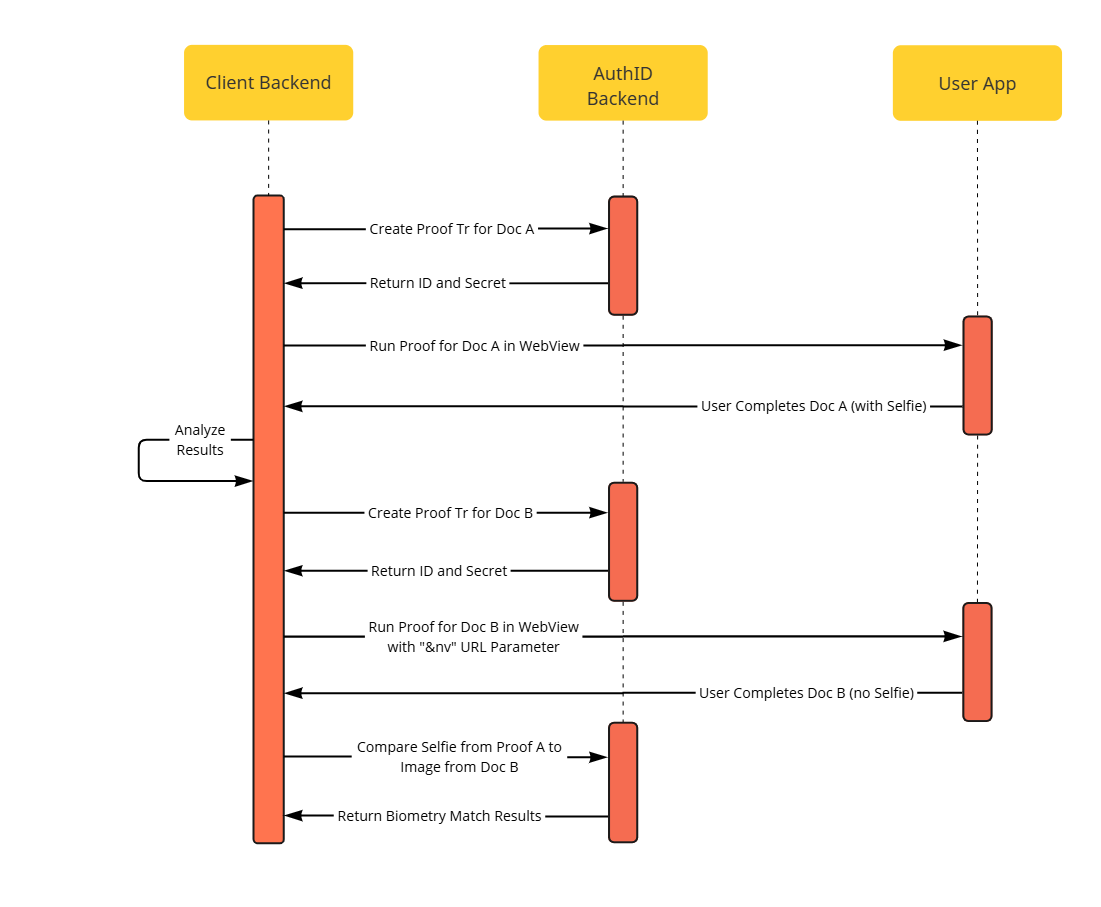
Onboarding with Multiple Documents
V.1
In certain onboarding scenarios, collecting multiple documents from a user may be required. Follow the steps below to streamline this process:
-
Initial Proof Transaction:
- Perform a standard Proof transaction with the primary document.
-
Secondary Proof Transaction:
- Execute an additional Proof transaction for the secondary document.
-
Selfie Comparison for Secondary Document:
- Use the Verify ID Document Owner API to compare the selfie collected during the primary document Proof transaction with the data from the secondary document.
This approach ensures a streamlined user experience by eliminating redundant selfie requests.
The Verify ID Document Owner API requires both a document and a selfie as input:
-
Copy the selfie data from the primary document (Doc A), located in
Payload.Data.CurrentFacialImage, and include it in the POST body as the input forFacialImage. -
Copy the document data from the secondary document (Doc B) and include it in the POST body as the input for Document.
The response provides complete Proof result details for Doc B, as though the selfie acquisition step had been included. This enables developers to analyze the secondary document's Proof results using the same logic and code as for the primary document.

Onboarding with Multiple Documents
Updated 29 days ago