The goal of authID's "Proof" mobile biometric identity verification system is to make identity verification faster, safer, and more efficient. Using cutting-edge facial biometric technology, this service enables users to verify their identities with their mobile devices.
Proof by authID uses biometric technology to enhance security, accelerate verification, and provide reliable remote identity confirmation. This is especially valuable when traditional in-person verification is either less secure or impractical.
📘
Proof Transaction
Do not include a leading zero in the mobile number.
Supported documents may vary depending on your setup.
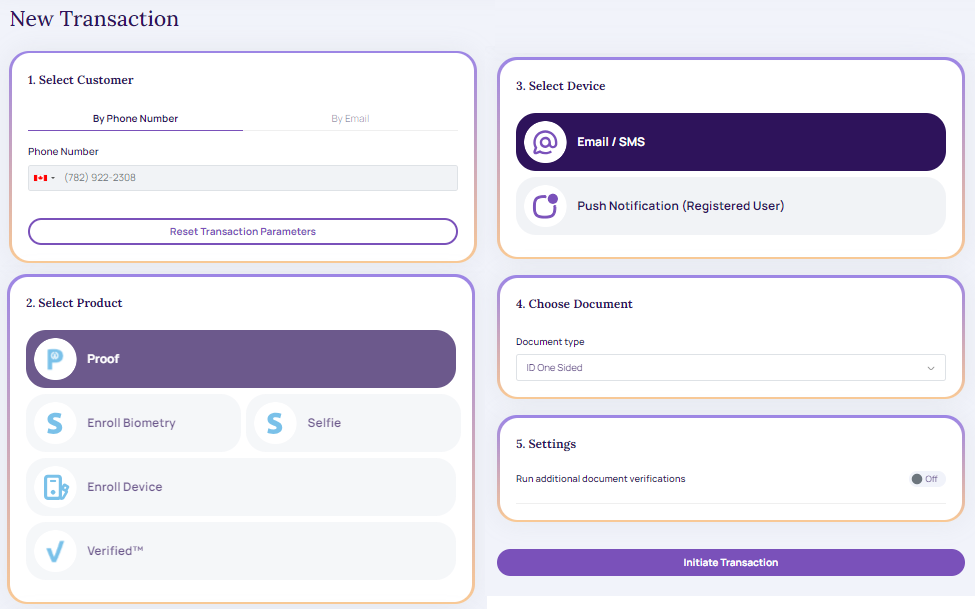
Initiate a Transaction
The Transaction is a procedure or activity of user authorization, authentication, or any action involving modifications to user profiles or access rights.
Go to the Identity Portal and click "New Transaction."
There are two ways to proceed with the customer:
By Phone Number
By Email
New Transaction
By Phone Number
Select the country code (by flag) from the drop-down.
Enter the user's phone number.
By Email
Enter the user's email.
Select Product
Click "Proceed to Product."
Tap Select to Product as Proof.
Select Device (transaction delivery method).
Proof BY Phone Number
Tap Email/SMS.
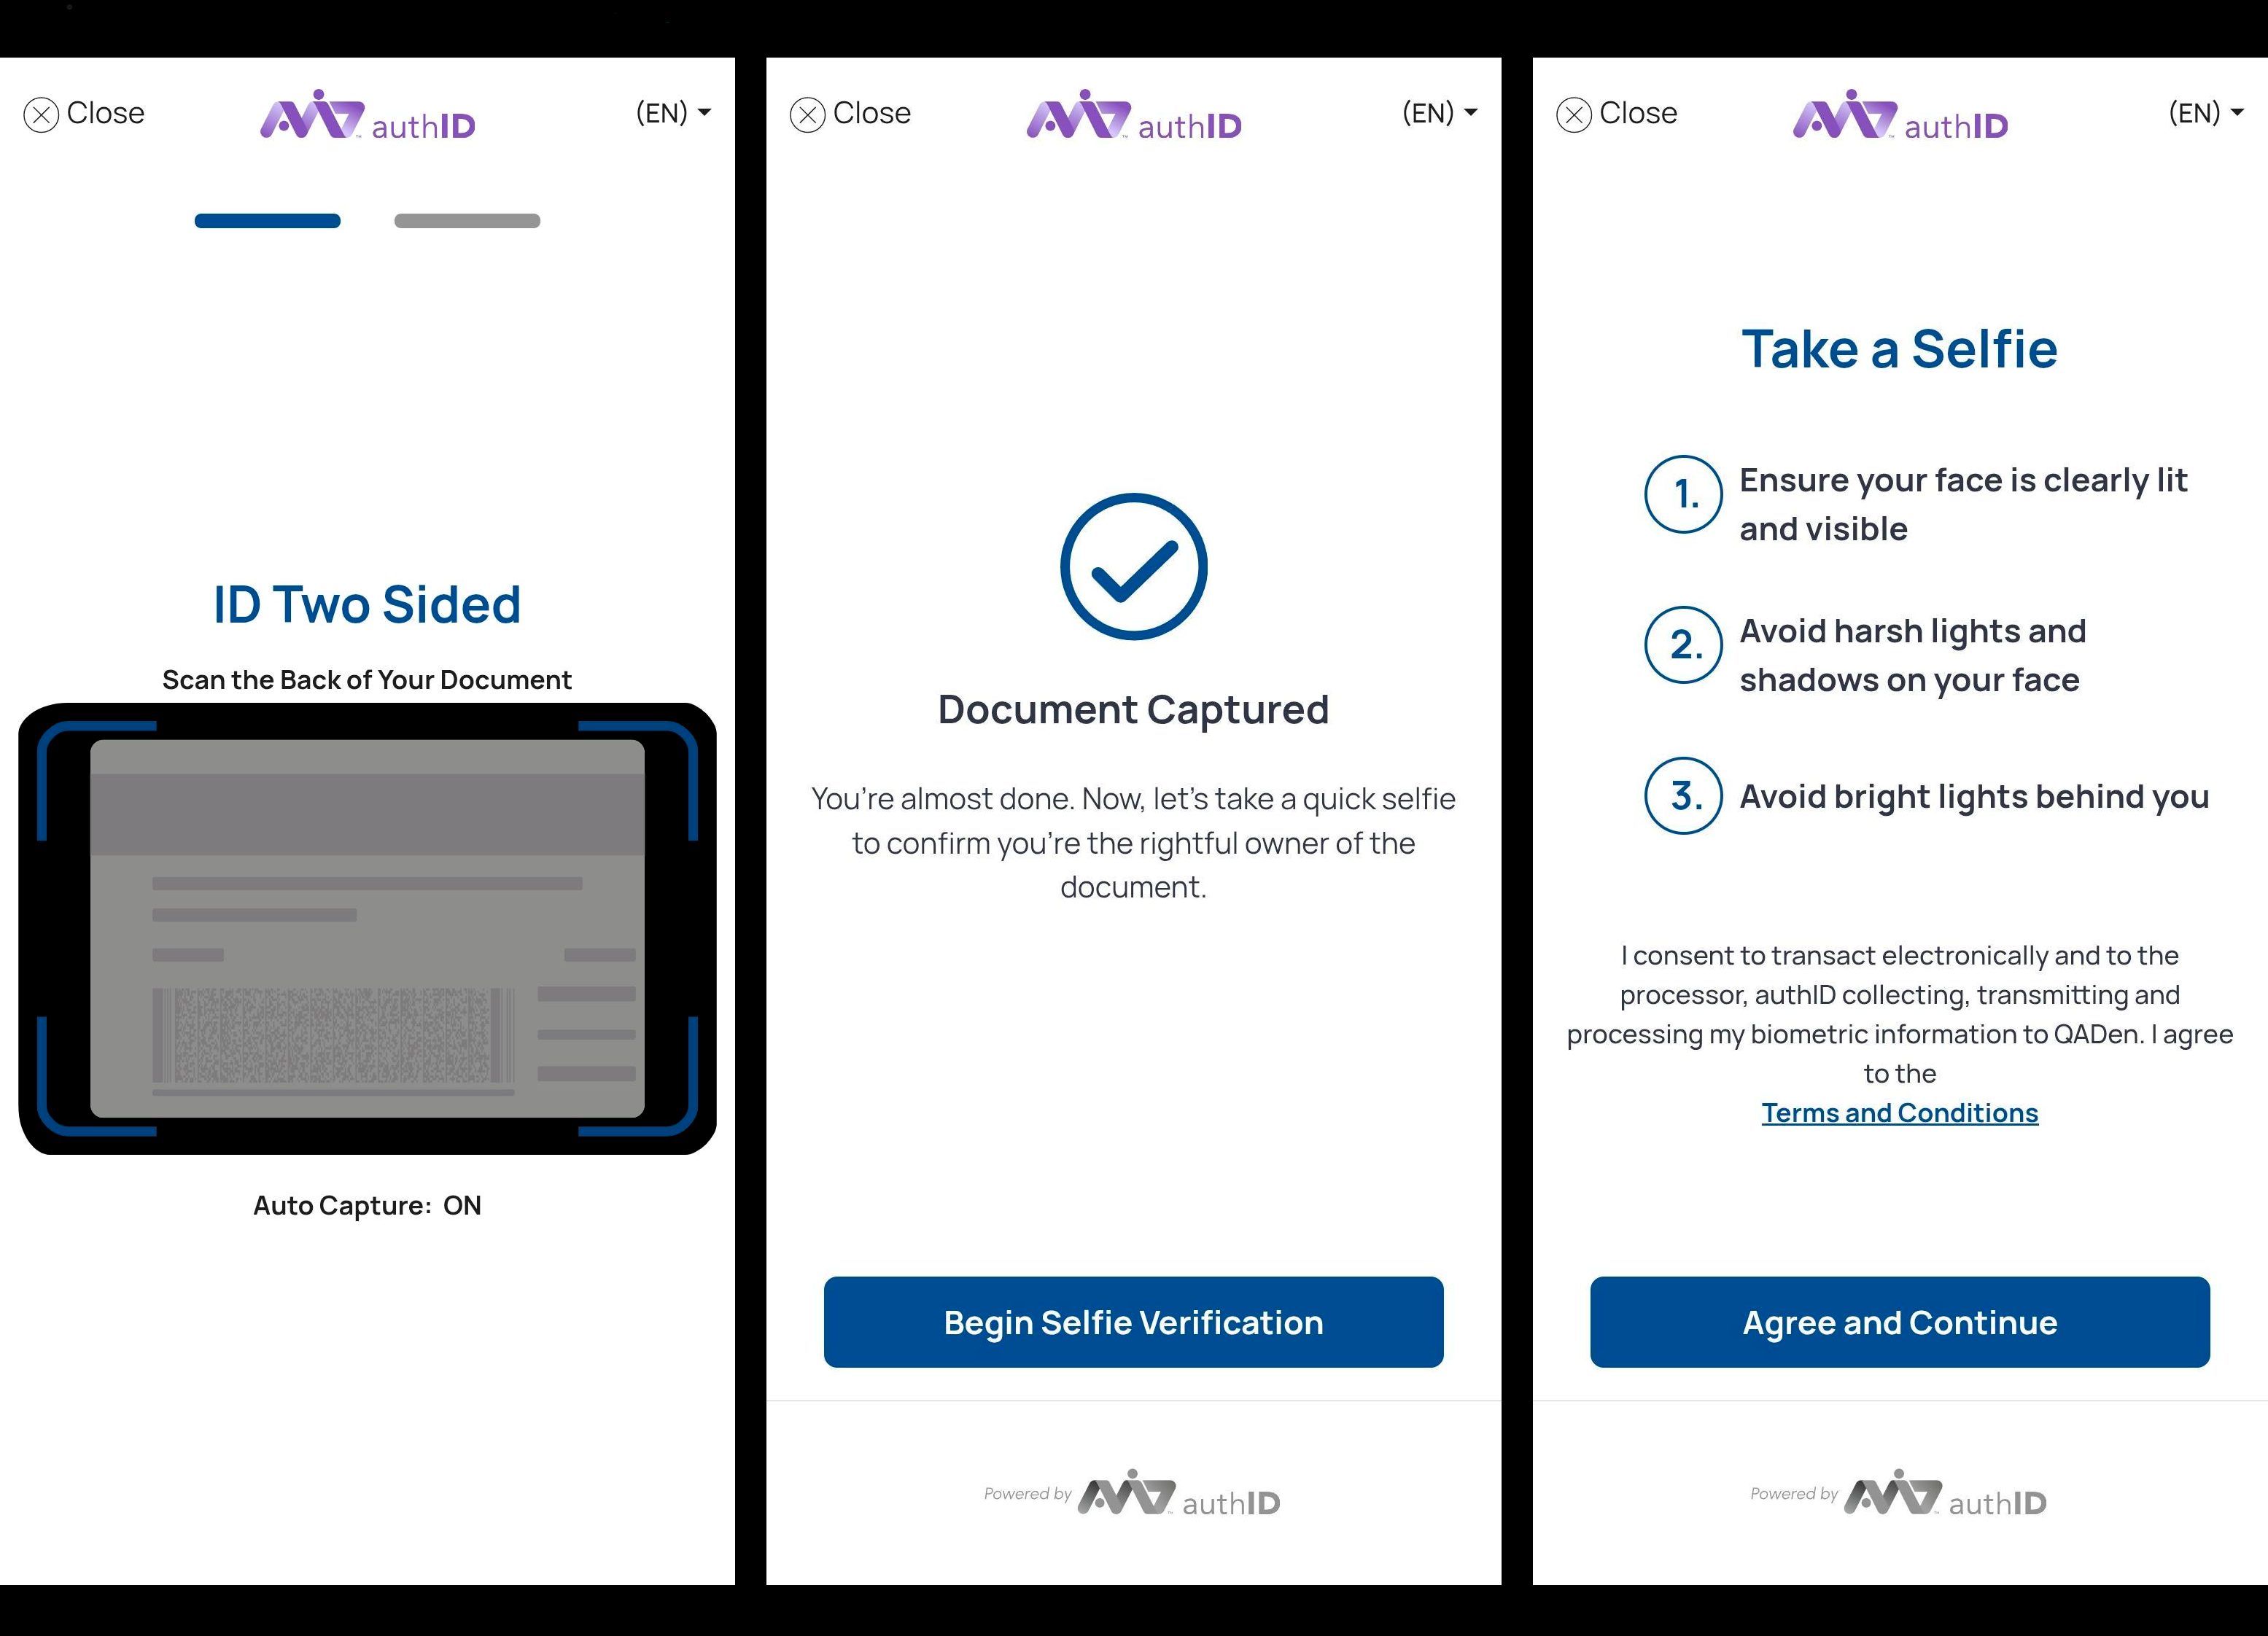
Choose a Document Type from the dropdown list.
Settings: By default, the run additional document verification radio button is set to OFF; set it to ON.
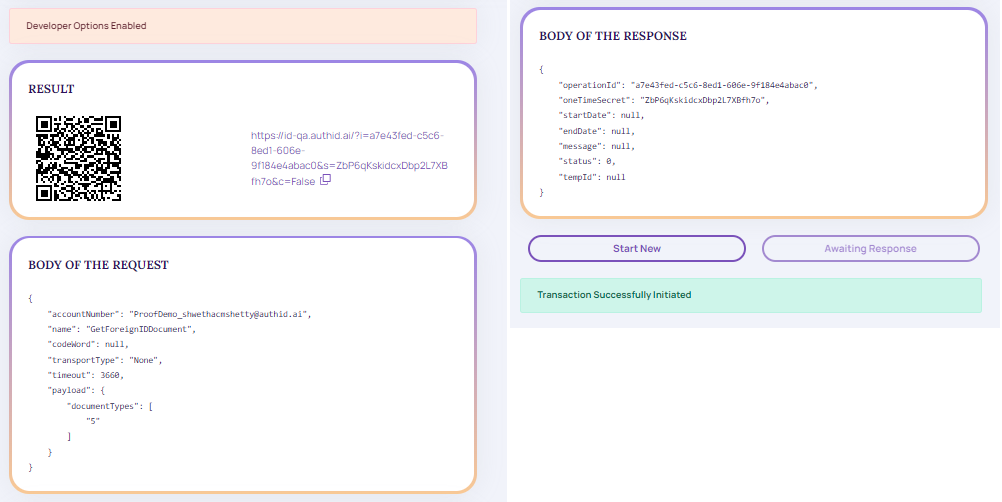
Click "Initiate Transaction." The developer options are enabled.
Developer options are enabled.
🚧
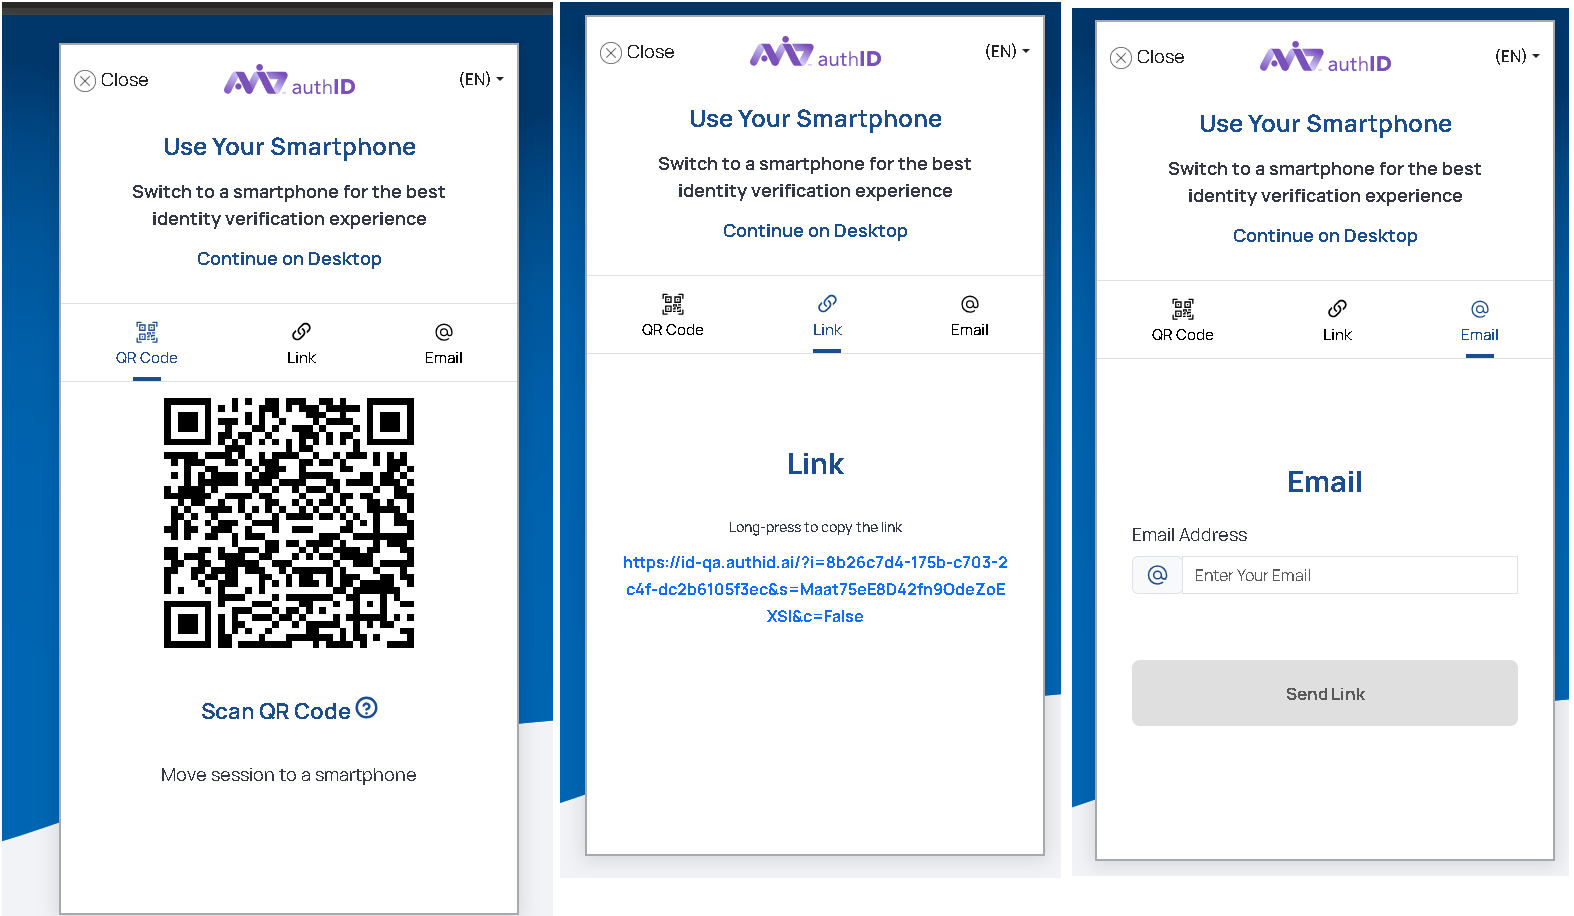
We recommend switching to a mobile device for better experience.
Device Handoff.
Click Continue on Mobile Device.
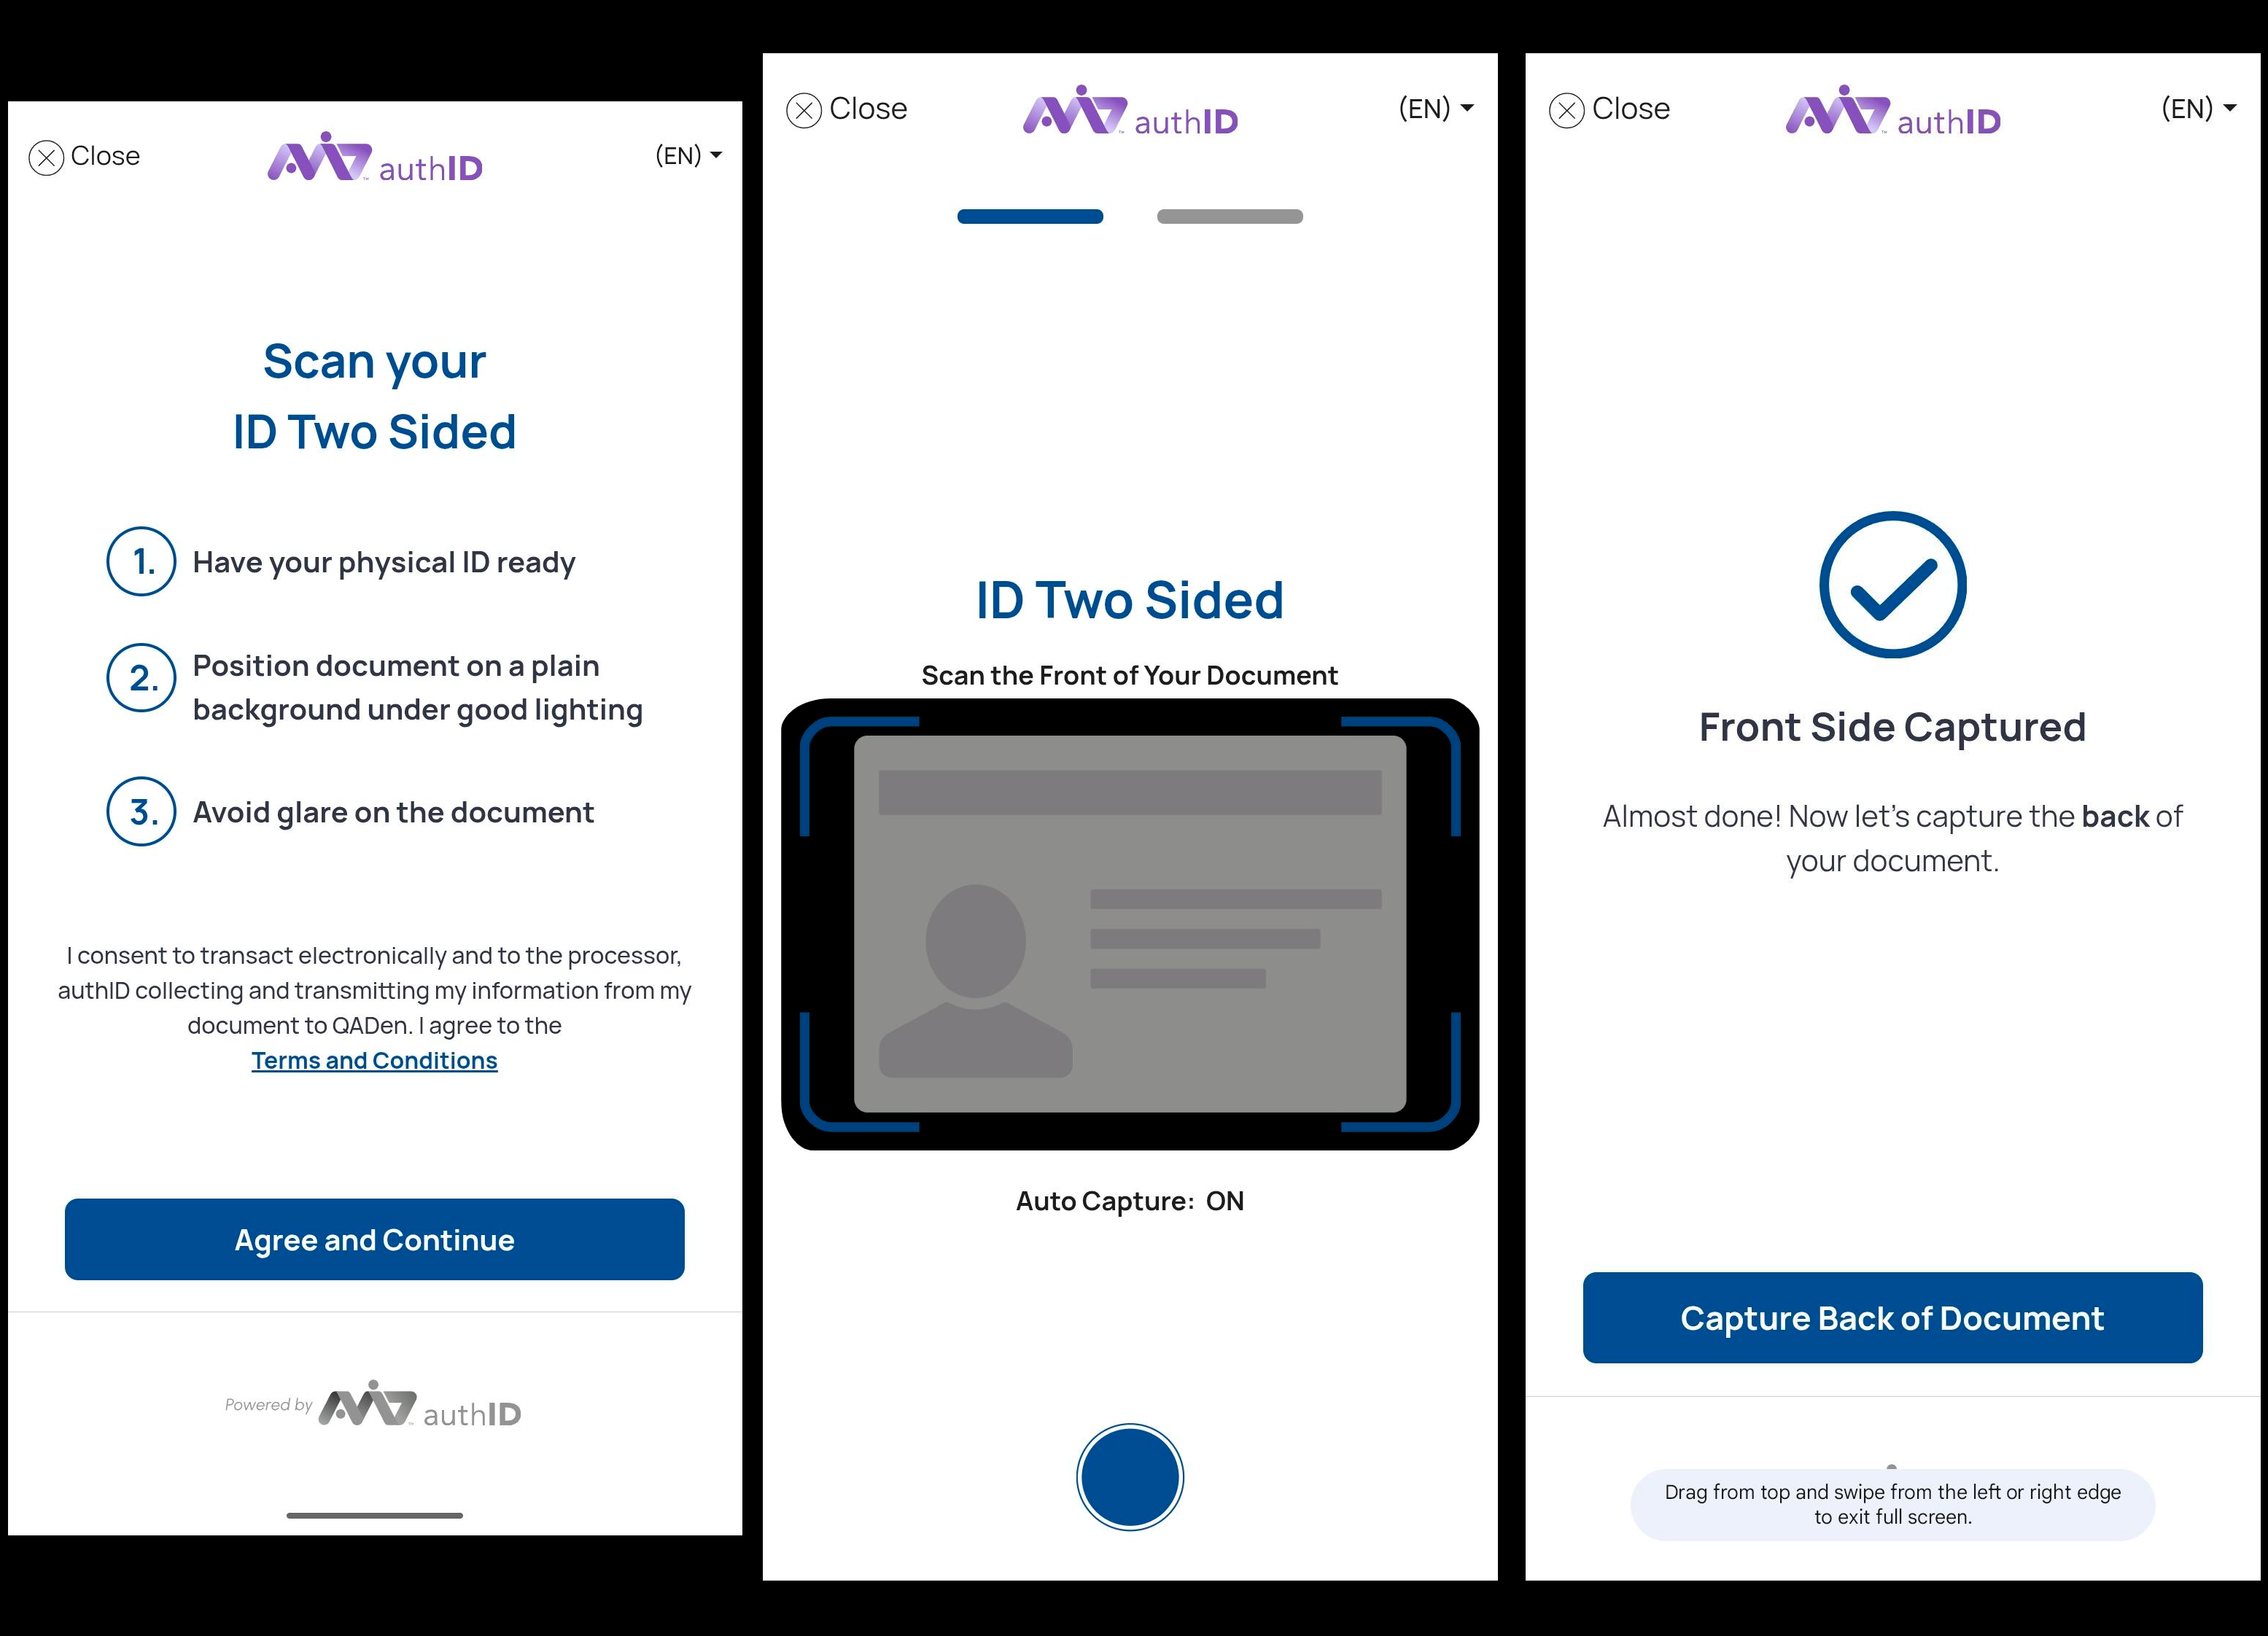
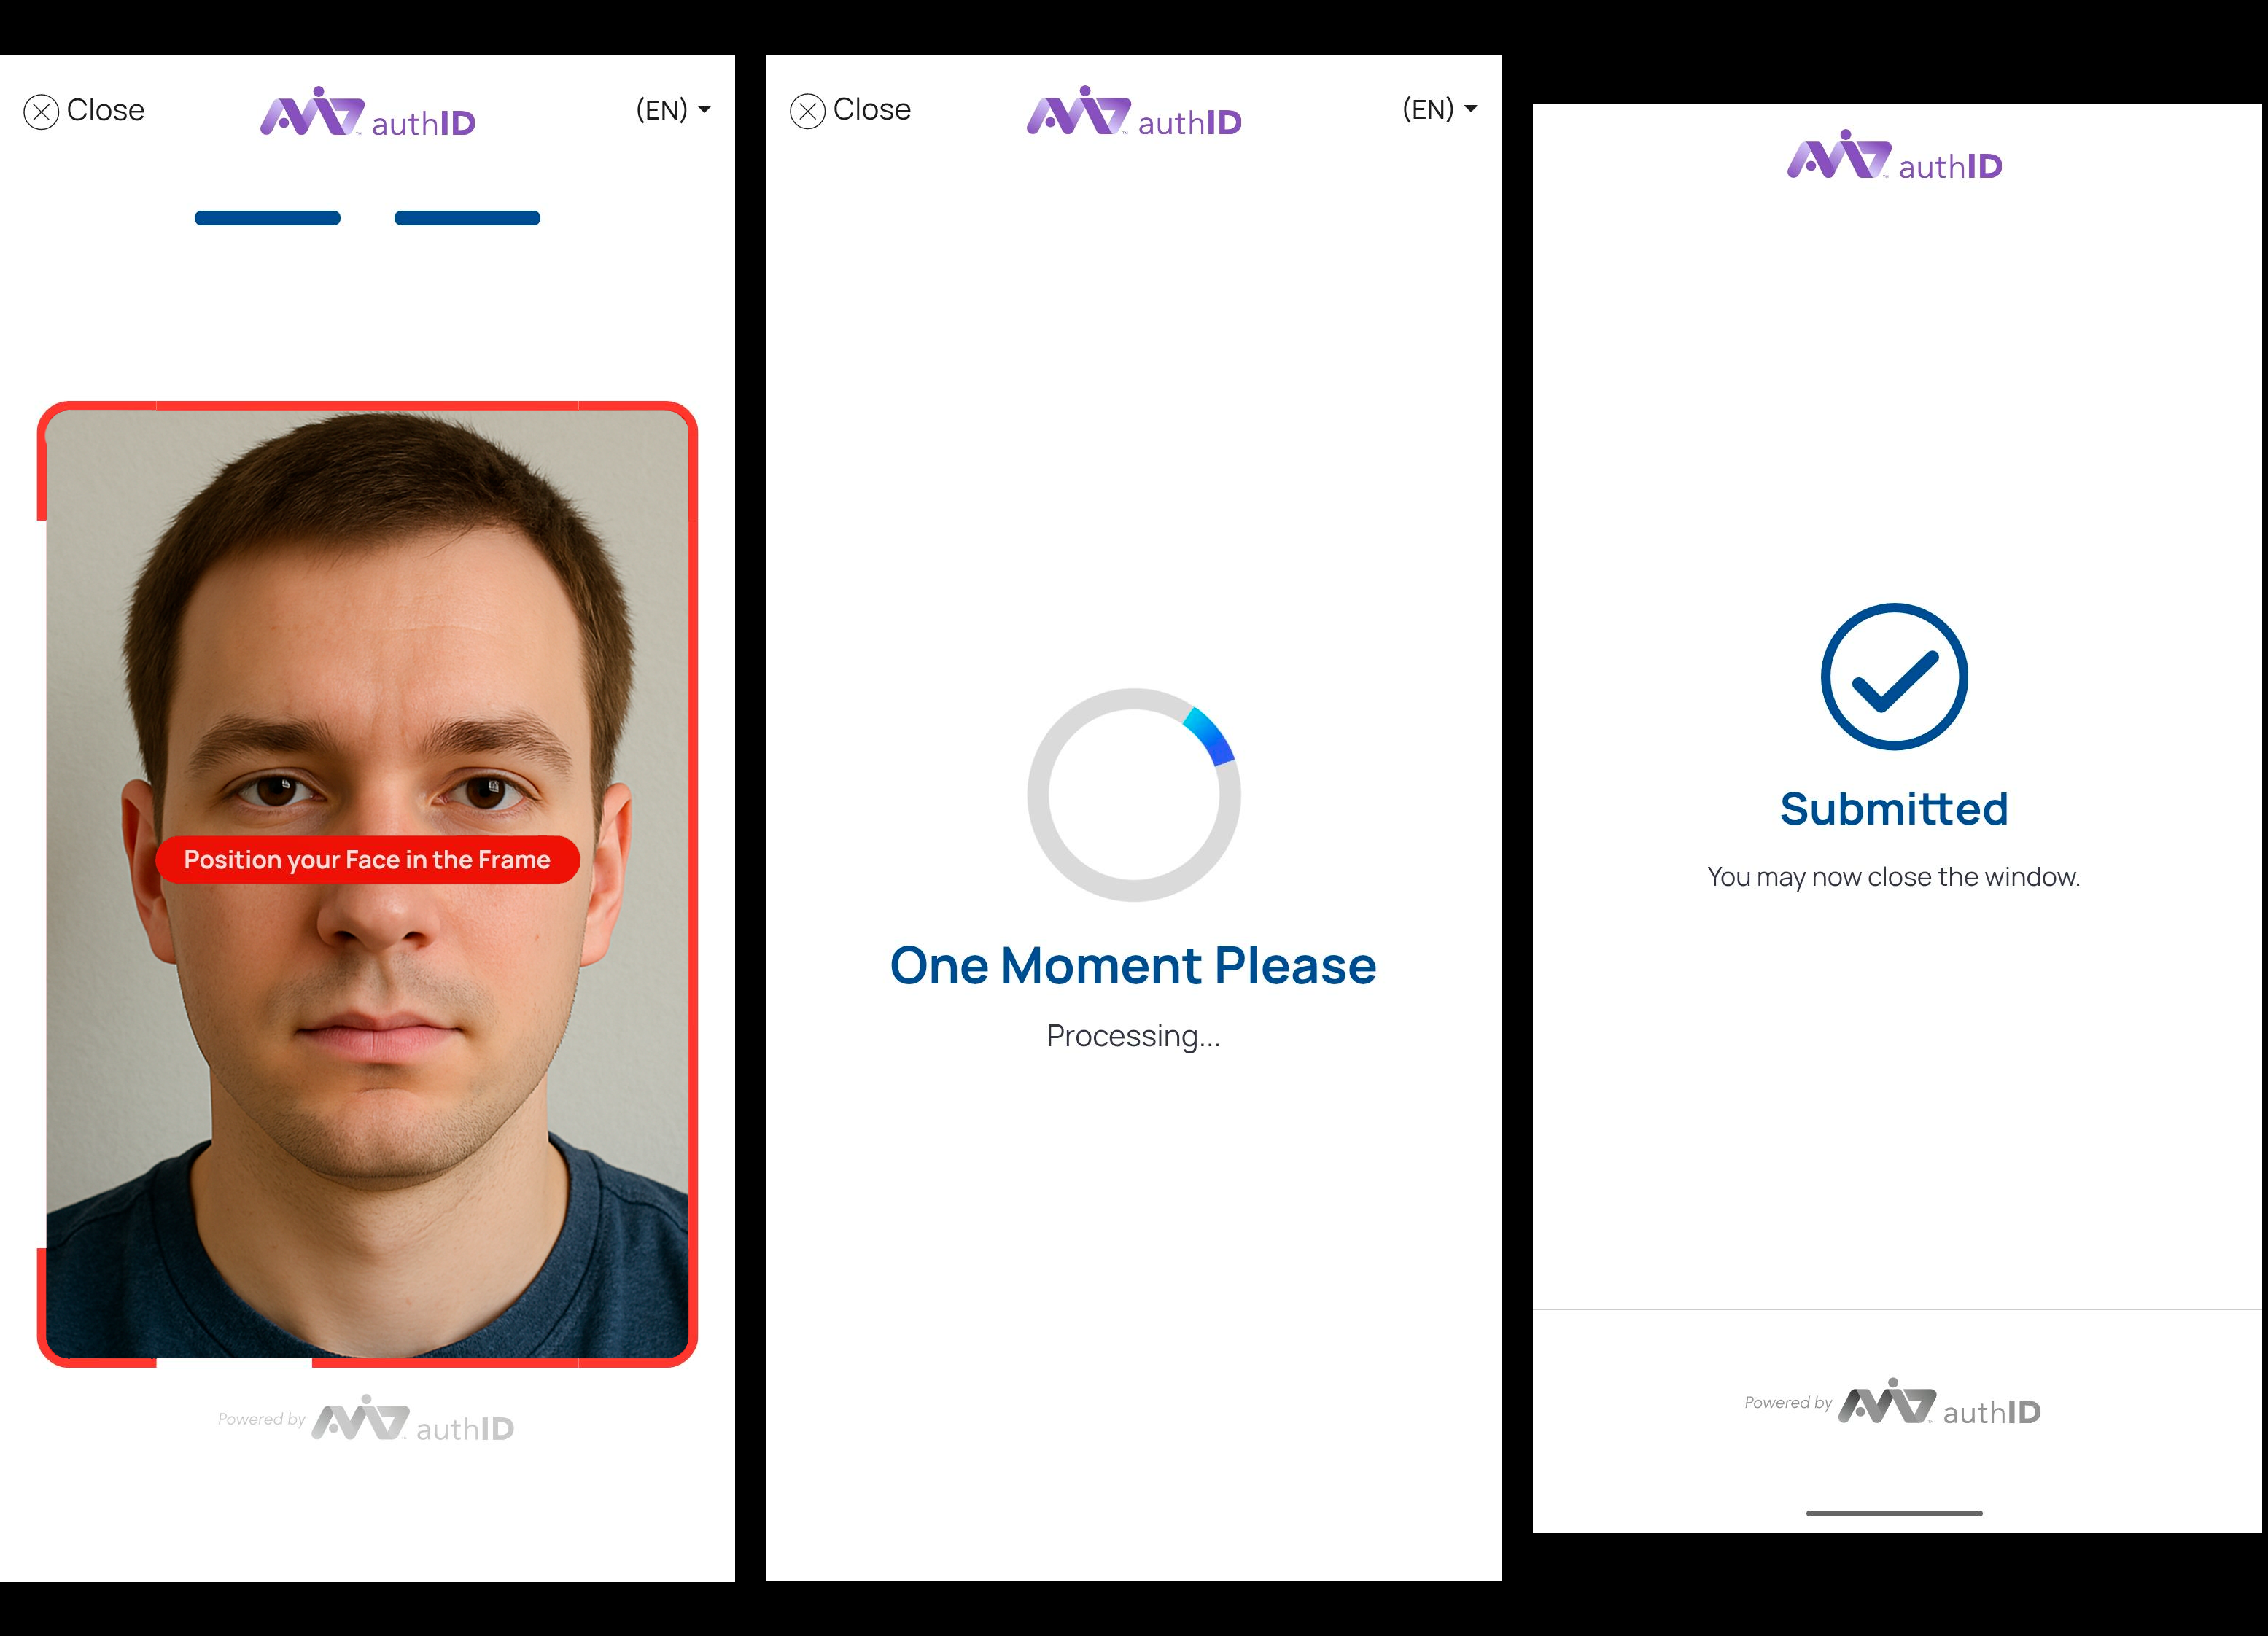
In this example we will use a two sided document:
The Proof Details screen is displayed.
📘
Note:
If your project does not involve a government-issued identity document, and you're planning to use a custom identity document, there's a Corporate Badge option available.
This document type allows you to use any ID card that includes a photo of the end user, making it suitable for internal or enterprise-specific identification workflows.
All standard biometric checks — including facial matching, facial liveness, and document liveness (PAD) — are performed and the corresponding signals are provided.
However, when using a custom document type, you’ll need to implement your own custom analysis logic specifically for evaluating the document PAD (Presentation Attack Detection) signal.