
Selfie
Enroll Users With Selfie
- Follow steps 1 to 2 under Initiate a Transaction Proof Onboarding
- Tap Select to Product as "Selfie.
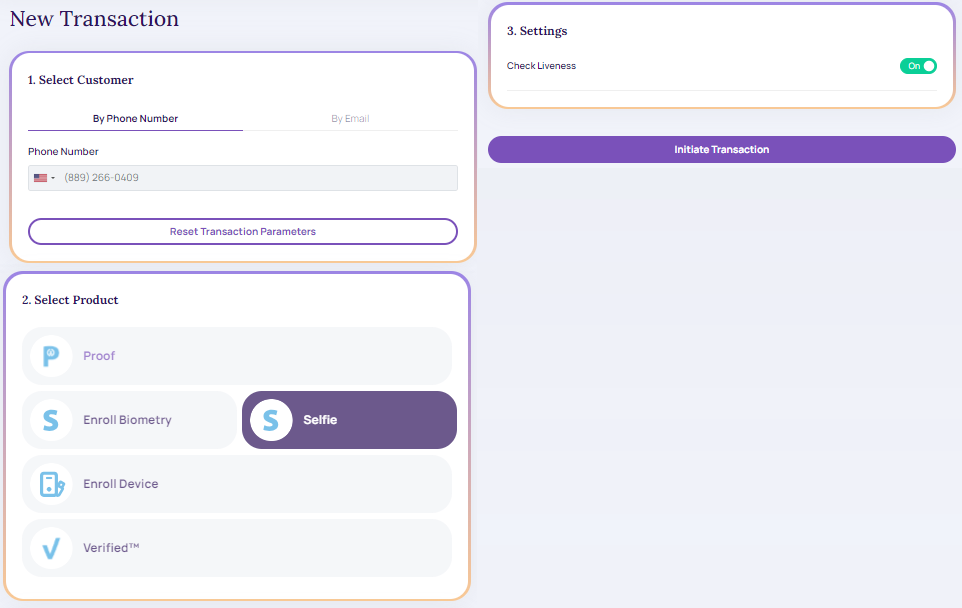
Selfie
- Settings: By default, the radio button against Check Liveness is set to OFF; change it to ON.
- Tap "Initiate Transaction. The developer options are enabled.
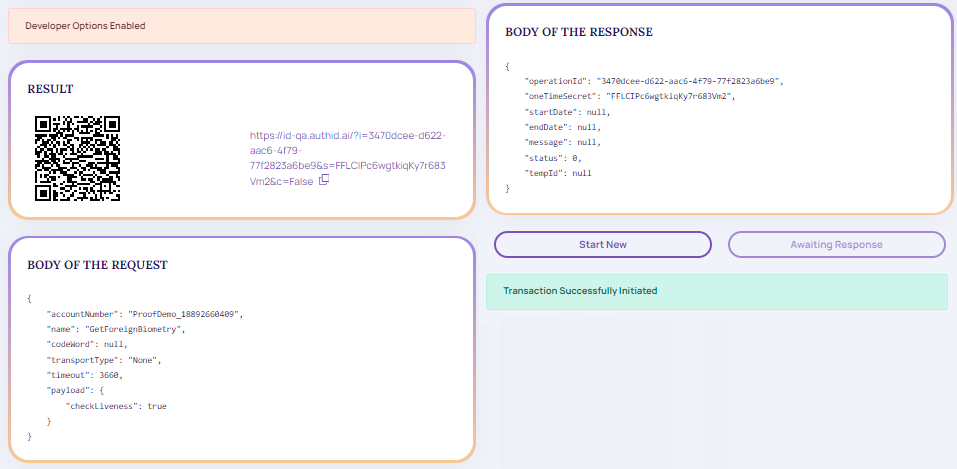
The developer options are enabled.
- Click on the result hyperlink on the screen below to continue with the selfie process.
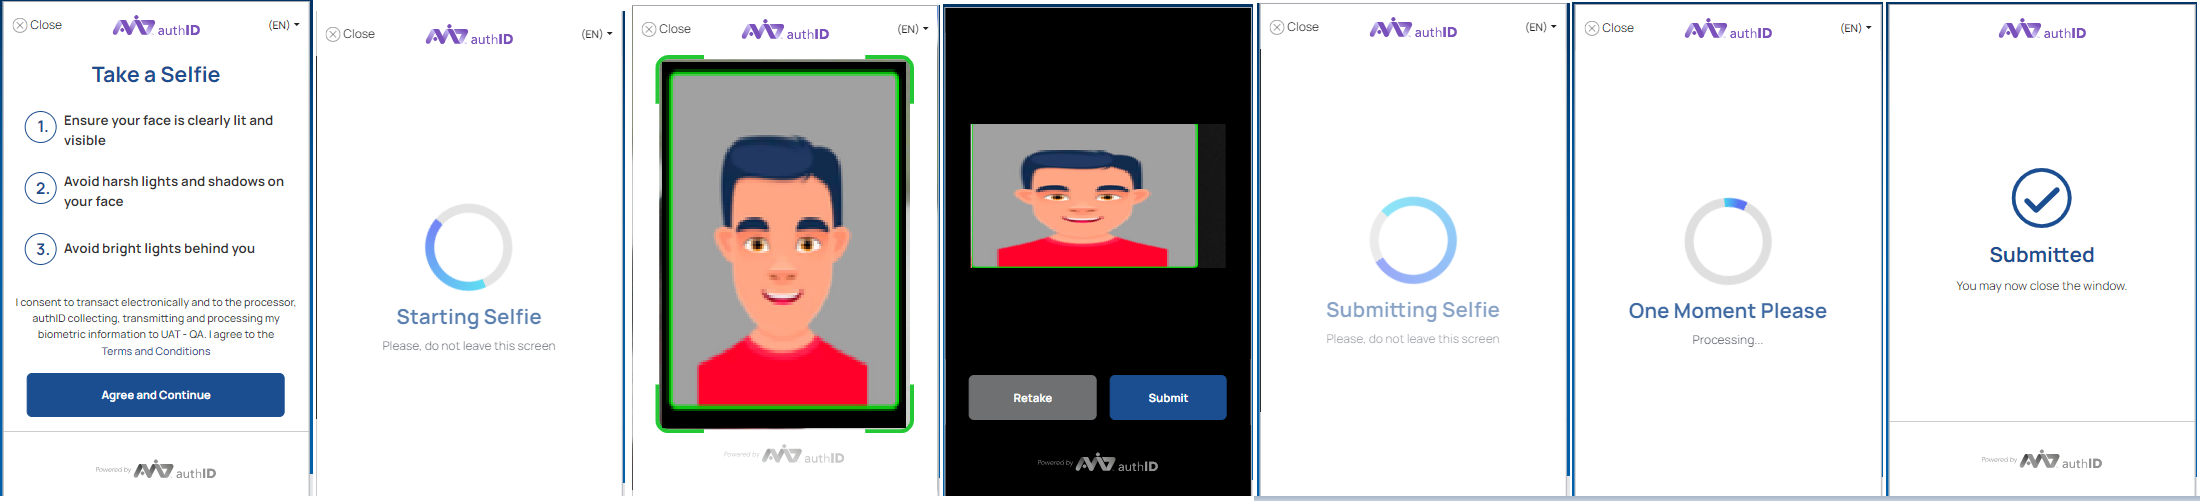
Selfie Process
Selfie Details
- Once the selfie is submitted, it redirects to the "Selfie Transaction Status, as shown below.
- Under the biometry enrollment details screen, the user can view the selfie transaction status and workflow progress details.
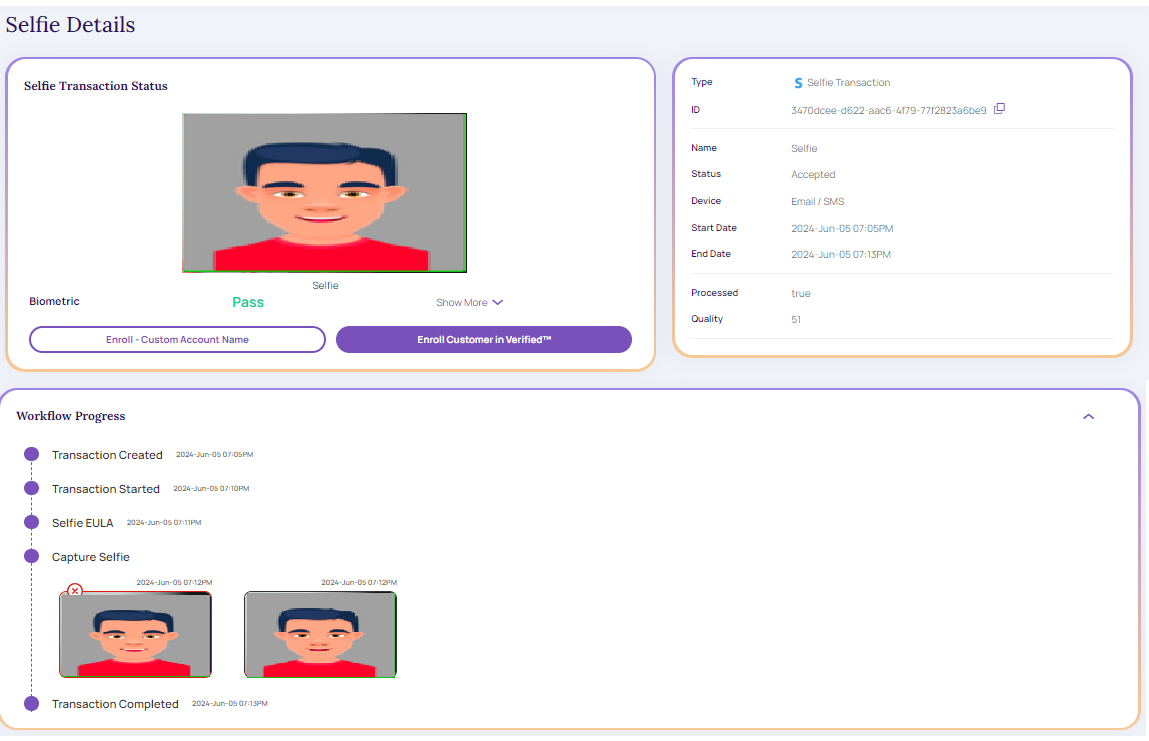
Selfie Transaction Status
- For more information, refer to, View Transaction Details & Enroll User in the Verified section.
View Selfie Transaction Details
Refer to Recent Proof and Selfie for more information about the View Selfie Transaction Details.